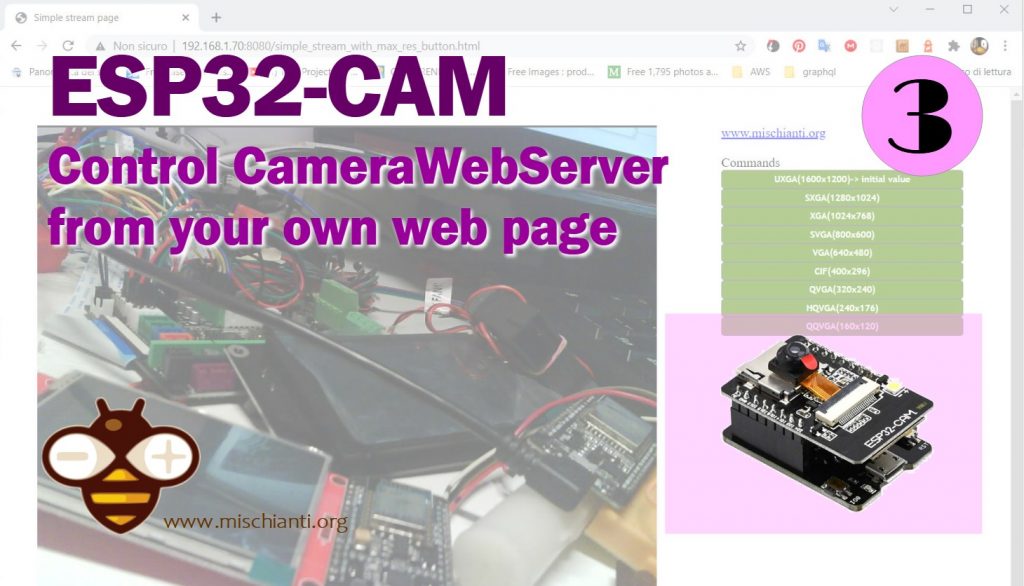
ESP32-CAM: controllare il CameraWebServer dalla tua pagina web – 3
Vado a scrivere quest’articolo perché ho iniziato a utilizzare questo dispositivo come “IP cam esterna” per il mio progetto web, e vorrei condividere le mie esperienze. Per controllare un URL esterno (dall’origine del dominio), probabilmente devi abilitare il CORS, e puoi trovare maggiori dettagli nell’articolo “Server REST con esp8266 e esp32: richieste CORS, OPTION e GET”.
Trovi qui l'esp32-cam ESP32 Dev Kit v1 - TTGO T-Display 1.14 ESP32 - NodeMCU V3 V2 ESP8266 Lolin32 - NodeMCU ESP-32S - WeMos Lolin32 - WeMos Lolin32 mini - ESP32-CAM programmer - ESP32-CAM bundle - ESP32-WROOM-32 - ESP32-S
Puoi trovare qui l'esp32-cam ed il programmatore AliExpress ESP32-CAM programmer - AliExpress ESP32-CAM bundle
Struttura CameraWebServer
Probabilmente hai già letto l’articolo “ESP32-CAM: aggiornare CameraWebServer con la funzionalità di flash” ma vorrei inserire i passaggi per recuperare nuovamente l’esempio principale.
Recupera lo sketch per la modifica
Lo sketch usa il framework 1.0.6 non il 2.x.x dove sono state apportate modifiche.
Innanzitutto, scarica CameraWebServer da qui o aprendo l’esempio in Arduino o direttamente dall’installazione del tuo core esp32 con questi passaggi:
Recupera il percorso delle preferenze dal tuo IDE ArduinoFile --> Preferences
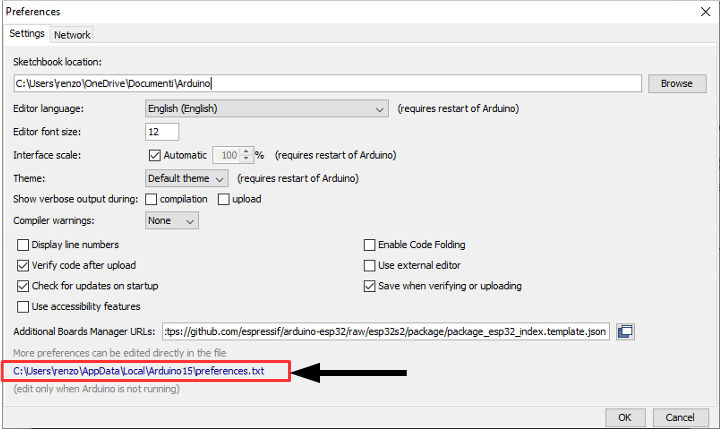
da qui, vai a
<arduino-preferences-path>\packages\esp32\hardware\esp32\1.0.6\libraries\ESP32\examples\Camera\CameraWebServer
Puoi trovare in quella cartella quattro file
CameraWebServer.ino: lo schizzo principale;app_httpd.cpp: praticamente è il back end dell’applicazione;camera_pins.h: contiene lo schema dei pin per tutte le varianti;camera_index.h: contiene la pagina web in versione gzip base64.
Server Web/REST
Tutta la logica del Web/REST Server è nel file app_httpd.cpp , ma usa una libreria esp32 nativa (simile a quella ESP-IDF) con comando di base, ma non così difficile.
È possibile trovare il punto di ingresso in questa funzione
void startCameraServer(){
    httpd_config_t config = HTTPD_DEFAULT_CONFIG();

    httpd_uri_t index_uri = {
        .uri       = "/",
        .method    = HTTP_GET,
        .handler   = index_handler,
        .user_ctx  = NULL
    };

    httpd_uri_t status_uri = {
        .uri       = "/status",
        .method    = HTTP_GET,
        .handler   = status_handler,
        .user_ctx  = NULL
    };

    httpd_uri_t cmd_uri = {
        .uri       = "/control",
        .method    = HTTP_GET,
        .handler   = cmd_handler,
        .user_ctx  = NULL
    };

    httpd_uri_t capture_uri = {
        .uri       = "/capture",
        .method    = HTTP_GET,
        .handler   = capture_handler,
        .user_ctx  = NULL
    };

   httpd_uri_t stream_uri = {
        .uri       = "/stream",
        .method    = HTTP_GET,
        .handler   = stream_handler,
        .user_ctx  = NULL
    };


    ra_filter_init(&ra_filter, 20);

    mtmn_config.type = FAST;
    mtmn_config.min_face = 80;
    mtmn_config.pyramid = 0.707;
    mtmn_config.pyramid_times = 4;
    mtmn_config.p_threshold.score = 0.6;
    mtmn_config.p_threshold.nms = 0.7;
    mtmn_config.p_threshold.candidate_number = 20;
    mtmn_config.r_threshold.score = 0.7;
    mtmn_config.r_threshold.nms = 0.7;
    mtmn_config.r_threshold.candidate_number = 10;
    mtmn_config.o_threshold.score = 0.7;
    mtmn_config.o_threshold.nms = 0.7;
    mtmn_config.o_threshold.candidate_number = 1;

    face_id_init(&id_list, FACE_ID_SAVE_NUMBER, ENROLL_CONFIRM_TIMES);

    Serial.printf("Starting web server on port: '%d'\n", config.server_port);
    if (httpd_start(&camera_httpd, &config) == ESP_OK) {
        httpd_register_uri_handler(camera_httpd, &index_uri);
        httpd_register_uri_handler(camera_httpd, &cmd_uri);
        httpd_register_uri_handler(camera_httpd, &status_uri);
        httpd_register_uri_handler(camera_httpd, &capture_uri);
    }

    config.server_port += 1;
    config.ctrl_port += 1;
    Serial.printf("Starting stream server on port: '%d'\n", config.server_port);
    if (httpd_start(&stream_httpd, &config) == ESP_OK) {
        httpd_register_uri_handler(stream_httpd, &stream_uri);
    }
}
Ma poniamo la nostra attenzione su /status e /control l’endpoints che ci aiutano a modificare il parametro dalla richiesta remota.
Questo endpoint è in GET in modo che tu possa testarlo direttamente da un browser web e hai bisogno del dominio della richiesta.
Stato endpoint
Per prima cosa, chiameremo l’endpoint /status. La mia esp32-cam ha questo IP 192.168.1.41, quindi la richiesta diventa:
http://192.168.1.41/status
e il risultato è
{
  "framesize": 5,
  "quality": 10,
  "brightness": 0,
  "contrast": 0,
  "saturation": 0,
  "sharpness": 0,
  "special_effect": 0,
  "wb_mode": 0,
  "awb": 1,
  "awb_gain": 1,
  "aec": 1,
  "aec2": 0,
  "ae_level": 0,
  "aec_value": 168,
  "agc": 1,
  "agc_gain": 0,
  "gainceiling": 0,
  "bpc": 0,
  "wpc": 1,
  "raw_gma": 1,
  "lenc": 1,
  "vflip": 0,
  "hmirror": 0,
  "dcw": 1,
  "colorbar": 0,
  "face_detect": 0,
  "face_enroll": 0,
  "face_recognize": 0,
  "flash": 0
}
Il dominio della maggior parte delle proprietà è 0-1 (falso – vero), ma alcune sono più complesse
- qualità: 0 – 63
- luminosità: -2 – 2
- contrasto: -2 – 2
- saturazione: -2 – 2
- nitidezza: -2 – 2
- effetto_speciale: 0 – 6
- wb_mode: 0 – 4
- ae_level: -2 – 2
- aec_value: 0 – 1200
- agc_gain: 0 – 30
- guadagno massimo: 0 – 6
- dimensione del fotogramma: 0 – 10
Controllo e flusso dell’endpoint
Possiamo usare l’endpoint /control per modificare alcuni di questi valori.
Richiede due variabili nella stringa di query:
var: l’elemento da cambiareval: il valore da assegnare
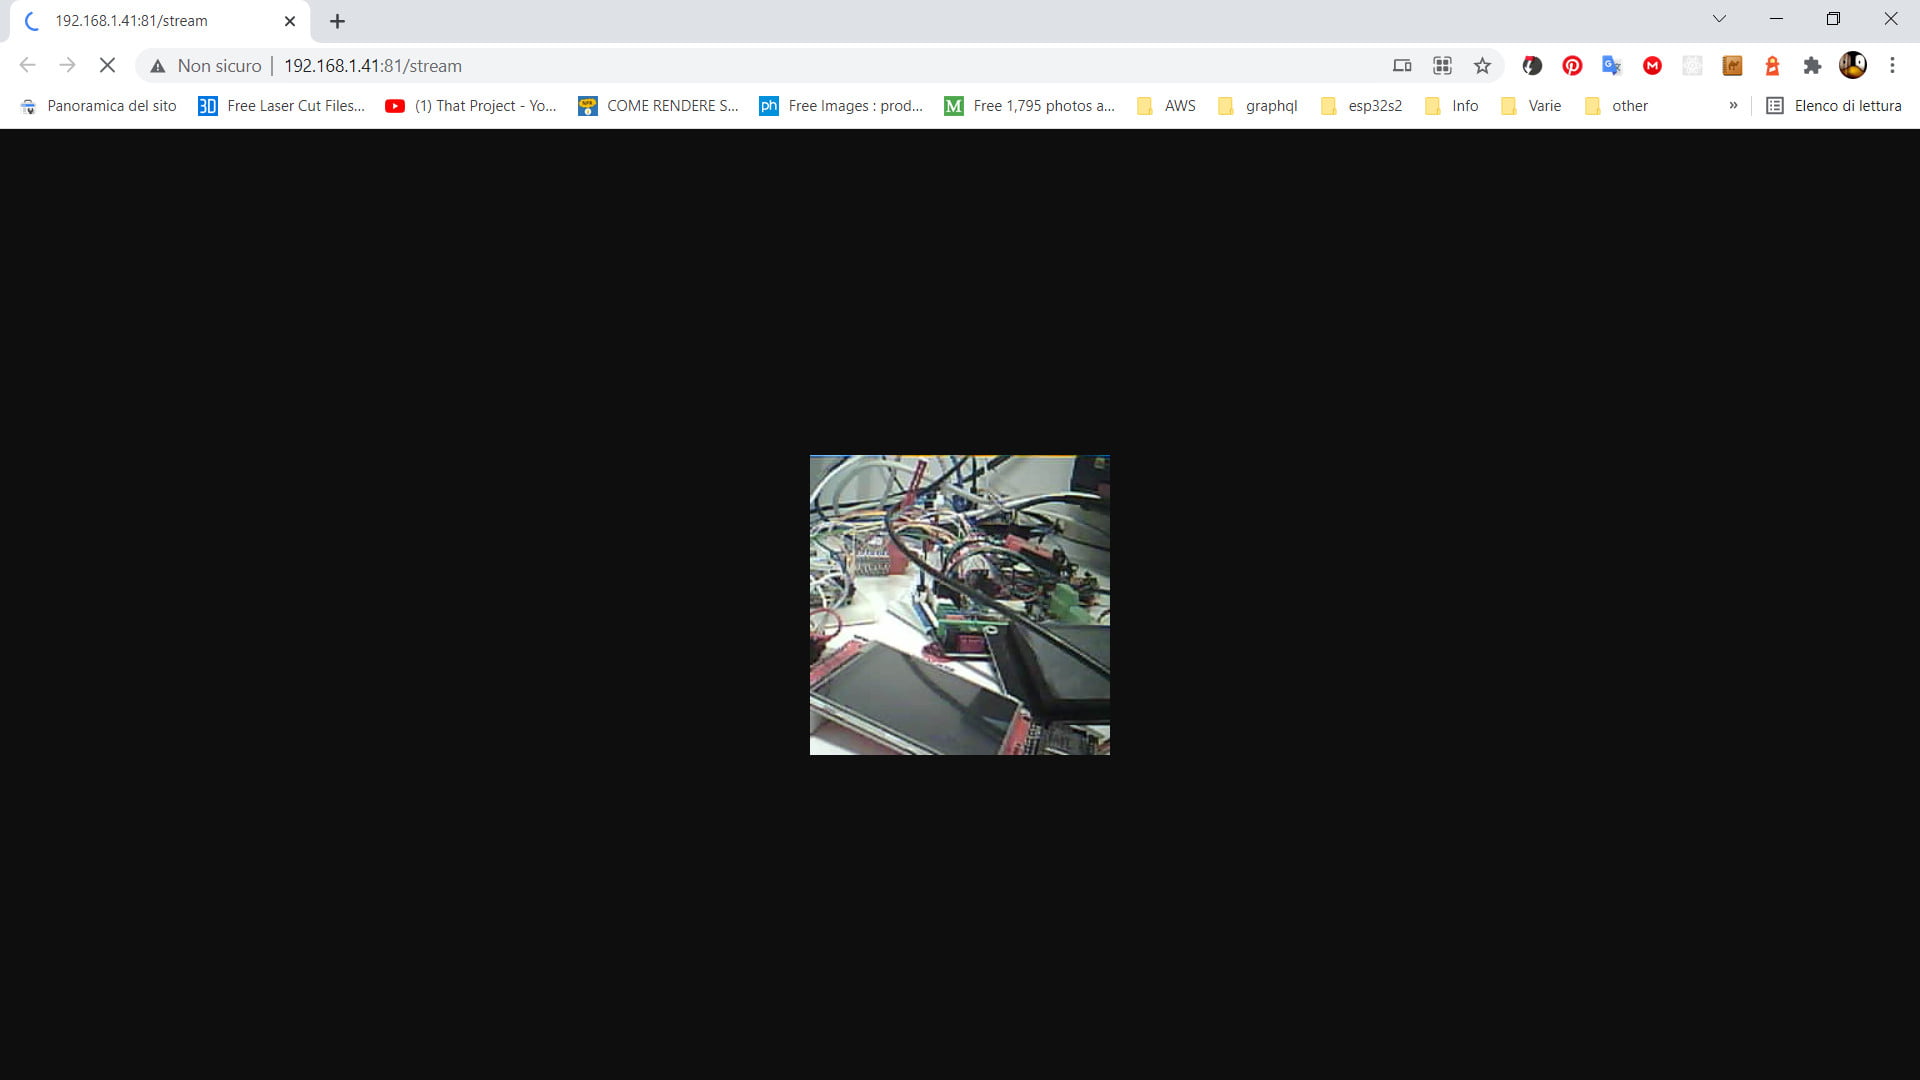
Ora avvia lo stream e chiudi tutte le pagine della tua esp32-cam e aprine una nuova con solo lo stream; nel mio caso l’URL è:
http://192.168.1.41:81/stream
ottieni una pagina come questa:
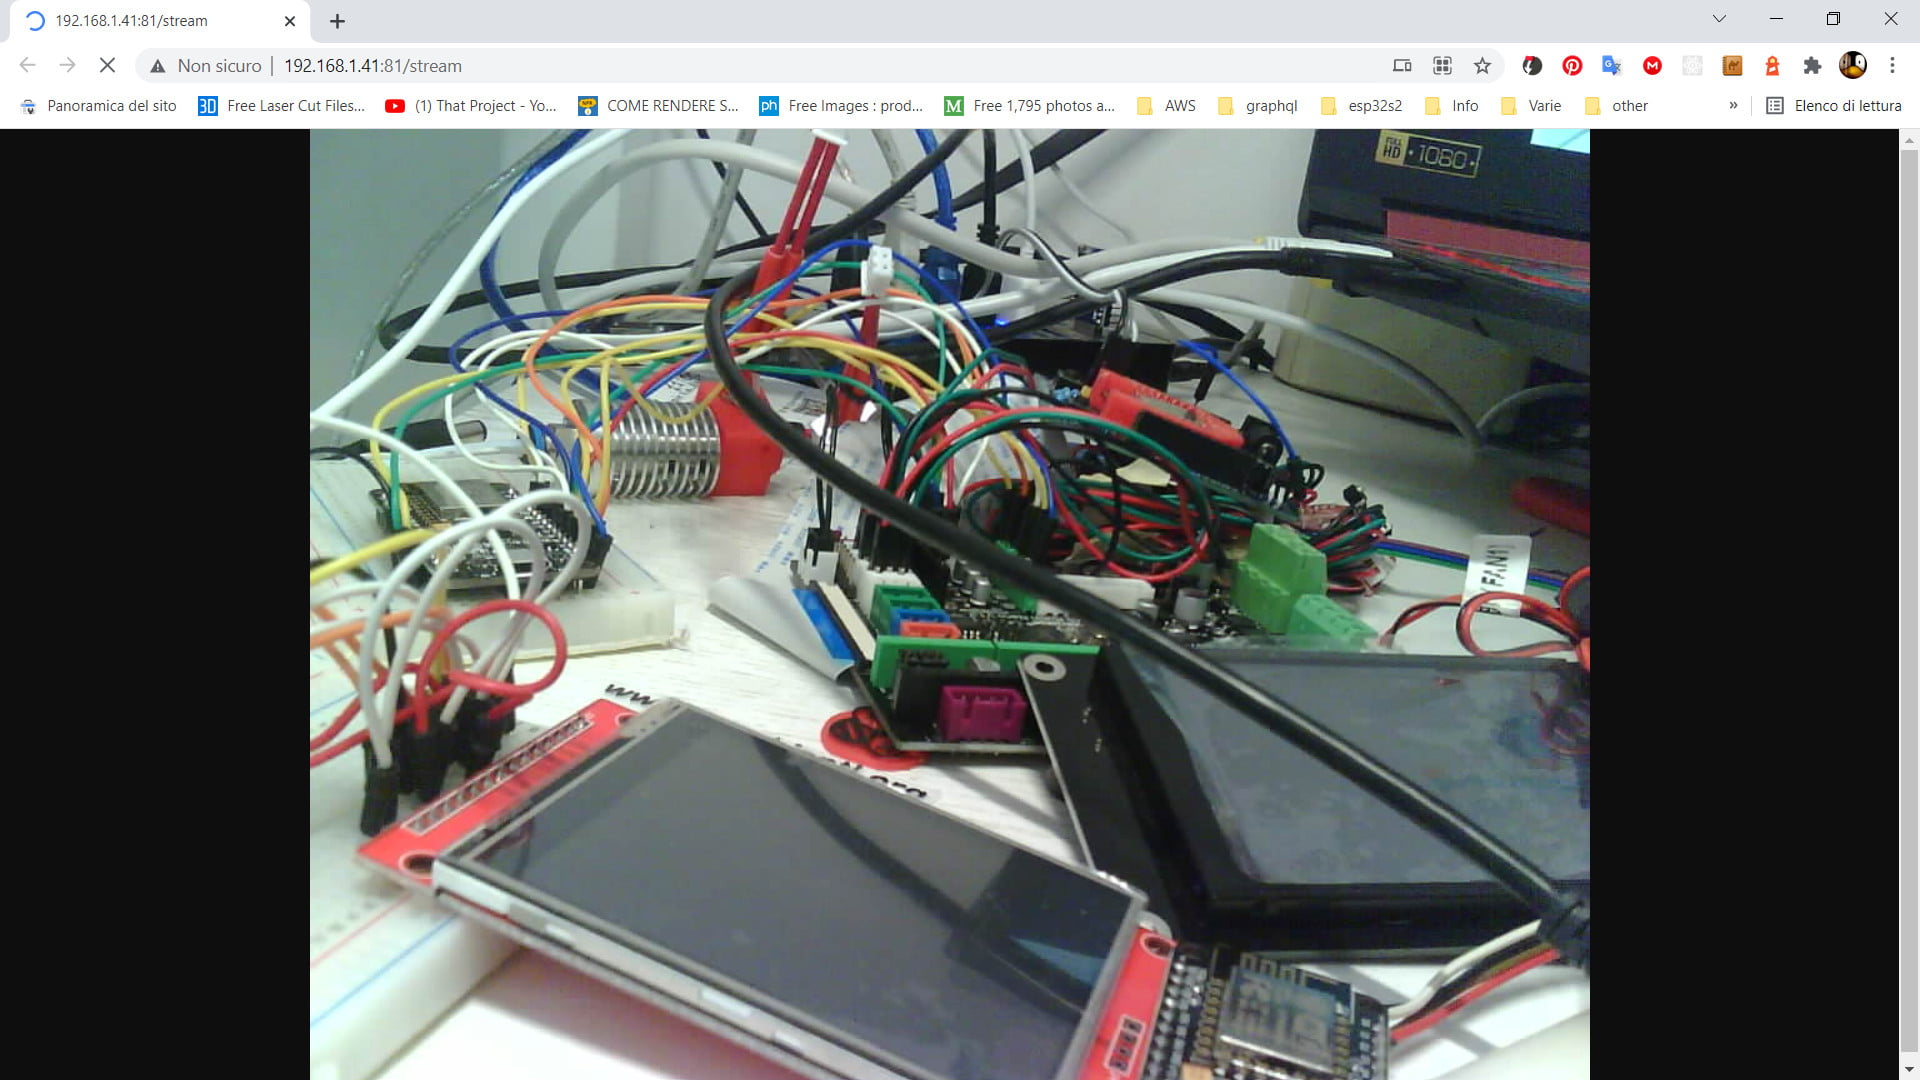
Ora, se apri un’altra scheda o un’altra pagina del browser e incolli questo URL:
http://192.168.1.41/control?var=framesize&val=10
Il risultato nella pagina dello stream è:
Creare una semplice pagina HTML che mostra lo stream video
Ora creeremo una semplice pagina HTML che trasmette il contenuto dell’esp32-cam.
<!DOCTYPE html><!-- Simple stream and control page for esp32-cam Renzo Mischianti <www.mischianti.org> -->
<html lang="en">
<head>
    <meta charset="UTF-8">
    <title>Simple stream page</title>
</head>
<style>
    .main-container {
        display: flex;
        flex-wrap: wrap
    }
    .main-container .video-block {
        padding: 40px;
        width: 100%;
        max-width: 768px;
        min-width: 300px
    }
    .main-container .cmd-block {
        padding: 40px;
        min-width: 300px
    }
</style>
<body>

<div class="main-container">
    <div class="video-block">
        <img alt="Video stream"
             src='http://192.168.1.41:81/stream' style="object-fit: contain; height: 100%; width: 100%; background-color: #353535"/>
    </div>
    <div class="cmd-block">
        <a href="mischianti.org">www.mischianti.org</a>
        <br>
        Commands
    </div>
</div>
</body>
</html>
E questo è il risultato.
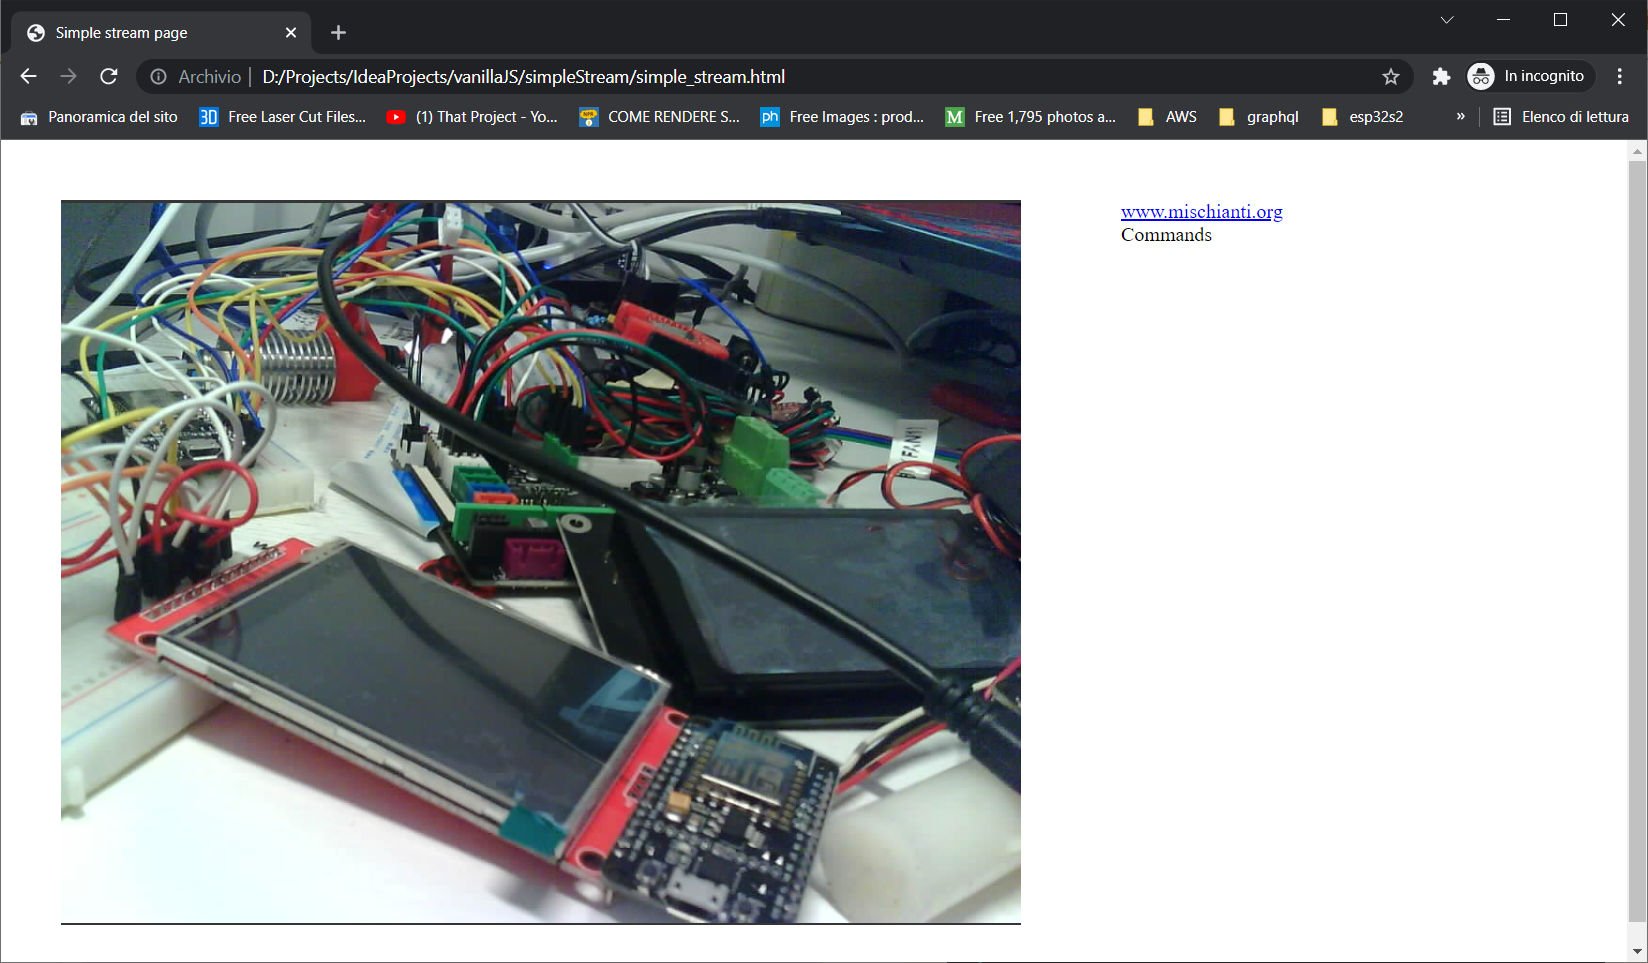
Puoi verificarlo per mostrare un flusso semplice; puoi usare un semplice tag IMG e nient’altro.
<img alt="Video stream"
             src='http://192.168.1.41:81/stream' style="object-fit: contain; height: 100%; width: 100%; background-color: #353535"/>
Vogliamo aggiungere alcuni pulsanti per gestire la risoluzione con una semplice chiamata JS.
<!DOCTYPE html><!-- Simple stream and control page for esp32-cam Renzo Mischianti <www.mischianti.org> -->
<html lang="en">
<head>
    <meta charset="UTF-8">
    <title>Simple stream page</title>
</head>
<style>
    .main-container {
        display: flex;
        flex-wrap: wrap
    }
    .main-container .video-block {
        padding: 40px;
        width: 100%;
        max-width: 768px;
        min-width: 300px
    }
    .main-container .cmd-block {
        padding: 40px;
        min-width: 300px
    }

    .btn {
        border: 1px solid #777;
        background: #6e9e2d;
        color: #fff;
        font: bold 11px 'Trebuchet MS';
        padding: 4px;
        cursor: pointer;
        -moz-border-radius: 4px;
        -webkit-border-radius: 4px;
    }
</style>
<body>
<script type="application/javascript">
    var cameraIP = '192.168.1.41';
    function changeFramesize(framesize) {
        var oReq = new XMLHttpRequest();
        oReq.onreadystatechange = function()
        {
                console.log(oReq.responseText);
        }
        oReq.onerror = function (err){
            alert(err);
        }
        oReq.open("GET", "http://" + cameraIP + "/control?var=framesize&val="+framesize+"");
        oReq.send();
    }
</script>
<div class="main-container">
    <div class="video-block">
        <img alt="Video stream"
             src='http://192.168.1.41:81/stream' style="object-fit: contain; height: 100%; width: 100%; background-color: #353535"/>
    </div>
    <div class="cmd-block">
        <a href="mischianti.org">www.mischianti.org</a>
        <br>
        <br>
        Commands
        <br>
        <div style="display: grid">
        <button id="fs10" class="btn" onclick="changeFramesize(10);">UXGA(1600x1200)</button>
        <button id="fs9" class="btn" onclick="changeFramesize(9);">SXGA(1280x1024)</button>
        <button id="fs8" class="btn" onclick="changeFramesize(8);">XGA(1024x768)</button>
        <button id="fs7" class="btn" onclick="changeFramesize(7);">SVGA(800x600)</button>
        <button id="fs6" class="btn" onclick="changeFramesize(6);">VGA(640x480)</button>
        <button id="fs5" class="btn" onclick="changeFramesize(5);">CIF(400x296)</button>
        <button id="fs4" class="btn" onclick="changeFramesize(4);">QVGA(320x240)</button>
        <button id="fs3" class="btn" onclick="changeFramesize(3);">HQVGA(240x176)</button>
        <button id="fs0" class="btn" onclick="changeFramesize(0);">QQVGA(160x120)</button>
        </div>
    </div>
</div>
</body>
</html>
La funzione è elementare.
    var cameraIP = '192.168.1.41';
    function changeFramesize(framesize) {
        var oReq = new XMLHttpRequest();
        oReq.onreadystatechange = function()
        {
                console.log(oReq.responseText);
        }
        oReq.onerror = function (err){
            alert(err);
        }
        oReq.open("GET", "http://" + cameraIP + "/control?var=framesize&val="+framesize+"");
        oReq.send();
    }
È una richiesta XHR in GET rispetto alla telecamera, ma è strano che CORS non blocchi questa chiamata; se andiamo a controllare il codice, possiamo trovare l’intestazione che consente l’origine.
static esp_err_t cmd_handler(httpd_req_t *req){
    char*  buf;
    size_t buf_len;
    char variable[32] = {0,};
    char value[32] = {0,};

    buf_len = httpd_req_get_url_query_len(req) + 1;
    if (buf_len > 1) {
        buf = (char*)malloc(buf_len);
        if(!buf){
            httpd_resp_send_500(req);
            return ESP_FAIL;
        }
        if (httpd_req_get_url_query_str(req, buf, buf_len) == ESP_OK) {
            if (httpd_query_key_value(buf, "var", variable, sizeof(variable)) == ESP_OK &&
                httpd_query_key_value(buf, "val", value, sizeof(value)) == ESP_OK) {
            } else {
                free(buf);
                httpd_resp_send_404(req);
                return ESP_FAIL;
            }
        } else {
            free(buf);
            httpd_resp_send_404(req);
            return ESP_FAIL;
        }
        free(buf);
    } else {
        httpd_resp_send_404(req);
        return ESP_FAIL;
    }

    int val = atoi(value);
    sensor_t * s = esp_camera_sensor_get();
    int res = 0;

    if(!strcmp(variable, "framesize")) {
        if(s->pixformat == PIXFORMAT_JPEG) res = s->set_framesize(s, (framesize_t)val);
    }
    else if(!strcmp(variable, "quality")) res = s->set_quality(s, val);
    else if(!strcmp(variable, "contrast")) res = s->set_contrast(s, val);
    else if(!strcmp(variable, "brightness")) res = s->set_brightness(s, val);
    else if(!strcmp(variable, "saturation")) res = s->set_saturation(s, val);
    else if(!strcmp(variable, "gainceiling")) res = s->set_gainceiling(s, (gainceiling_t)val);
    else if(!strcmp(variable, "colorbar")) res = s->set_colorbar(s, val);
    else if(!strcmp(variable, "awb")) res = s->set_whitebal(s, val);
    else if(!strcmp(variable, "agc")) res = s->set_gain_ctrl(s, val);
    else if(!strcmp(variable, "aec")) res = s->set_exposure_ctrl(s, val);
    else if(!strcmp(variable, "hmirror")) res = s->set_hmirror(s, val);
    else if(!strcmp(variable, "vflip")) res = s->set_vflip(s, val);
    else if(!strcmp(variable, "awb_gain")) res = s->set_awb_gain(s, val);
    else if(!strcmp(variable, "agc_gain")) res = s->set_agc_gain(s, val);
    else if(!strcmp(variable, "aec_value")) res = s->set_aec_value(s, val);
    else if(!strcmp(variable, "aec2")) res = s->set_aec2(s, val);
    else if(!strcmp(variable, "dcw")) res = s->set_dcw(s, val);
    else if(!strcmp(variable, "bpc")) res = s->set_bpc(s, val);
    else if(!strcmp(variable, "wpc")) res = s->set_wpc(s, val);
    else if(!strcmp(variable, "raw_gma")) res = s->set_raw_gma(s, val);
    else if(!strcmp(variable, "lenc")) res = s->set_lenc(s, val);
    else if(!strcmp(variable, "special_effect")) res = s->set_special_effect(s, val);
    else if(!strcmp(variable, "wb_mode")) res = s->set_wb_mode(s, val);
    else if(!strcmp(variable, "ae_level")) res = s->set_ae_level(s, val);
    else if(!strcmp(variable, "face_detect")) {
        detection_enabled = val;
        if(!detection_enabled) {
            recognition_enabled = 0;
        }
    }
    else if(!strcmp(variable, "face_enroll")) is_enrolling = val;
    else if(!strcmp(variable, "face_recognize")) {
        recognition_enabled = val;
        if(recognition_enabled){
            detection_enabled = val;
        }
    }
    else {
        res = -1;
    }

    if(res){
        return httpd_resp_send_500(req);
    }

    httpd_resp_set_hdr(req, "Access-Control-Allow-Origin", "*");
    return httpd_resp_send(req, NULL, 0);
}
Nel dettaglio, la linea
httpd_resp_set_hdr(req, "Access-Control-Allow-Origin", "*");
Questa intestazione è sufficiente perché si tratta di una semplice richiesta GET, poiché un POST è più complesso e dobbiamo aggiungere OPTION.
Aggiungeremo una chiamata all’endpoint /status e aggiungeremo una stringa alla dimensione del frame corretta all’apertura della pagina.
<!DOCTYPE html><!-- Simple stream and control page for esp32-cam Renzo Mischianti <www.mischianti.org> -->
<html lang="en">
<head>
    <meta charset="UTF-8">
    <title>Simple stream page</title>
</head>
<style>
    .main-container {
        display: flex;
        flex-wrap: wrap
    }
    .main-container .video-block {
        padding: 40px;
        width: 100%;
        max-width: 768px;
        min-width: 300px
    }
    .main-container .cmd-block {
        padding: 40px;
        min-width: 300px
    }

    .btn {
        border: 1px solid #777;
        background: #6e9e2d;
        color: #fff;
        font: bold 11px 'Trebuchet MS';
        padding: 4px;
        cursor: pointer;
        -moz-border-radius: 4px;
        -webkit-border-radius: 4px;
    }
</style>
<body>
<script type="application/javascript">
    var cameraIP = '192.168.1.41';
    function changeFramesize(framesize) {
        var oReq = new XMLHttpRequest();
        oReq.onreadystatechange = function()
        {
                console.log(oReq.responseText);
        }
        oReq.onerror = function (err){
            alert(err);
        }
        oReq.open("GET", "http://" + cameraIP + "/control?var=framesize&val="+framesize+"");
        oReq.send();
    }
</script>
<div class="main-container">
    <div class="video-block">
        <img alt="Video stream"
             src='http://192.168.1.41:81/stream' style="object-fit: contain; height: 100%; width: 100%; background-color: #353535"/>
    </div>
    <div class="cmd-block">
        <a href="mischianti.org">www.mischianti.org</a>
        <br>
        <br>
        Commands
        <br>
        <div style="display: grid">
        <button id="fs10" class="btn" onclick="changeFramesize(10);">UXGA(1600x1200)</button>
        <button id="fs9" class="btn" onclick="changeFramesize(9);">SXGA(1280x1024)</button>
        <button id="fs8" class="btn" onclick="changeFramesize(8);">XGA(1024x768)</button>
        <button id="fs7" class="btn" onclick="changeFramesize(7);">SVGA(800x600)</button>
        <button id="fs6" class="btn" onclick="changeFramesize(6);">VGA(640x480)</button>
        <button id="fs5" class="btn" onclick="changeFramesize(5);">CIF(400x296)</button>
        <button id="fs4" class="btn" onclick="changeFramesize(4);">QVGA(320x240)</button>
        <button id="fs3" class="btn" onclick="changeFramesize(3);">HQVGA(240x176)</button>
        <button id="fs0" class="btn" onclick="changeFramesize(0);">QQVGA(160x120)</button>
        </div>
    </div>
</div>
<script type="application/javascript">
    var oReq = new XMLHttpRequest();
    oReq.onloadend = function()
    {
        console.log(oReq.responseText);
        debugger
        if (oReq.response) {
            var fsB = document.getElementById("fs" + JSON.parse(oReq.response).framesize);
            if (fsB) {
                fsB.innerText = fsB.innerText + "-> initial value";
            }
        }
    }
    oReq.onerror = function (err){
        alert(err);
    }
    oReq.open("GET", "http://" + cameraIP + "/status");
    oReq.send();

</script>
</body>
</html>
Il codice per farlo è altrettanto semplice.
    var oReq = new XMLHttpRequest();
    oReq.onloadend = function()
    {
        console.log(oReq.responseText);
        debugger
        if (oReq.response) {
            var fsB = document.getElementById("fs" + JSON.parse(oReq.response).framesize);
            if (fsB) {
                fsB.innerText = fsB.innerText + "-> initial value";
            }
        }
    }
    oReq.onerror = function (err){
        alert(err);
    }
    oReq.open("GET", "http://" + cameraIP + "/status");
    oReq.send();
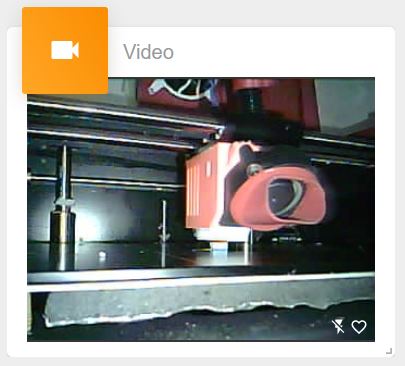
Il risultato in questo screenshot:

Allo stesso modo, l’end-point di stato ha l’intestazione per ignorare CORS.
static esp_err_t status_handler(httpd_req_t *req){
    static char json_response[1024];

    sensor_t * s = esp_camera_sensor_get();
    char * p = json_response;
    *p++ = '{';

    p+=sprintf(p, "\"framesize\":%u,", s->status.framesize);
    p+=sprintf(p, "\"quality\":%u,", s->status.quality);
    p+=sprintf(p, "\"brightness\":%d,", s->status.brightness);
    p+=sprintf(p, "\"contrast\":%d,", s->status.contrast);
    p+=sprintf(p, "\"saturation\":%d,", s->status.saturation);
    p+=sprintf(p, "\"sharpness\":%d,", s->status.sharpness);
    p+=sprintf(p, "\"special_effect\":%u,", s->status.special_effect);
    p+=sprintf(p, "\"wb_mode\":%u,", s->status.wb_mode);
    p+=sprintf(p, "\"awb\":%u,", s->status.awb);
    p+=sprintf(p, "\"awb_gain\":%u,", s->status.awb_gain);
    p+=sprintf(p, "\"aec\":%u,", s->status.aec);
    p+=sprintf(p, "\"aec2\":%u,", s->status.aec2);
    p+=sprintf(p, "\"ae_level\":%d,", s->status.ae_level);
    p+=sprintf(p, "\"aec_value\":%u,", s->status.aec_value);
    p+=sprintf(p, "\"agc\":%u,", s->status.agc);
    p+=sprintf(p, "\"agc_gain\":%u,", s->status.agc_gain);
    p+=sprintf(p, "\"gainceiling\":%u,", s->status.gainceiling);
    p+=sprintf(p, "\"bpc\":%u,", s->status.bpc);
    p+=sprintf(p, "\"wpc\":%u,", s->status.wpc);
    p+=sprintf(p, "\"raw_gma\":%u,", s->status.raw_gma);
    p+=sprintf(p, "\"lenc\":%u,", s->status.lenc);
    p+=sprintf(p, "\"vflip\":%u,", s->status.vflip);
    p+=sprintf(p, "\"hmirror\":%u,", s->status.hmirror);
    p+=sprintf(p, "\"dcw\":%u,", s->status.dcw);
    p+=sprintf(p, "\"colorbar\":%u,", s->status.colorbar);
    p+=sprintf(p, "\"face_detect\":%u,", detection_enabled);
    p+=sprintf(p, "\"face_enroll\":%u,", is_enrolling);
    p+=sprintf(p, "\"face_recognize\":%u", recognition_enabled);
    *p++ = '}';
    *p++ = 0;
    httpd_resp_set_type(req, "application/json");
    httpd_resp_set_hdr(req, "Access-Control-Allow-Origin", "*");
    return httpd_resp_send(req, json_response, strlen(json_response));
}
Uso questi strumenti per incorporare una fotocamera esp32 nella mia soluzione Web BeePrint per controllare la mia FlyingBear Ghost 5.
Uso un convertito molto utile per alimentare la cam sulla mia stampante 3D.
You can find here Converter from 9v-24v to USB 5v quick charging
Grazie
- ESP32-CAM: piedinatura, specifiche e configurazione dell’Arduino IDE
- ESP32-CAM: aggiornare CameraWebServer con la funzionalità di flash
- ESP32-CAM: controllare il CameraWebServer dalla tua pagina web
Firmware con funzionalità aggiuntive.