Unleashing the Creative Potential: A Comprehensive CrowBit Inventor Kit for micro:bit Review and Tutorial
Are you looking to unlock your child’s creativity through hands-on learning? The CrowBit Inventor Kit for micro:bit is a great choice. This comprehensive kit is designed to nurture young minds and let them explore the exciting world of electronics and coding.
With the CrowBit Inventor Kit, children can build their own projects using the micro:bit – a tiny computer that fits in the palm of their hand. Whether it’s creating a digital thermometer, a motion sensor alarm, or a remote-controlled robot, the possibilities are endless.
This kit provides all the essential components and detailed instructions needed to bring ideas to life. It’s perfect for beginners and experienced coders alike, as it combines simplicity with advanced functionality.
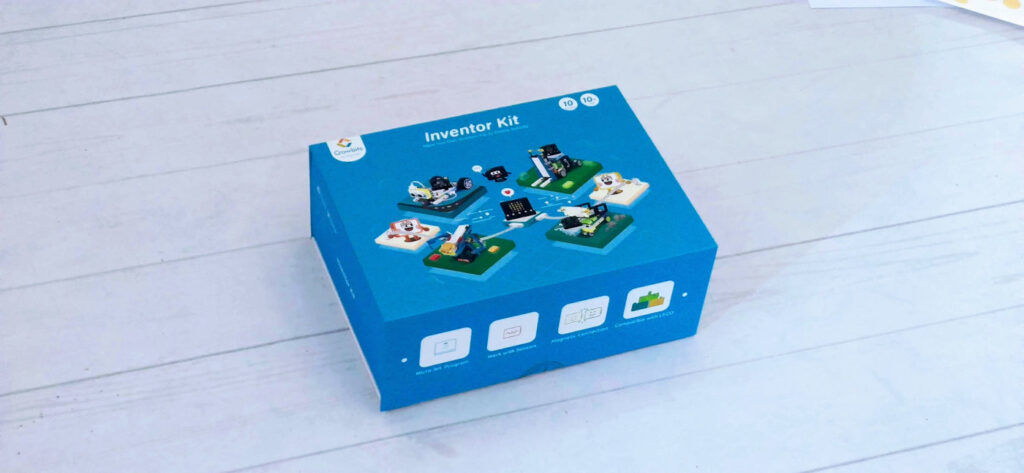
Not only does the CrowBit Inventor Kit foster creativity, but it also develops crucial skills such as problem-solving, critical thinking, and collaboration. It’s a perfect introduction to the world of STEM education.
From Elecrow from Aliexpress
Unleash your child’s creative potential today with the CrowBit Inventor Kit for micro:bit. Let their imagination run wild as they embark on a journey of discovery and innovation.
Understanding the micro:bit and its capabilities
The micro:bit is a small, versatile computer designed to help young learners dive into the worlds of programming and electronics. It was developed by the BBC to inspire children to get involved in coding and technology. This pocket-sized device comes equipped with a variety of features that make it an ideal starting point for beginners. From its array of LED lights to its built-in sensors, the micro:bit offers endless opportunities for creativity and exploration.
At the heart of the micro:bit is a powerful ARM Cortex-M0 processor, which allows it to execute simple to complex tasks efficiently. The device includes a 25 LED matrix, two programmable buttons, and various built-in sensors such as an accelerometer, compass, and temperature sensor. These features enable kids to create interactive projects ranging from games to scientific experiments, fostering a sense of accomplishment and curiosity.
One of the standout capabilities of the micro:bit is its ability to connect to other devices. It includes Bluetooth technology, which allows it to communicate with smartphones and tablets, enabling a range of exciting projects. Additionally, the micro:bit features multiple input and output options, such as GPIO pins, a 25-LED matrix display, and buttons, providing numerous ways to interact with the physical world. This versatility makes it not only educational but also fun to use.
Moreover, the simplicity of the micro:bit is a significant advantage for young learners. It can be programmed using a variety of languages, including block-based coding with MakeCode, Python, and JavaScript. This flexibility allows children to choose their preferred method of learning, catering to different styles and preferences. As they experiment and build projects, they gain confidence in their coding skills while developing a deeper understanding of how technology works.
Features and components of the CrowBit Inventor Kit
The CrowBit Inventor Kit for micro:bit is a comprehensive package that enhances the learning experience with the micro:bit. It contains a wide range of electronic components and accessories that allow children to build and program various projects. This kit is not only designed to be educational but also engaging, encouraging creativity and problem-solving skills. Each component is thoughtfully chosen to provide maximum learning opportunities while being fun to use.
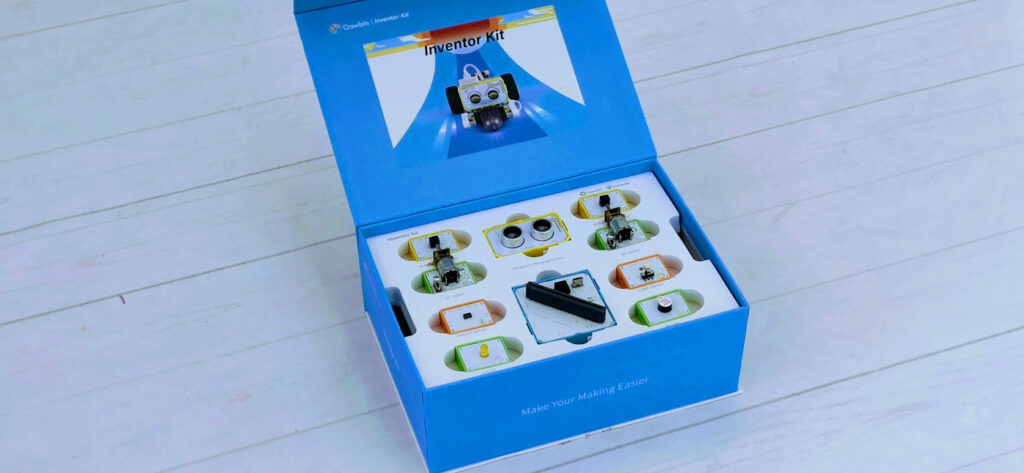
Included in the kit are various sensors, motors, and modules that can be easily connected to the micro:bit. Some of these components include LED lights, ultrasonic sensors, temperature sensors, and motors, which can be used to create a multitude of projects. The kit also comes with a detailed instruction manual that provides step-by-step guidance on how to assemble and program different projects, making it suitable for both beginners and more experienced users.
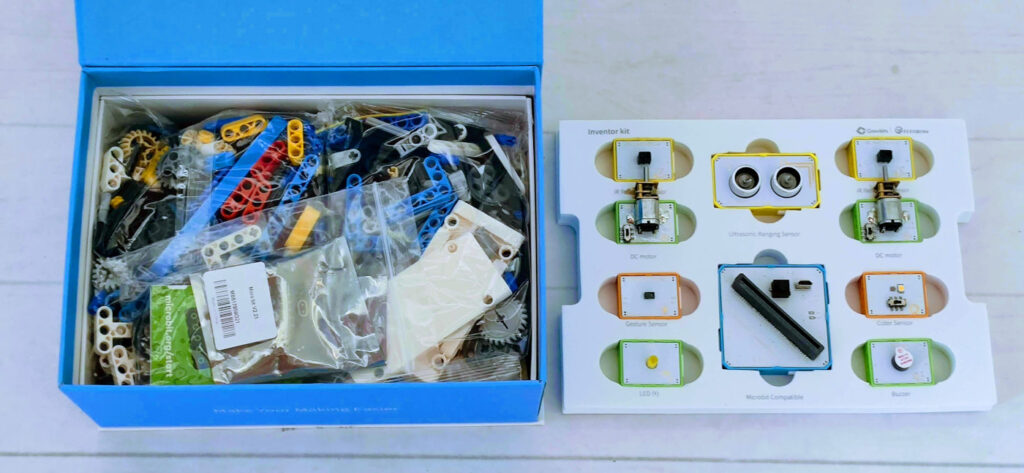
Another key feature of the CrowBit Inventor Kit is its modular design. Each component is designed to be easily connected using simple plugs, making assembly straightforward and intuitive. This approach not only reduces frustration but also encourages experimentation. Children can mix and match components to create their own unique projects, fostering a sense of ownership and creativity as they learn about electronics and programming.
Package content
- Crowbits-Ultrasonic Ranging Sensor
- 2xCrowbits-IR Reflective Sensor
- Crowbits-Buzzer
- Crowbits- LED(Yellow)
- 2xCrowbits-DC Motor
- Crowbits-Microbit Compatible
- Crowbits-Color Sensor
- Crowbits-Gesture Sensor
- 4xMagnetic Cable
- Lego Compatible Block Pack
- Micro USB Cable
- User Manual
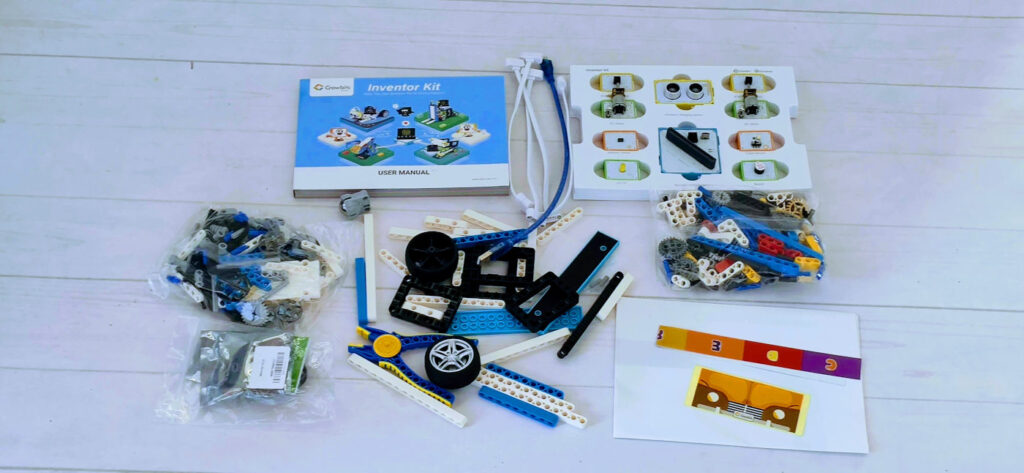
Step-by-step setup guide for the CrowBit Inventor Kit
Setting up the CrowBit Inventor Kit is a straightforward process that can be accomplished in just a few simple steps. To begin, start by unboxing the kit and laying out all the components on a clean, flat surface. This will allow you to familiarize yourself with each part and ensure that nothing is missing. Make sure you have the micro:bit, connectors, and any additional components ready for assembly.
Next, you’ll need to connect the micro:bit to the various modules included in the kit. Start by plugging the micro:bit into the CrowBit mainboard, ensuring that it is securely connected. Then, refer to the instruction manual to identify which components you want to use for your first project. For example, if you’re interested in building a simple LED display, connect the LED module to the appropriate port on the mainboard. The modular design allows for easy connections, enabling you to quickly swap out components as needed.
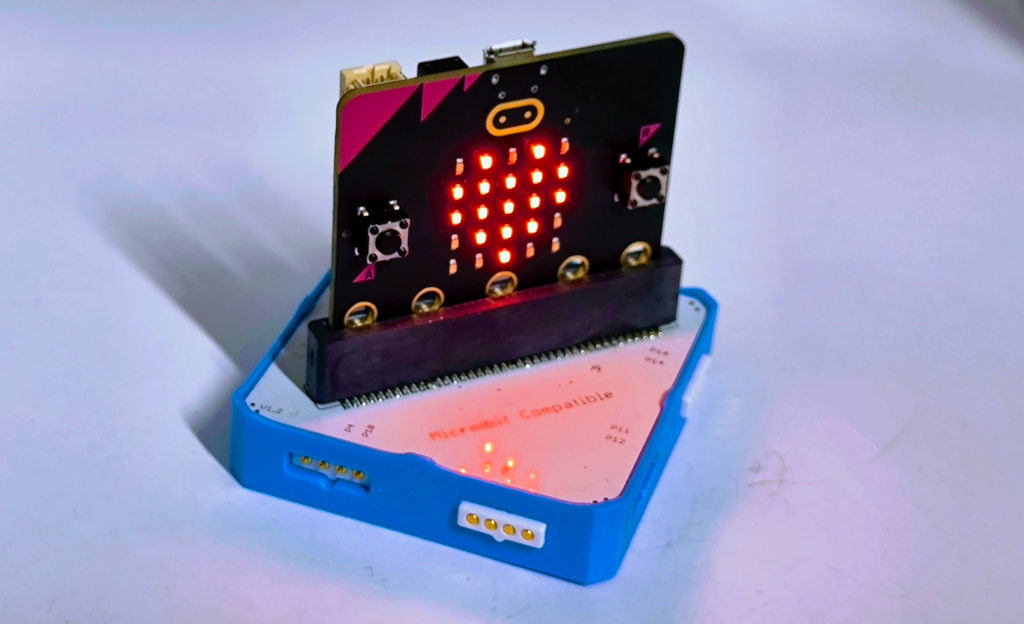
Once everything is connected, it’s time to power up your micro:bit. You can do this by either using batteries or connecting it to a computer via USB. After powering up, you’ll need to program the micro:bit using a coding platform such as MakeCode or Python. Follow the instructions provided in the manual to write your first simple program. This initial setup will pave the way for countless creative projects and experiments.
Getting started with basic projects and experiments (Focus on Ultrasonic guitar, assembly and programming)
One of the exciting projects that can be created using the CrowBit Inventor Kit is the Ultrasonic Guitar. This project combines creativity with technology, allowing children to create music using ultrasonic sensors. To get started, gather the necessary components: the ultrasonic sensor, micro:bit, and additional wiring as specified in the project instructions. The assembly process is straightforward and can be completed in just a few minutes.
Assembly
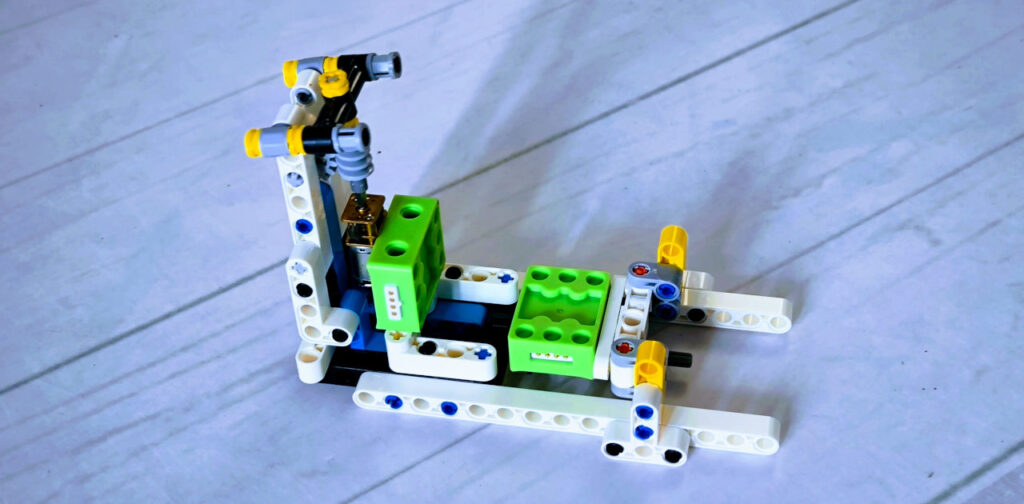
Begin by assembling the arm (or neck) of the guitar using LEGO-compatible pieces. These pieces form the elongated part of the guitar, where the strings would normally go. Ensure the pieces fit securely to create a sturdy arm.
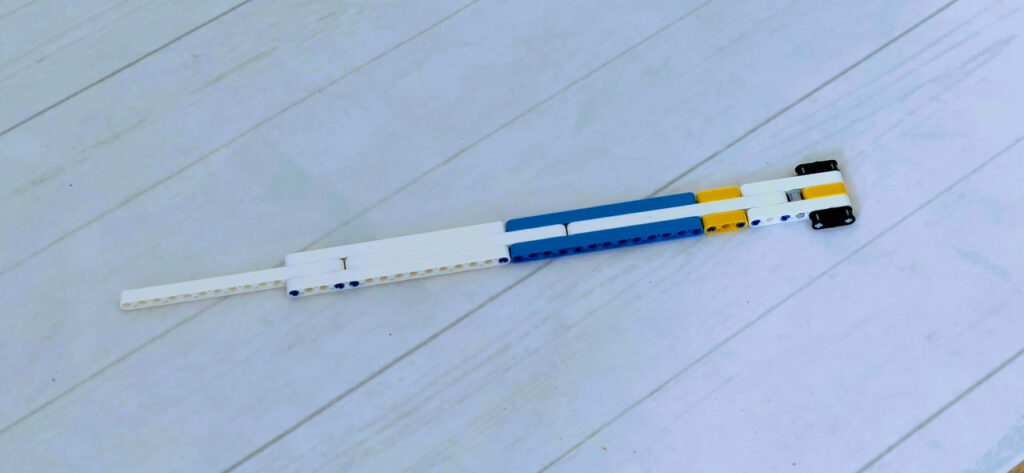
Once the arm is ready, attach it to the main body of the guitar. The body is wider and forms the base, where the strumming action happens. Connect it securely to the arm, making sure the pieces fit well to avoid instability.
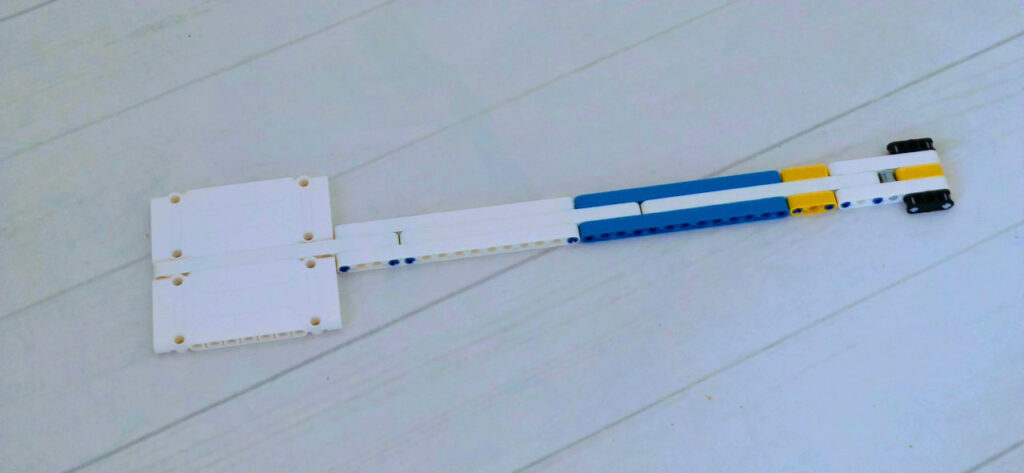
Now, add the head of the guitar to the top of the arm. This section of the guitar typically holds the tuning pegs in a real guitar. In this case, it’s the final structural element for the neck of your LEGO guitar.
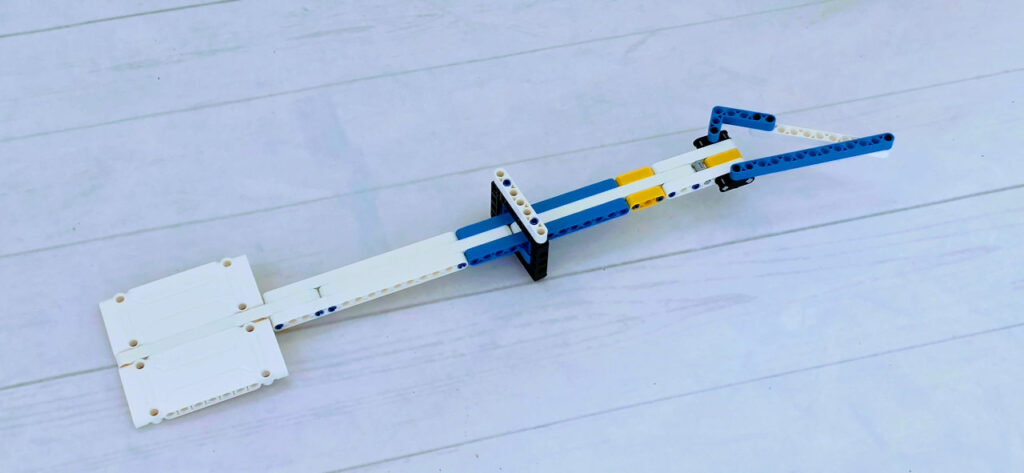
To give the guitar a finished look, attach decorative pieces to the back.
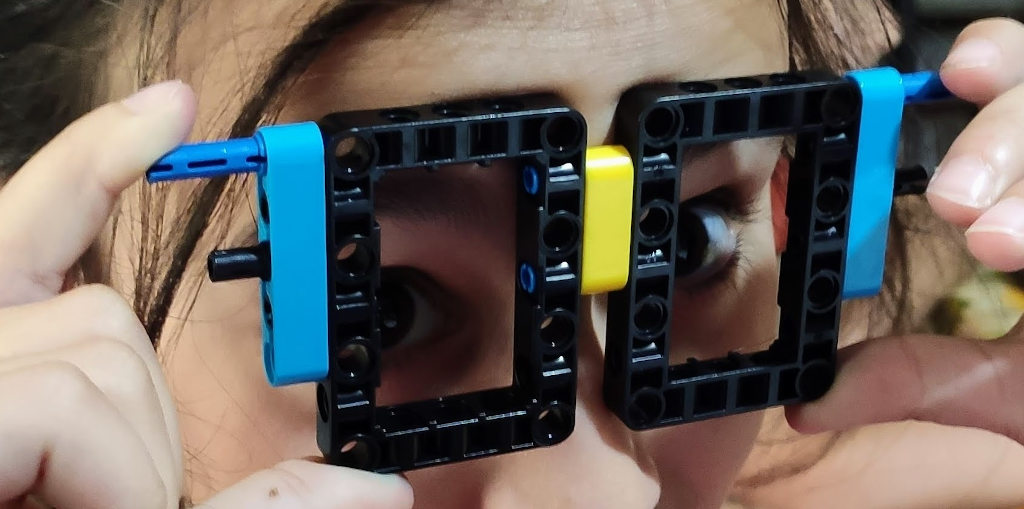
These pieces enhance both the appearance and stability of the model.
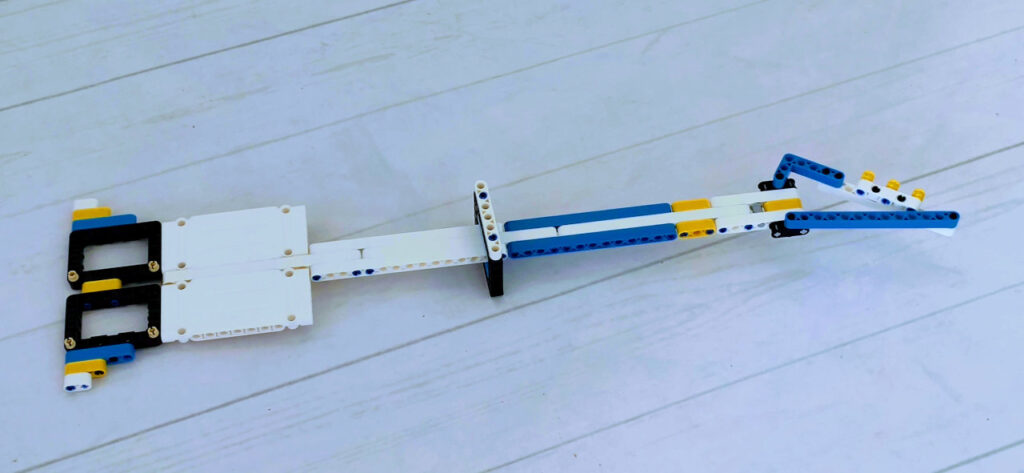
With the LEGO guitar assembled, it’s time to incorporate the Crowbit components. Attach the ultrasonic sensor to the body of the guitar. Place the Microbit in the Crowbit base, and securely connect it to the guitar. The ultrasonic sensor will allow interaction, and the Microbit will handle the programming and processing for the guitar’s functionality.
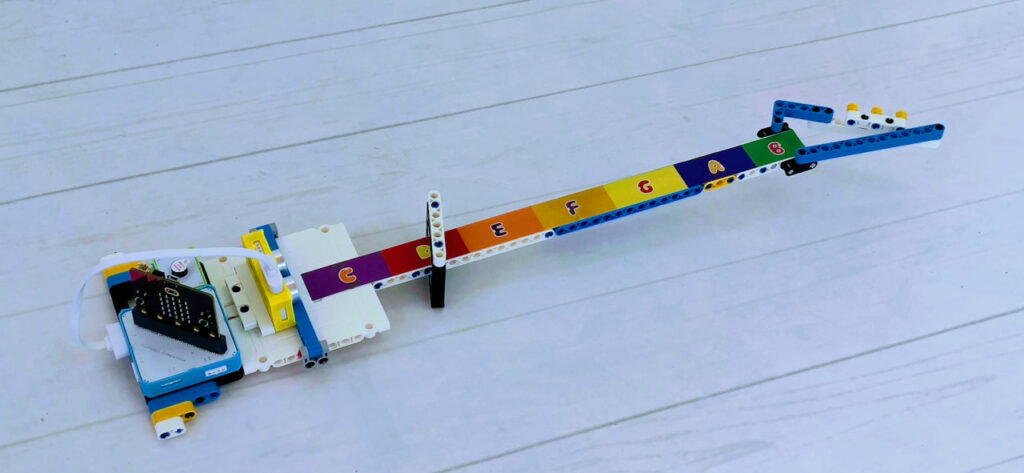
Begin by connecting the ultrasonic sensor to the micro:bit according to the schematic provided in the kit’s manual. Make sure to secure all connections to avoid any issues during operation. Once everything is connected, it’s time to focus on programming the micro:bit. Using the LetsCode platform, create a new project and write a simple code that responds to the distance detected by the ultrasonic sensor. The idea is to play different musical notes based on the distance between the sensor and the hand or object being detected.
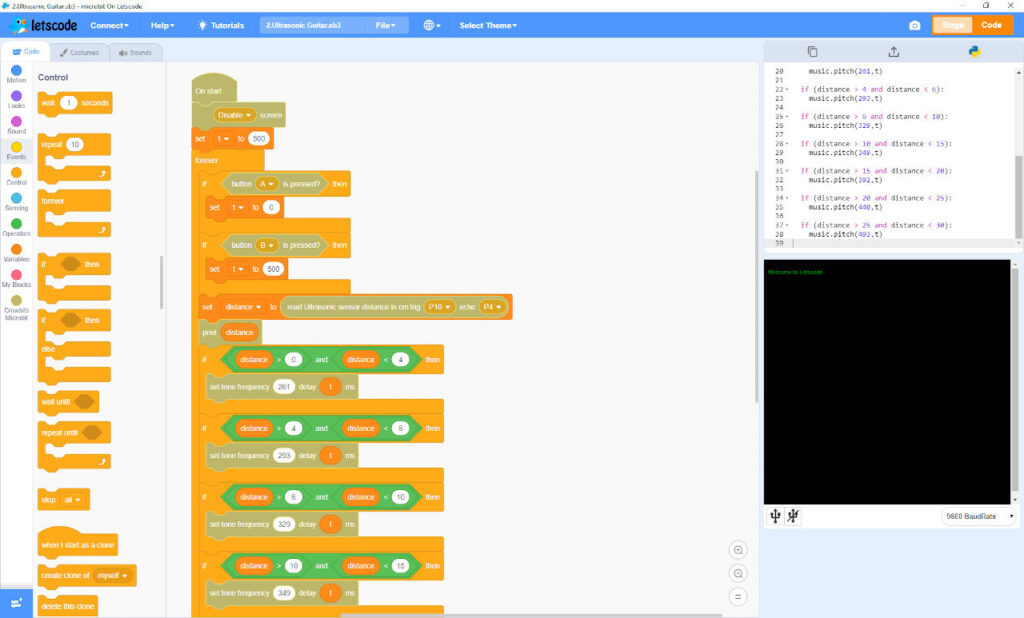
As you program the Ultrasonic Guitar, you can experiment with different sounds and melodies. Adjust the parameters in your code to see how it affects the music produced. This hands-on approach not only teaches coding skills but also introduces concepts of sound and distance in a fun and engaging way. Through this project, children will learn how sensors work and how they can be integrated into creative applications, enhancing their understanding of electronics and programming.
You can find the cod of all examples here.
Exploring advanced projects and possibilities with the CrowBit Inventor Kit (Focus on Forklift Truck, assembly and programming)
Once children have grasped the basics, they can delve into more advanced projects, such as building a Forklift Truck using the CrowBit Inventor Kit. This project challenges learners to apply their coding and engineering skills to create a functional vehicle that can lift and move objects. To begin, gather the components necessary for the Forklift Truck, including motors, wheels, and the micro:bit.
Assembly
Begin by assembling the base of the forklift truck using LEGO-compatible pieces. This will be the foundation of your forklift, where the other components will be attached. Ensure the base is sturdy and level.
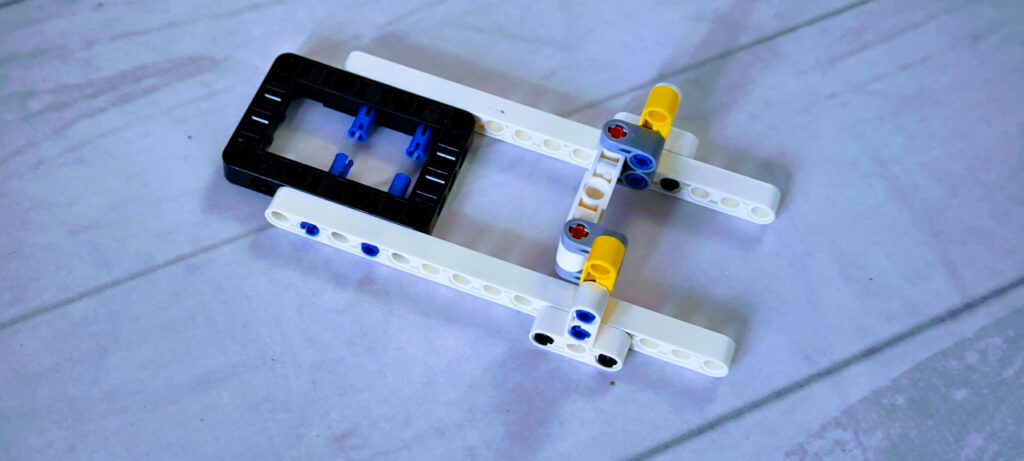
Assemble the motor and attach the necessary LEGO pieces that will help integrate it with the forklift’s base. This motor will later be responsible for driving the forklift’s movement.
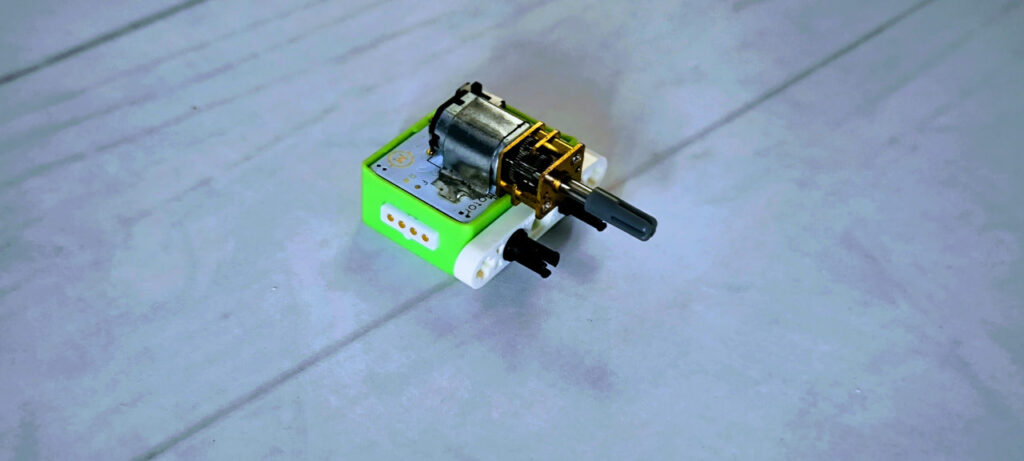
Now, connect the motor to the base of the forklift. Ensure it is aligned properly and securely fastened, as it will power the truck’s wheels for forward and backward movement.
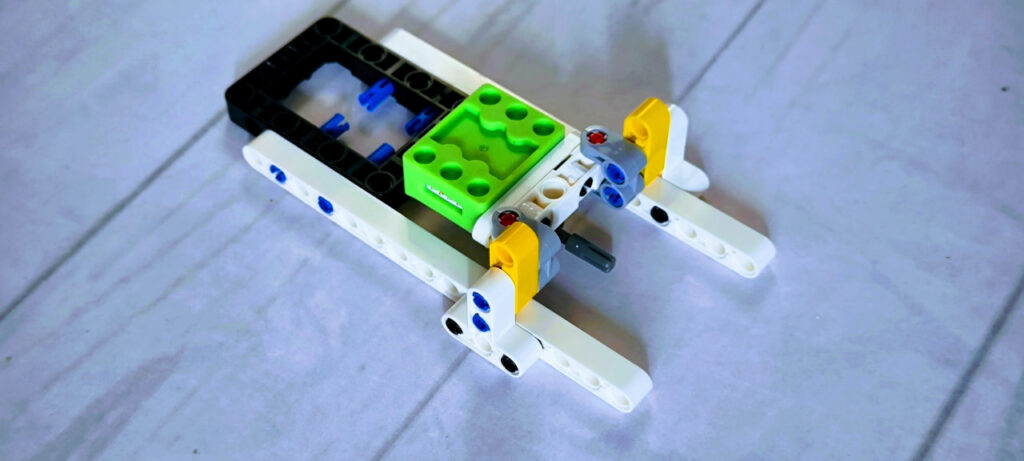
Next, attach the front portion of the forklift. This section will eventually support the elevator mechanism, so it needs to be stable.
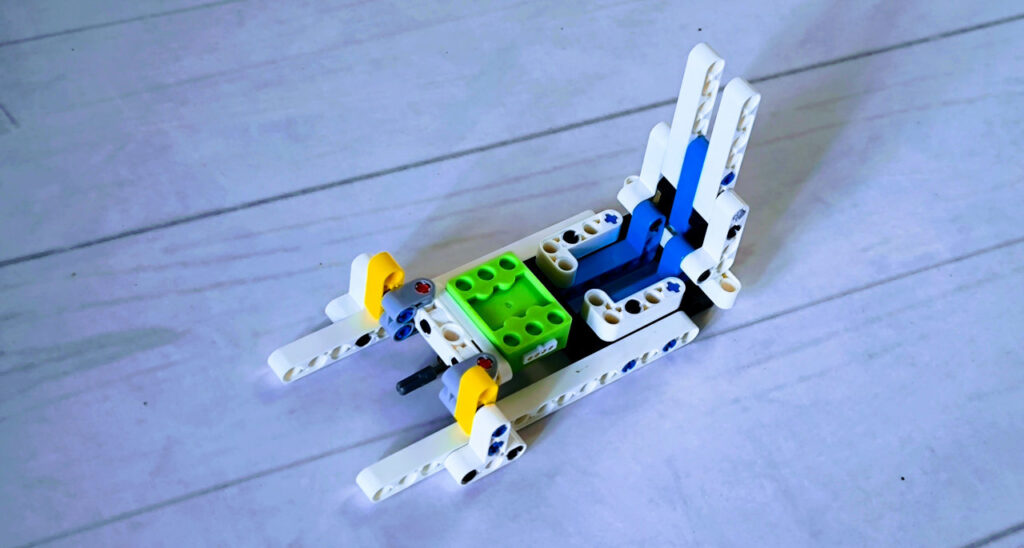
Add the motor that will operate the elevator mechanism to the front section. This motor will be responsible for raising and lowering the forklift’s elevator.
Focus on attaching the gears to the elevator motor. These gears are essential for transmitting power from the motor to the elevator, allowing it to move smoothly.
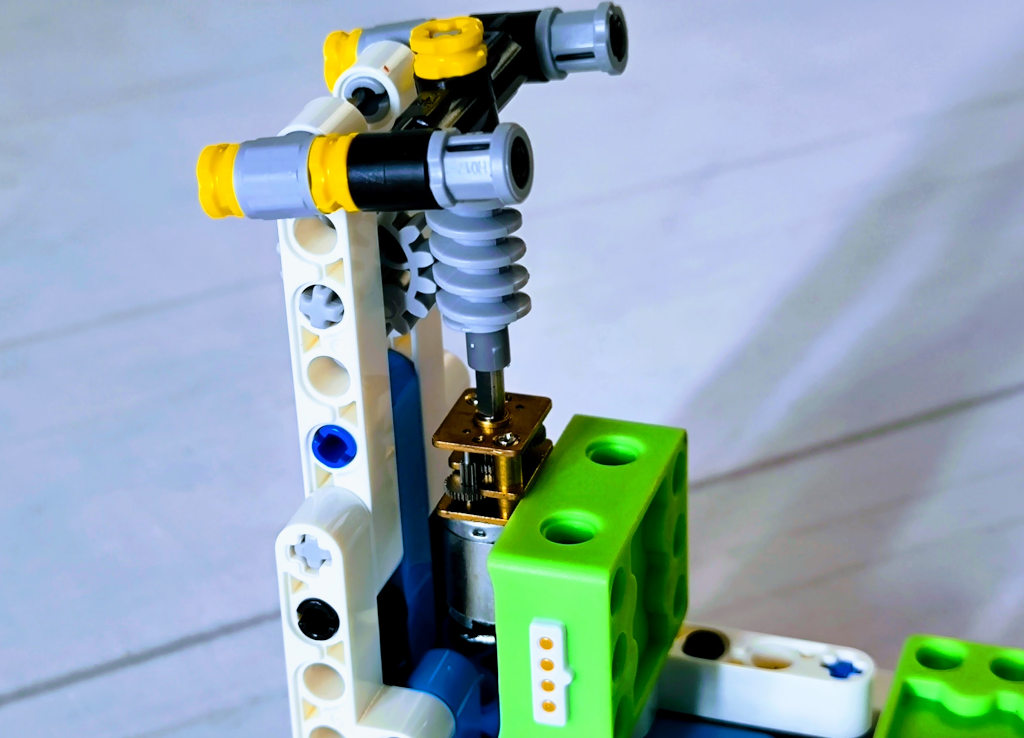
Insert the vertical bars that guide the elevator’s motion. These bars will keep the elevator stable as it moves up and down.
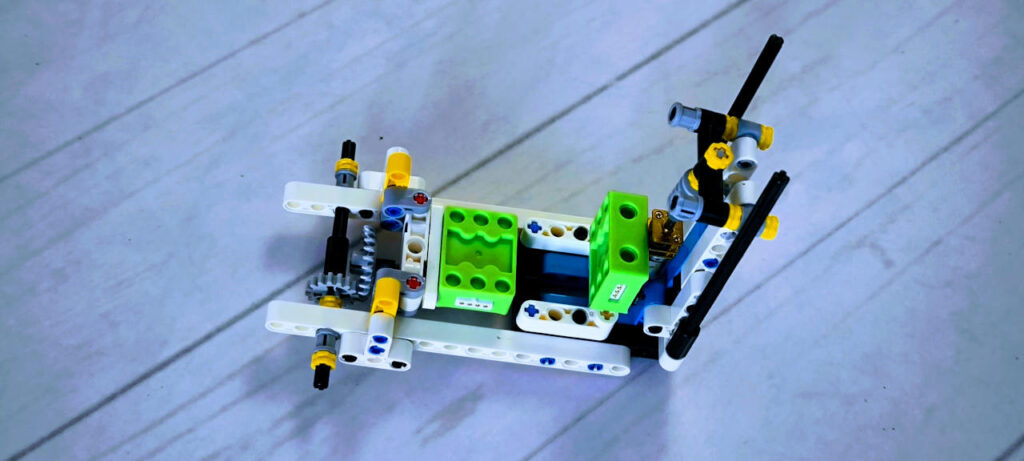
Now, assemble and attach the elevator piece that will slide up and down along the bars. Ensure it fits snugly and can move smoothly.
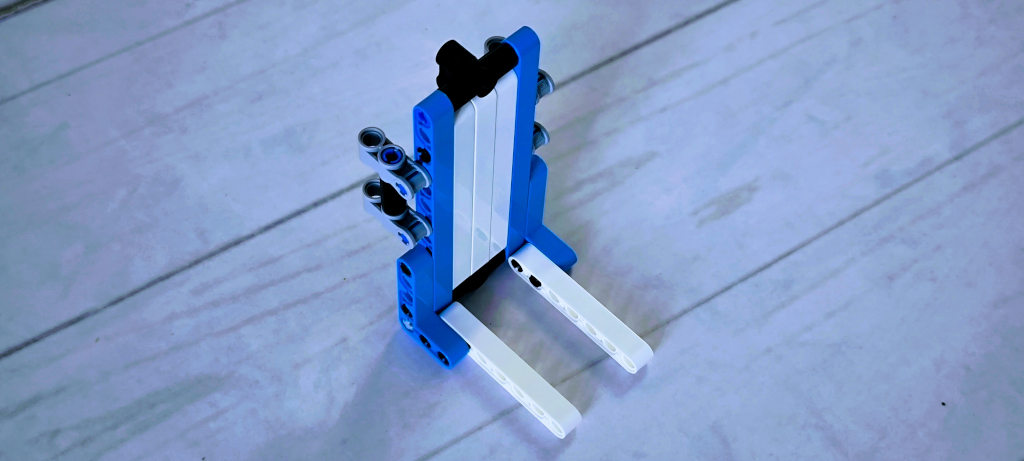
Carefully insert the elevator piece into the bars, making sure it can move freely within the track.
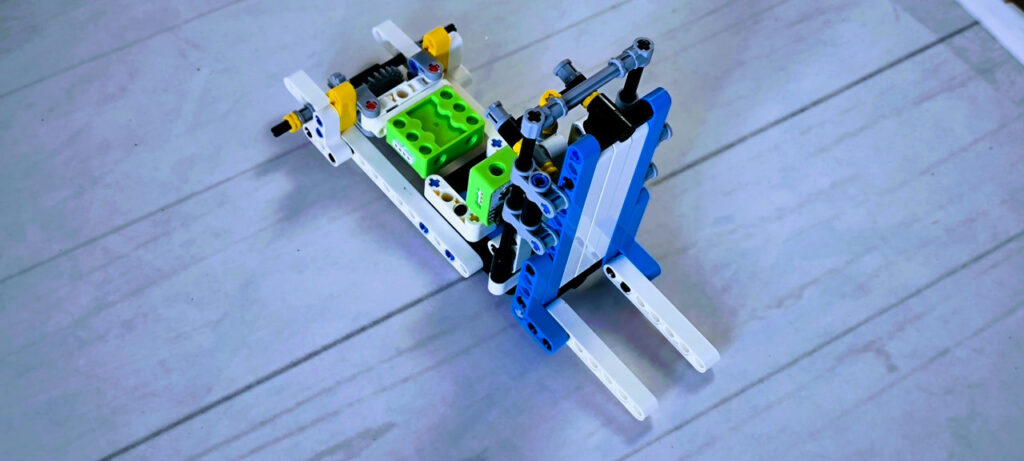
Now the gear to power the wheel.
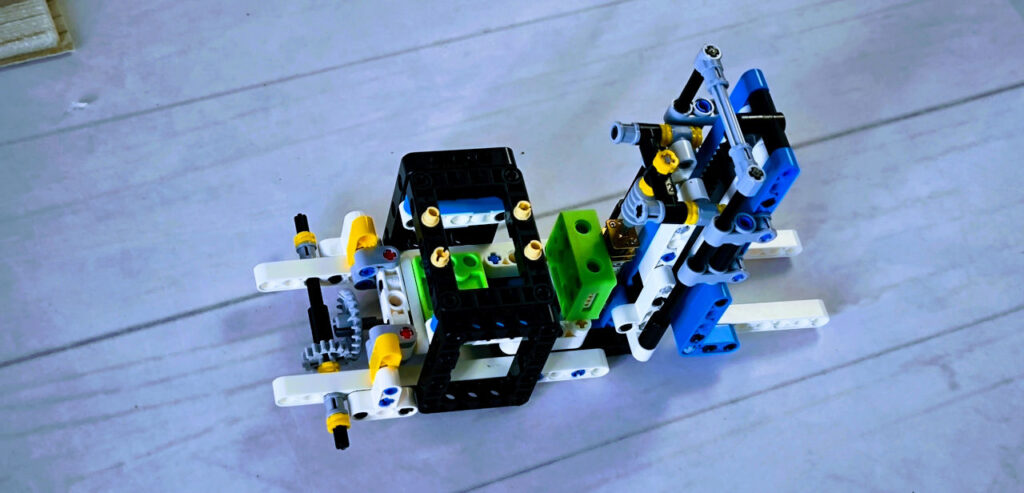
Add the cabine section where the driver would sit. This completes the visual look of the forklift truck and adds to its structural integrity.
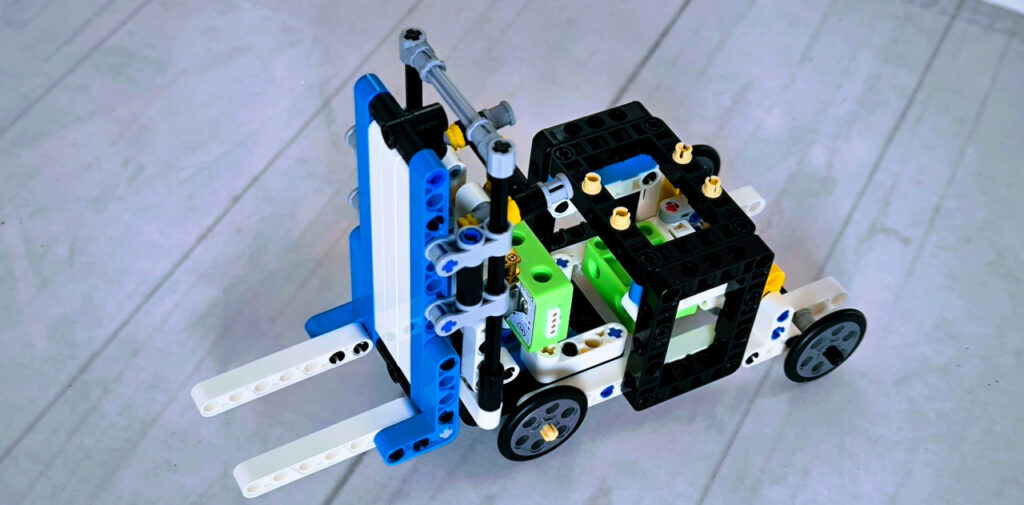
Finally, attach the Microbit to the Crowbit base and connect the cables to the motors and sensors. The Microbit will control the forklift’s movements and elevator functions, powered by your programming.
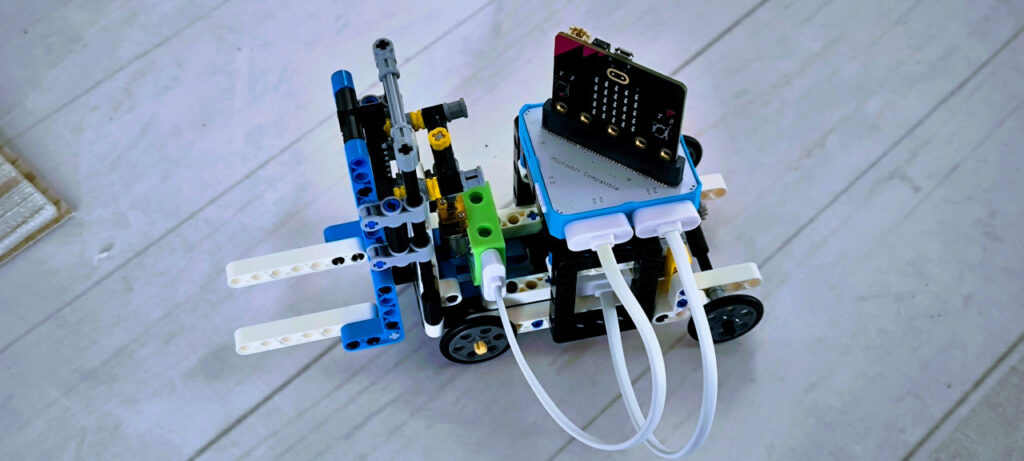
Start by assembling the chassis of the forklift. Connect the wheels to the motors and attach them securely to the base. Ensure that the micro:bit is properly mounted and connected to the motors. Following the instructions in the kit, set up the lifting mechanism, which often includes a servo motor that will allow the forklift to pick up and lower objects. This assembly process encourages children to think critically about design and functionality.
After completing the physical assembly, it’s time to program the forklift. Using a platform like MakeCode, write a program that controls the motors and the lifting mechanism. Children can create controls that allow the forklift to move forward, backward, and lift items.
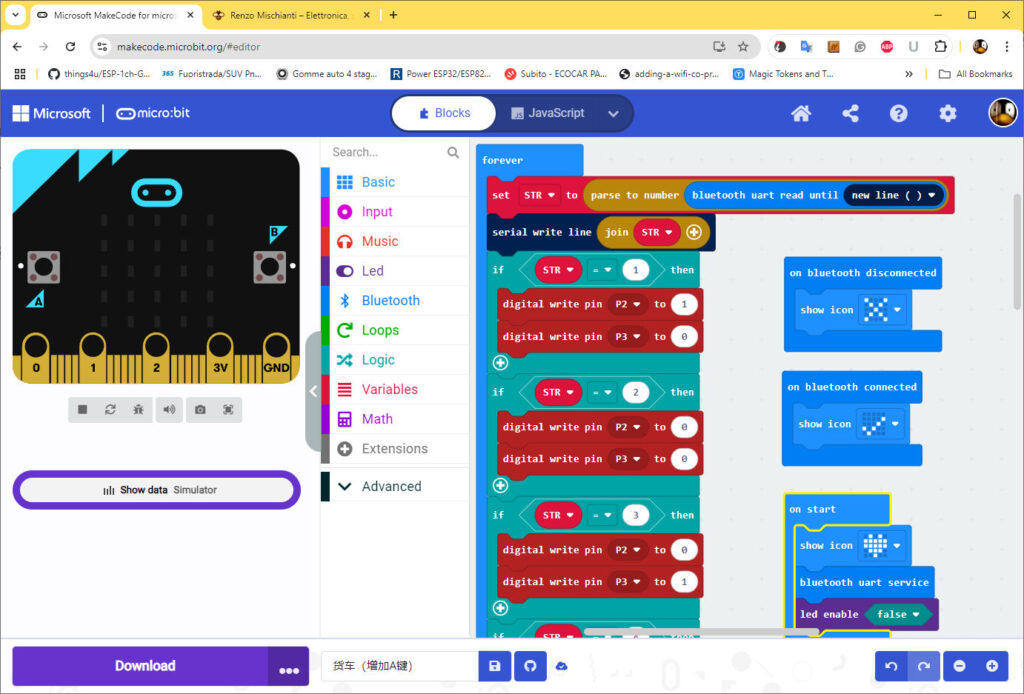
This project not only reinforces coding skills but also introduces concepts like robotics and mechanical engineering. As they experiment with programming the forklift, children will gain insights into how technology can be used to solve real-world problems.
You can find the code of all examples and also the Android app here.
Troubleshooting common issues and tips for success
As with any hands-on project, it’s common to encounter challenges when working with the CrowBit Inventor Kit. One of the most frequent issues is improper connections between components. If a project isn’t functioning as expected, start by checking all connections to ensure they are secure and correctly placed. Loose or incorrect connections can lead to malfunction, so taking the time to verify these can save a lot of frustration.
Another common issue is programming errors. If the micro:bit isn’t responding as intended, review the code for any mistakes. Make sure that the logic is sound and that all commands are correctly spelled and formatted. Using the debugging tools available in the coding platform can help identify where the problem lies. Encourage children to think critically and troubleshoot issues independently, as this process is an essential part of learning.
To ensure success with the CrowBit Inventor Kit, it’s important to foster a mindset of experimentation and exploration. Encourage children to try new ideas, even if they might not work on the first attempt. Learning through trial and error is a valuable experience that builds resilience and problem-solving skills. By embracing mistakes as part of the learning process, children will develop confidence and creativity in their projects.

