LoRa remote water level and pump controller (ReWaL): Client PCB – 5
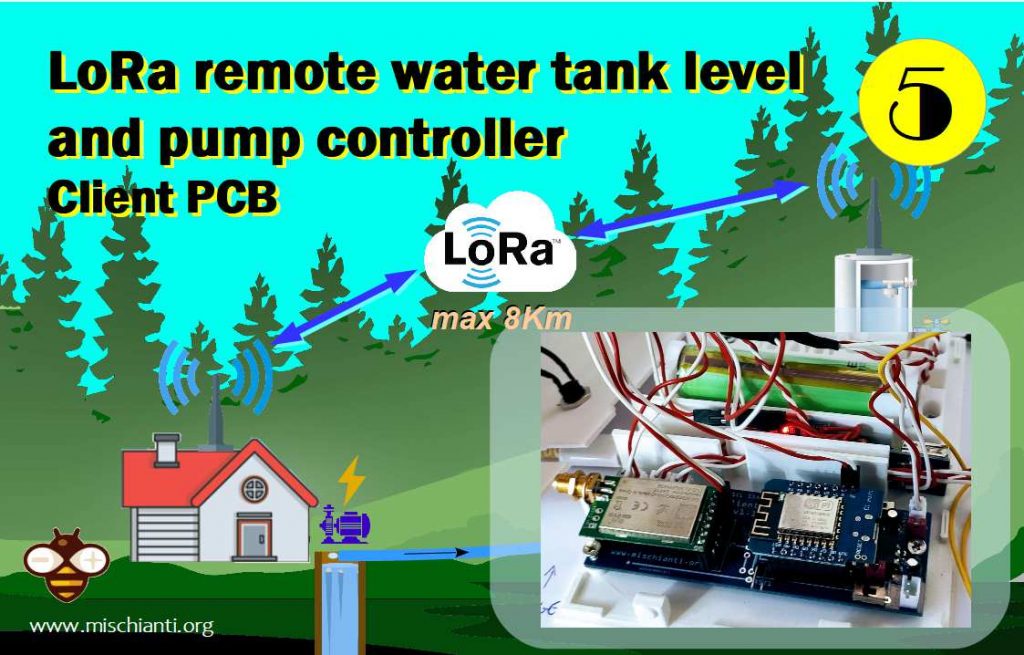
Now we must assemble the Client PCB, and you can get It without additional cost from PCB way.
Client PCB PCBWay

The prototyping and testing
For the client, I use the external module to manage the power supply, so there is no dependency for the people that don’t need to be autonomous with the battery.
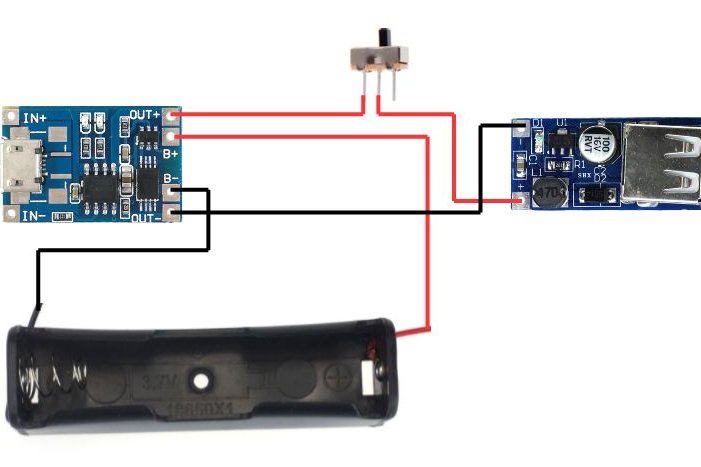
Battery and Solar panel circuit
You can find all the components of solar battery recharge on “Emergency power bank homemade“.
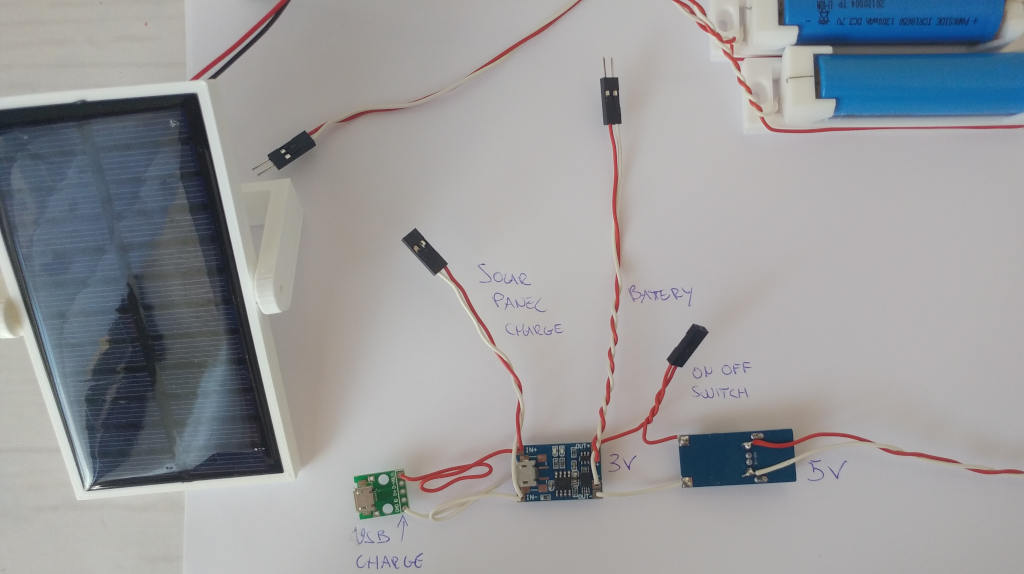
Here is a simple video to show how this simple circuit work
The components are simple to find
Solar panel 6v 1w on AliExpress 6v 1w
MicroUSB to DIP adapter on AliExpress
Charging lithium battery module on tp4056 - tp4056 and step-up - Charge disharge USB - Charge disharge
Step UP module on AliExpress
I have tried many types of batteries and these are some of the best:
18650 batteries &nbps;AliExpress 18650 3.7v 3400mah
Client PCB
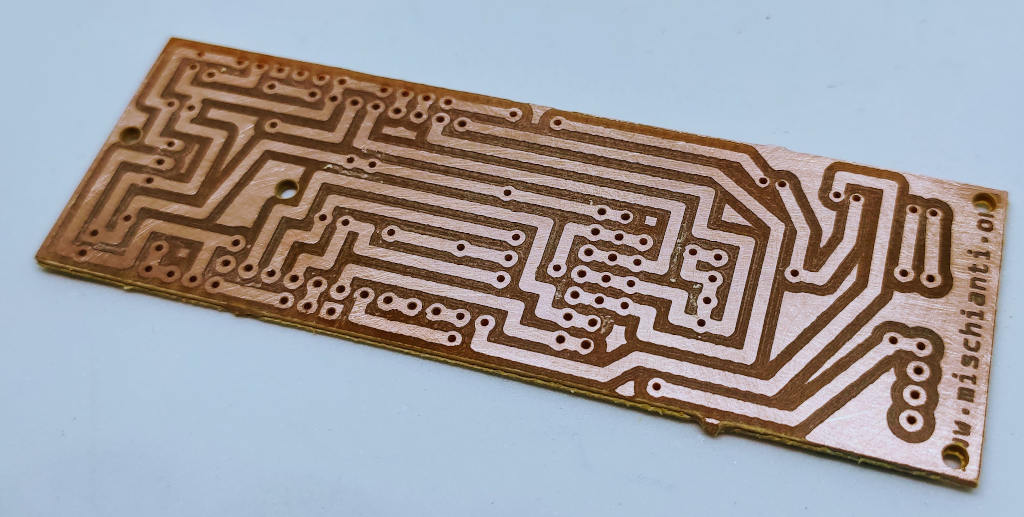
As usual, I prototype the PCB on Fritzing, and I’m going to mill with my Cyclone PCB Factory.
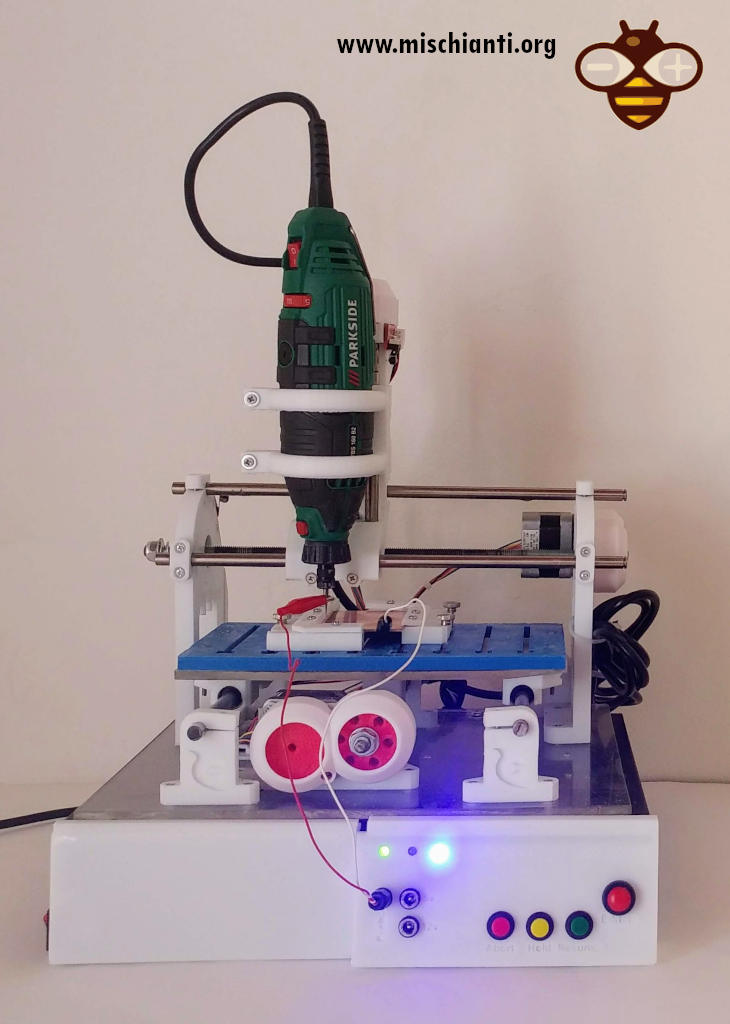
If you want to build It, you can refer to this Tutorial, “CNC Cyclone PCB Factory“, then the guide to prototype with the CNC “Milling PCB tutorial“.
Bill of Material
| Amount | Part Type | Properties |
|---|---|---|
| 5 | Header 2 | variant JST-pth-2 |
| 1 | Electrolytic Capacitor | capacitance 0.1µF |
| 1 | Electrolytic Capacitor | capacitance 10µF |
| 6 | Generic male header – 2 pins | form ♂ (male); pins 2; pin spacing 0.1in (2.54mm); |
| 1 | Generic male header – 6 pins | form ♂ (male); pins 6; pin spacing 0.1in (2.54mm); |
| 1 | Generic male header – 7 pins | form ♂ (male); pins 7; pin spacing 0.1in (2.54mm); |
| 1 | Lora E32-TTL-100 | |
| 3 | 4.7kΩ Resistor | resistenza 4.7kΩ; |
| 3 | 10kΩ Resistor | resistenza 10kΩ; |
| 1 | 20kΩ Resistor | resistenza 20kΩ; |
| 2 | Toggle Switch | switching circuit SPDT; |
| 1 | V_REG_LD1117VXX | voltage 3.3V; chip LD1117V33; |
| 1 | WeMos D1 Mini |
WeMos D1 mini on WeMos D1 mini - NodeMCU V2 V2.1 V3 - esp01 - esp01 programmer
LM1117 33 on AliExpress SMD (AMS1117) - AliExpress 3.3v (LM1117) - AliExpress 5v (7805) - AliExpress 9v (7809)AliExpress 12v (7812) - AliExpress 3.3v TO-92 (78L33)
EByte LoRa E32 on AliExpress (433MHz 5Km) - AliExpress (433MHz 8Km) - AliExpress (433MHz 16Km) - AliExpress (868MHz 915MHz 5.5Km) - AliExpress (868MHz 915MHz 8Km)
Connector jst-pth-2 on AliExpress XH2.54 2.54mm AliExpress PH2.0 2.0mm
Assembly
For assembly, you can refer to the silkscreen of the PCB, and I do It quite verbose.
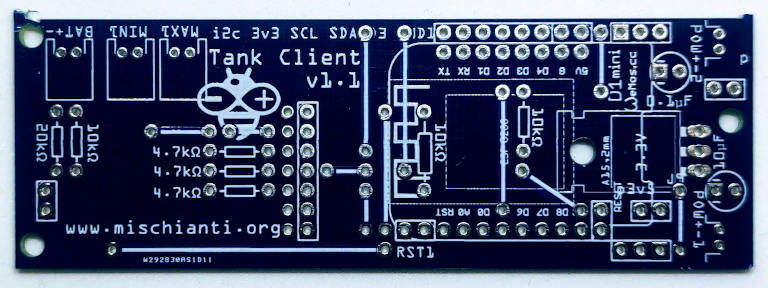
Then, we must start to assemble the component, the LEDs, switch, display, WeMos D1, and EByte E32.

Some steps of the soldering phase
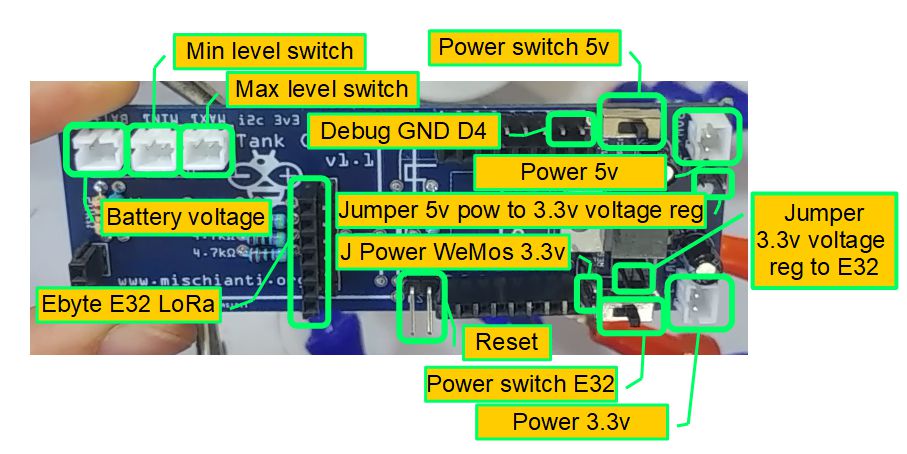
Here is the pinout and specification of the board.
Pay attention; you can use 5V or 3.3V or all power pins, but you must pay attention to the jumper configuration.
I will publish the box and how to mount it in the next article.
Thanks
- LoRa remote water tank level and pump controller: intro
- LoRa remote water level and pump controller: server software
- LoRa remote water level and pump controller: client software
- LoRa remote water level and pump controller: server PCB
- LoRa remote water level and pump controller: client PCB
- LoRa remote water level and pump controller: assemble server and 3D printed case
- LoRa remote water level and pump controller: assemble client and 3D printed case