Web Server with esp8266 and esp32: DHT temperature humidity on protected Web Interface – 6
We have seen how to create a complete security site, front-end and back-end with microservices.
In this article I briefly describe the web part and add the llink to the animated temperature and humidity widgets used on the site.
You can find the described code of the esp8266 and esp32 in the previous articles on GitHub repository.
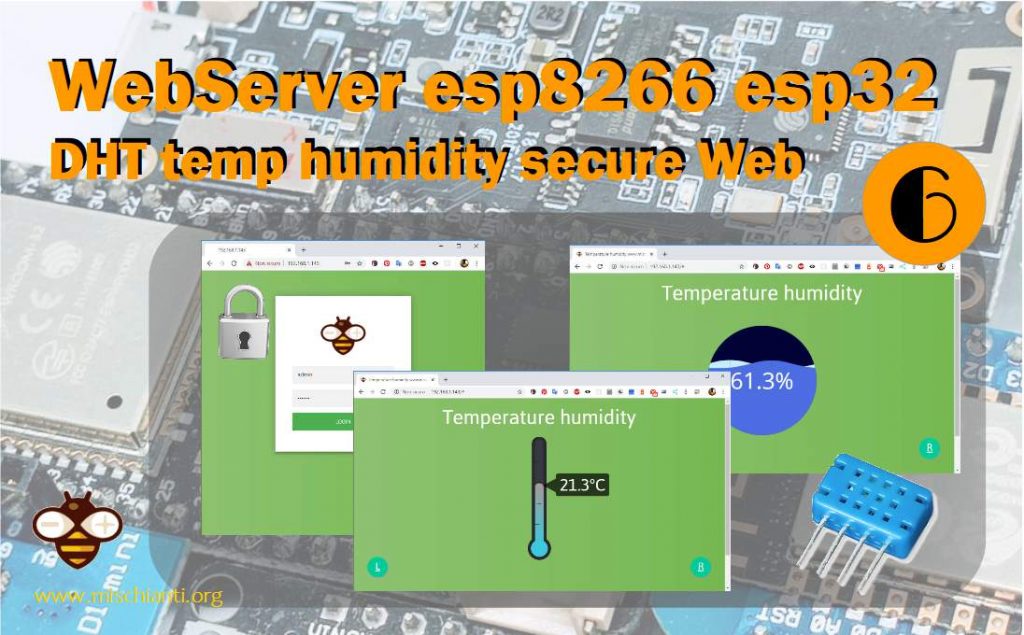
Front-end site
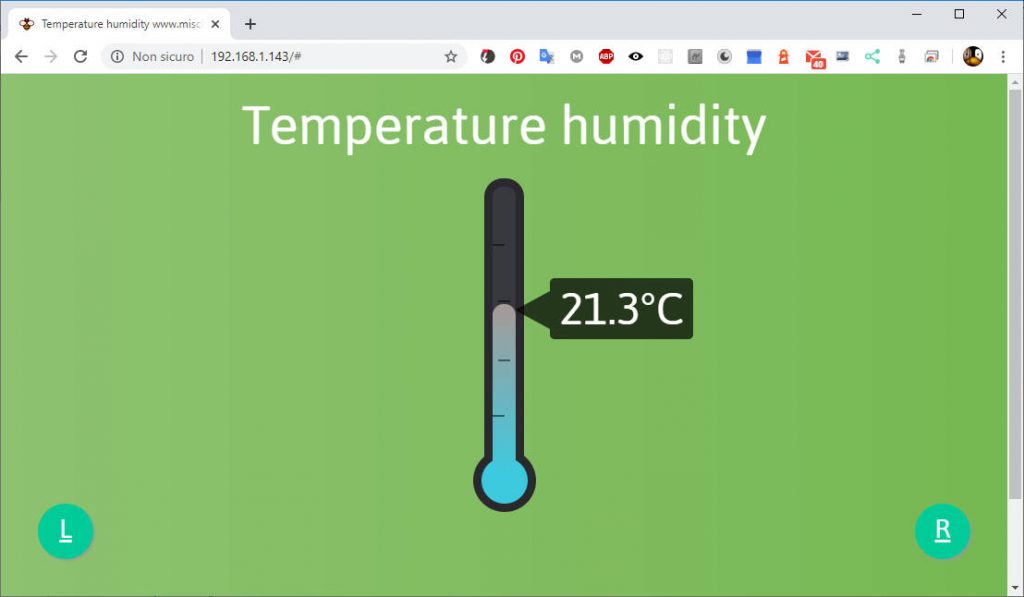
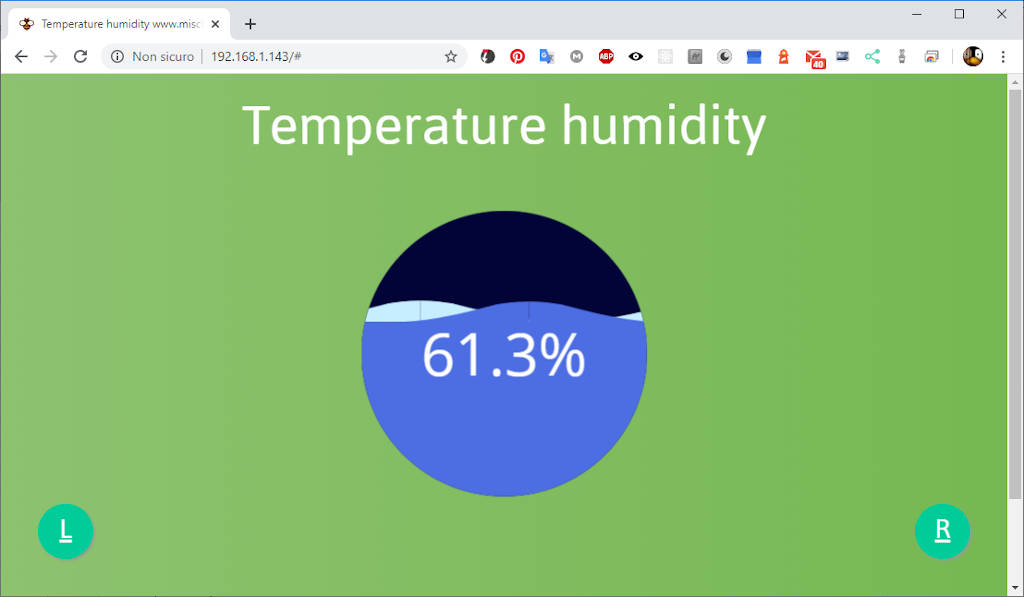
We reuse the login page, but we change the site to show temperature and humidity of a room.
In this function I’m going to retrieve temperature and humidity from DHT12 and add It in a Json structure that are managed by front end.
        var requestTempHum = function(){
            var xhttp = new XMLHttpRequest();
            xhttp.onreadystatechange = function() {
                if (this.readyState == 4 && this.status == 200) {
                    // Typical action to be performed when the document is ready:
                    var res = JSON.parse(xhttp.responseText);
                    humidityFunction(res.humidity);
                    termometerTemperature(res.temp);
                }
            };
            xhttp.onerror = function () {
                alert("Status code is " + this.status + " click F12 and check what is the problem on console");
            };

            xhttp.open("GET", "/temperatureHumidity", true);
            xhttp.send();
        }
The /temperatureHumidity end point is a GET which return a JSON mime type, and on front end you can get this data with a simple XMLHttpRequest, process the json string and transform it into an object like this to use it more easily.
The front-end have a simple structure
favicon.ico
floatButton.css
index.html
iot-widget.min.js
login.html
logo256.jpg
sldierElement.css
sliderManager.js
There are some css the login page from the previous example and a new one index.html.
The result is in this screens
This is only a simple demo, if you want you can add a simple timer to manage a polling request
        function polling() {
            setTimeout(function () {
                debouncedRequestTempHum();
                polling();
            }, 2500);
        }
        polling();
now every 2.5 seconds, the data are automatically updated.
Polling is not the better solution, but for year is a widely used solution.
JavaScript: temperature humidity widget
I also created two simple animated widget, that you can find on this repository, or you can download directly the simple js lib.
Widgets are written in React and work in both vanilla JS and also in React.
Here the declaration of humidity widget
<HumidityWidget humidity={this.state.humidity} diameter={150} animationRates={80} />
and temperature
<TermometerWidget temperature={this.state.temperature} />
The usage is very simple, for example the code in vanilla JS is
<!DOCTYPE html>
<html lang="en">
<head>
<meta charset="utf-8">
<title>Temperature humidity demo</title>

<script type="text/javascript" src="iot-widget.min.js"></script>
</head>
<body style="">
    <div id="container2"></div>
    <br/><br/><br/>
    <div id="container"></div>
	<script type="application/javascript">
        var container = document.getElementById('container');
        var hw = new Widget.Humidity(container, 40, 200, 50);
        hw.draw();

        var container2 = document.getElementById('container2');
        var tw = new Widget.Termometer(container2, 15, 250);
        tw.draw();
	</script>
    <button onclick="hw.setHumidity(80);">Set humidity to 80</button>
    <button onclick="hw.setHumidity(40);">Set humidity to 40</button>
    <button onclick="tw.setTemperature(30);">Set temperature to 30</button>
    <button onclick="tw.setTemperature(-5);">Set temperature to -5</button>
</body>
</html>
You can see the effect in the upper video.
Here the simple HTML page for the site
<!DOCTYPE html>
<html lang="en">
<head>
    <link rel="stylesheet" type="text/css" href="./sldierElement.css">
    <link rel="stylesheet" type="text/css" href="./floatButton.css">
    <script src="iot-widget.min.js"></script>
    <script src="sliderManager.js"></script>

    <meta charset="UTF-8">
    <title>Temperature humidity www.mischianti.org</title>

    <style>
        html {
            height: 100%;
        }
        body {
            height: 100%;

            background: #76b852; /* fallback for old browsers */
            background: -webkit-linear-gradient(right, #76b852, #8DC26F);
            background: -moz-linear-gradient(right, #76b852, #8DC26F);
            background: -o-linear-gradient(right, #76b852, #8DC26F);
            background: linear-gradient(to left, #76b852, #8DC26F);
        }

        .titleContainer {
            font-size:  6vw;;
            text-align: center;
            width: 100%;
            height: 16%;
            /*padding: 10px;*/
        }
        .sliderContainer {
            height: 84%;
            position: relative;
        }

        .humidity-container,
        .termometer-container{
            width: 768px;
            height: 100%;
        }
        .humidity-container{
            height: 70%;
        }
    </style>
</head>
<body>
<div class="titleContainer">Temperature humidity</div>
<div class="sliderContainer">
    <div class="slider-wrap">
        <div class="slider" id="slider">
            <div class="holder">
                <div class="slide-wrapper">

                    <div class="humidity-container" id="humidity-container"></div>
                </div>
                <div class="slide-wrapper">
                    <div class="termometer-container" id="termomter-container" ></div>
                </div>
            </div>
        </div>
    </div>
</div>
<script>
    var sliderElement = document.getElementById('slider');
    var sliderImageElements = document.querySelectorAll(".slide-wrapper");
    var holderElement = document.querySelector(".holder");
    var animateElements = document.querySelectorAll('.animate');

    sliderInitialization(  sliderElement,
        sliderImageElements,
        holderElement,
        animateElements,
        2);

    var container = document.getElementById('humidity-container');
    var hw = new Widget.Humidity(container, 0);
    hw.draw();

    var container2 = document.getElementById('termomter-container');
    var tw = new Widget.Termometer(container2, 0);
    tw.draw();

</script>

    <script>
        function getCookie(name) {
            const value = `; ${document.cookie}`;
            const parts = value.split(`; ${name}=`);
            if (parts.length === 2) return parts.pop().split(';').shift();
        }

        var token = getCookie('ESPSESSIONID');

        function debounce(fn, threshold) {
            threshold = threshold || 300;
            var timer;
            return function() {
                if (!timer) {
                    fn.apply(this, arguments);
                }
                clearTimeout(timer);
                timer = setTimeout(function() {
                    timer = null;
                }, threshold);
            };
        };

        var requestTempHum = function(){
            var xhttp = new XMLHttpRequest();
            xhttp.onreadystatechange = function() {
                if (this.readyState == 4 && this.status == 200) {
                    // Typical action to be performed when the document is ready:
                    var res = JSON.parse(xhttp.responseText);
                    hw.setHumidity(res.humidity);
                    tw.setTemperature(res.temp);
                }
            };
            xhttp.onerror = function () {
                alert("Status code is " + this.status + " click F12 and check what is the problem on console");
            };

            xhttp.open("GET", "/temperatureHumidity", true);
            xhttp.send();
        }

        var debouncedRequestTempHum = debounce(requestTempHum, 400);

        var refresh = function(){
            debouncedRequestTempHum();
        }
        debouncedRequestTempHum();

        function polling() {
            setTimeout(function () {
                debouncedRequestTempHum();
                polling();
            }, 2500);
        }
        polling();
    </script>
    <div style="position: absolute">
        <a href="#" onclick="refresh();" class="floatRefresh">
            <div style="font-size: xx-large">R</div>
        </a>
    </div>
    <div style="position: absolute">
        <a href="/logout" class="floatLogout">
            <div style="font-size: xx-large">L</div>
        </a>
    </div>

</body>
</html>
All the login management is in the back end that redirect to login.html page every time there isn’t the authentication cookie.
Thanks
- Web Server with esp8266 and esp32: serve pages and manage LEDs
- Web Server with esp8266 and esp32: byte array gzipped pages and SPIFFS
- Web Server with esp8266 and esp32: multi purpose generic web server
- Web Server with esp8266 and esp32: manage security and authentication
- Web Server with esp8266 and esp32: add secure REST back-end
- Web Server with esp8266 and esp32: DHT temperature humidity on protected Web Interface
Code and examples on this repository GitHub