WeMos D1 (esp8266) manage relay and shield
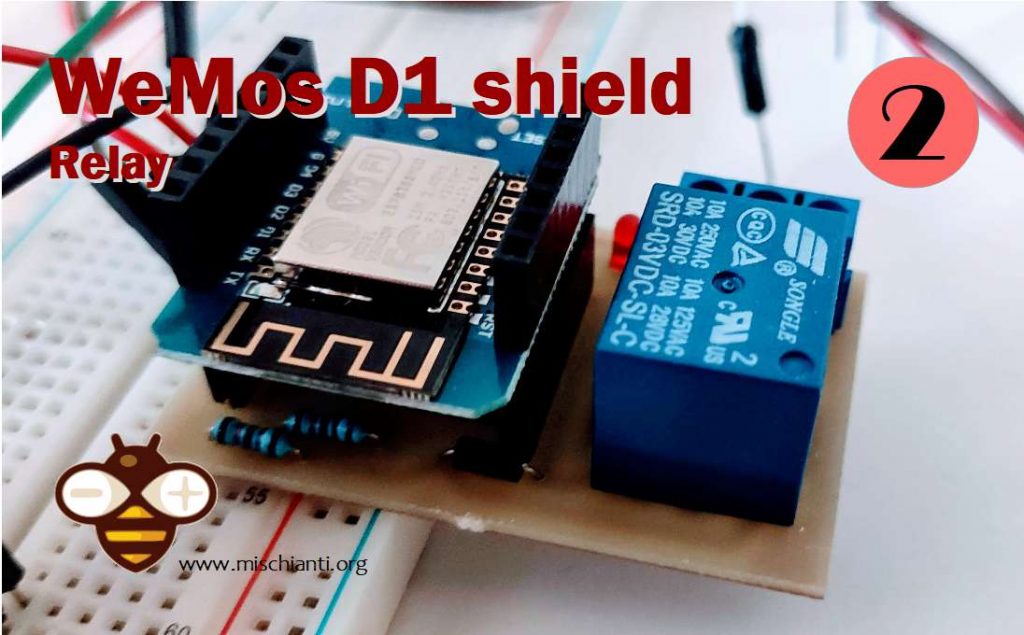
One of my project’s most used components is undoubtedly the relay; its working is quite simple; you can find It as a module or only the relay.
You can find multi voltage relay modules on AliExpressThe only problem you can have is that relay needs some power to be activated, so It’s preferable to use a transistor like 2n3904.
You can find 2n3904 transitor on AliExpressBasics
Here is a simple breadboard connection schema; as you can see, I use a microcontroller pin to activate a transistor that gets 3.3v power from the relative pin, but if you can, It’s better to use an external 3.3v.
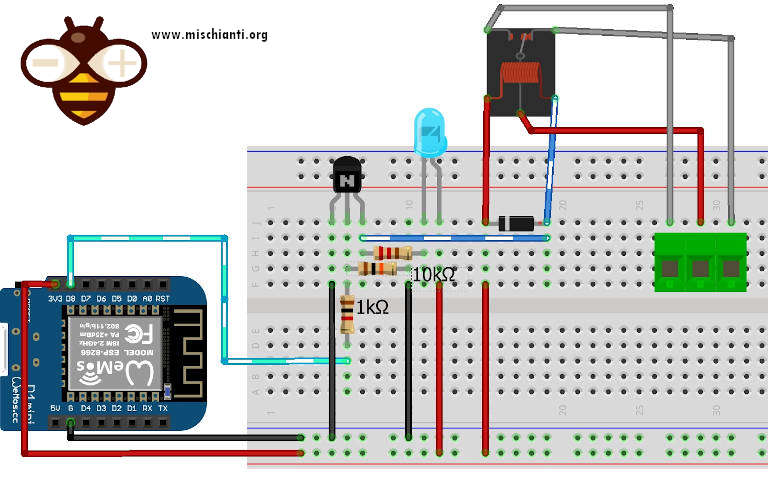
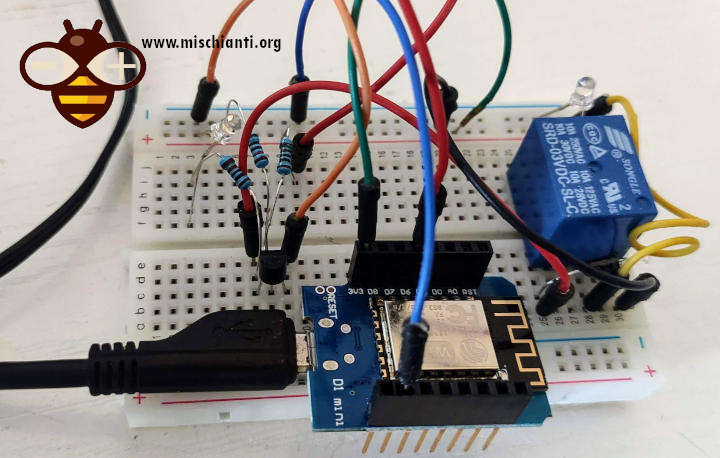
Here is the breadboard with this simple circuit.
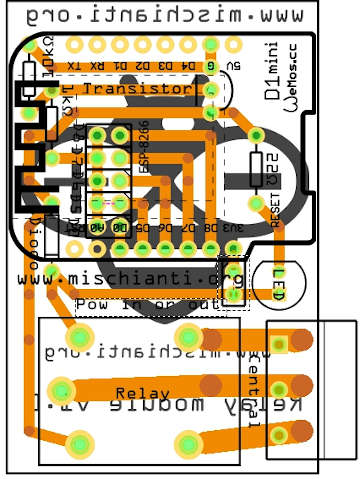
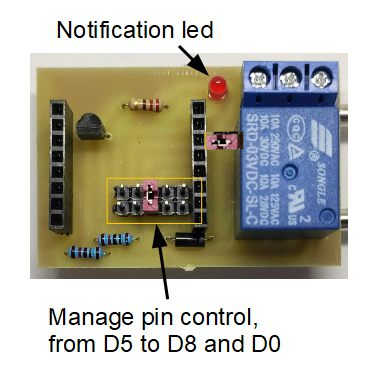
Now I’m going to create the PCB, and I add a set of male pins to manage with a jumper to select a specified WeMos pin. The options are from D5 to D8 and D0.
PCB v1
And I add pins to add a jumper to select internal 3.3v supply to the relay or use the bottom pin to add an external power source.
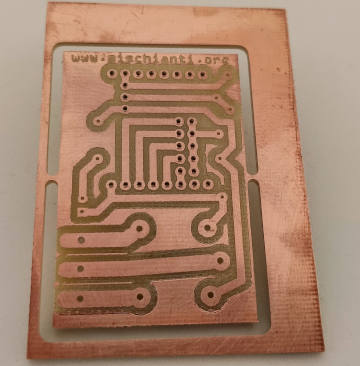
Then the prototyping, here the result of milling.
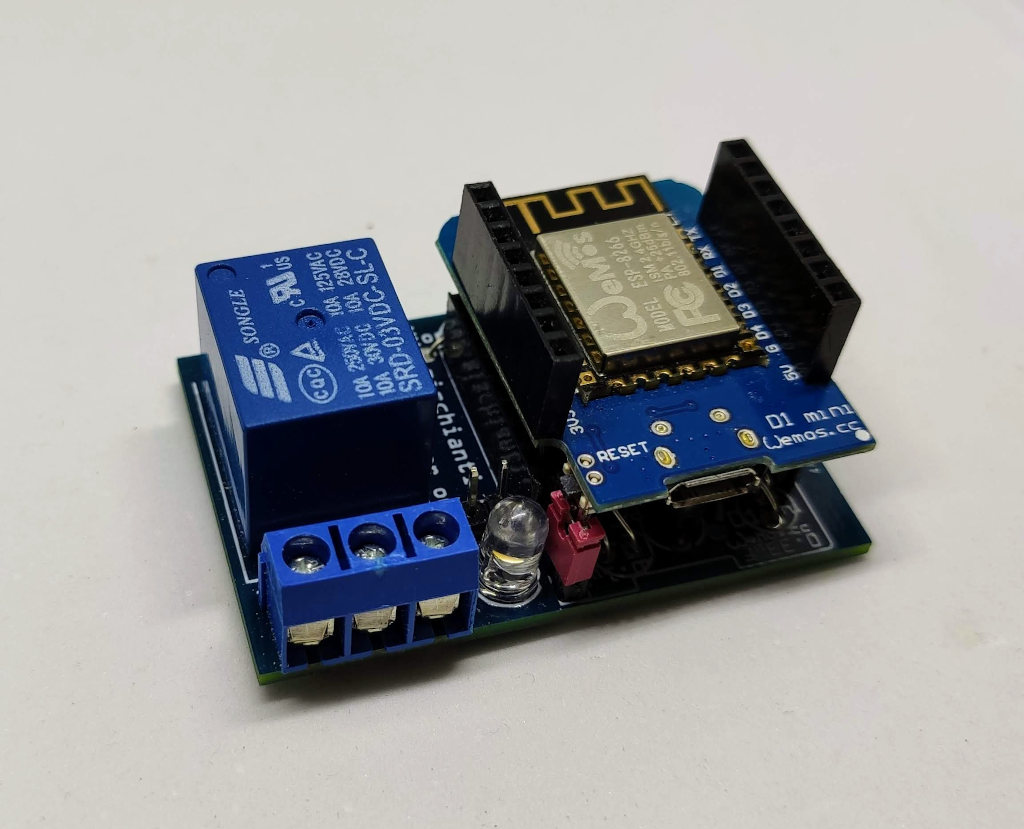
Here the PCB assembled, you can see a jumper near the relay; if you remove that and put power to the left pin and a comune GRD, you use an external power supply.
Here is the list of material
| N° | Object | Desc |
|---|---|---|
| 2 | Generic female header – 8 pins | 2.54mm |
| 6 | Generic male header – 2 pins | 2.54mm |
| 1 | Diode | 1n4007 |
| 1 | Blue (505nm) LED | |
| 1 | 1kΩ Resistor | |
| 1 | 10kΩ Resistor | |
| 1 | 22Ω Resistor | |
| 1 | Relay SRD-3VDC-SL-C | voltage 3.3V |
| 1 | NPN-Transistor | 2n3904 |
| 1 | WeMos D1 Mini |
Video dell’assemblaggio
You can find WeMos D1 mini on WeMos D1 mini - NodeMCU V2 V2.1 V3 - esp01 - esp01 programmer
You can find 3v realay on AliExpressPCB v2
A better PCB need a voltage regulator 78L33 only to manage relay power (and led),
You need a 78L33 voltage regulator AliExpress SMD (AMS1117) - AliExpress 3.3v (LM1117) - AliExpress 5v (7805) - AliExpress 9v (7809)AliExpress 12v (7812) - AliExpress 3.3v TO-92 (78L33)
so I create this version.
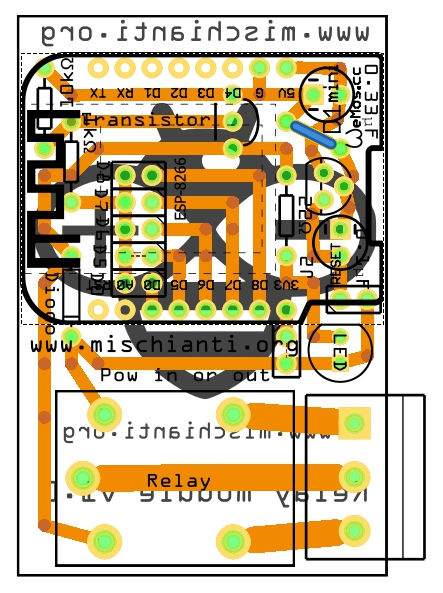
As you can see, I add a voltage regulator that grabs power directly from 5v, and you can exclude that voltage regulator and use 3.3v of WeMos with a jumper.
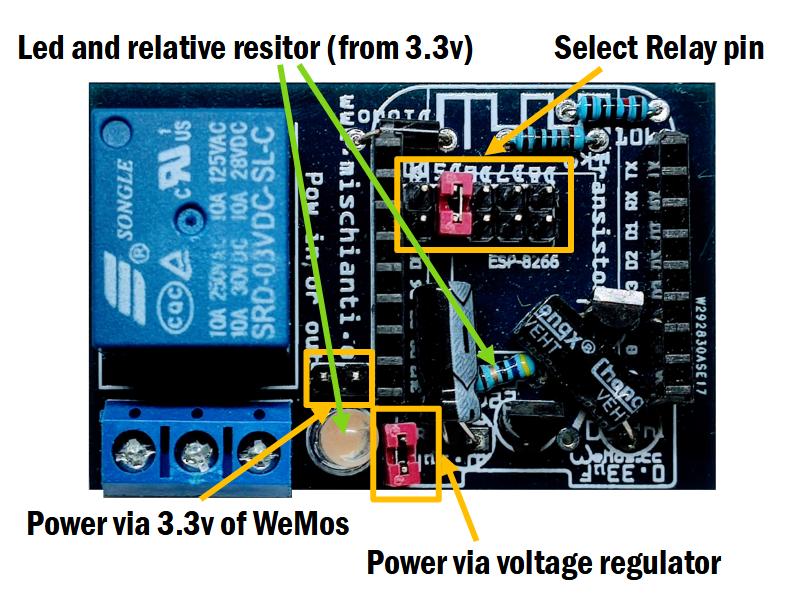
The result is quite similar.
You can find It directly on PCBWay for a few dollars.
WeMos D1 mini relay shield PCBWay

Code
The code is very trivial, here activate and deactivate the relay.
/*
 * Relay Shield
 * https://mischianti.org
 *
 * RELAY       ----- WeMos
 * ACTIVATION  ----- D6(PullUp)
 */
#include "Arduino.h"

#define RELAY_ACTIVATION_PIN D6

void setup()
{
	Serial.begin(112500);

	while (!Serial){}

	Serial.println("Startup!");
	pinMode(RELAY_ACTIVATION_PIN, OUTPUT);
	Serial.println("-");
}

uint8_t status = LOW;
void loop()
{
	if (status==LOW){
		status = HIGH;
	}else{
		status = LOW;
	}
	digitalWrite(RELAY_ACTIVATION_PIN, status);

	delay(3000);
}
Thanks
- WeMos D1 (esp8266): i2c shield to manage encoder, multiple buttons, and LEDs
- WeMos D1 (esp8266): relay shield
- WeMos D1 (esp8266): Ebyte LoRa shield (e32, e22 and e220)