
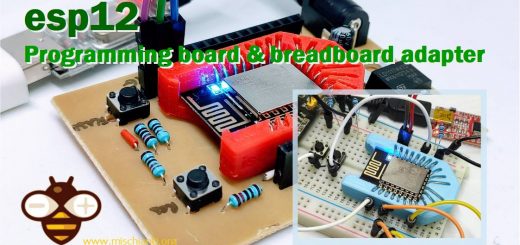
ESP32-wroom-32 ESP32-S programming board and breadboard adapter
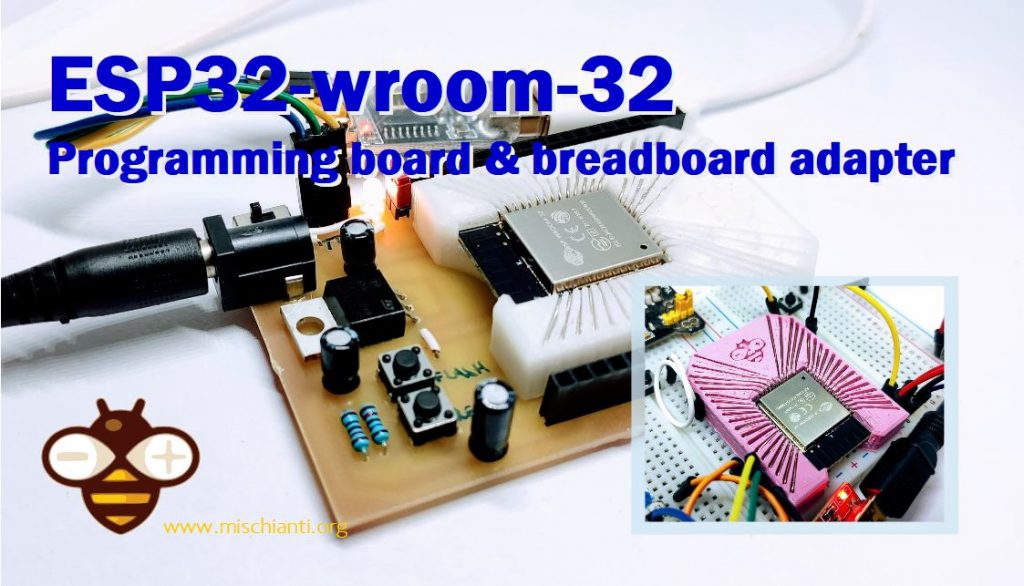
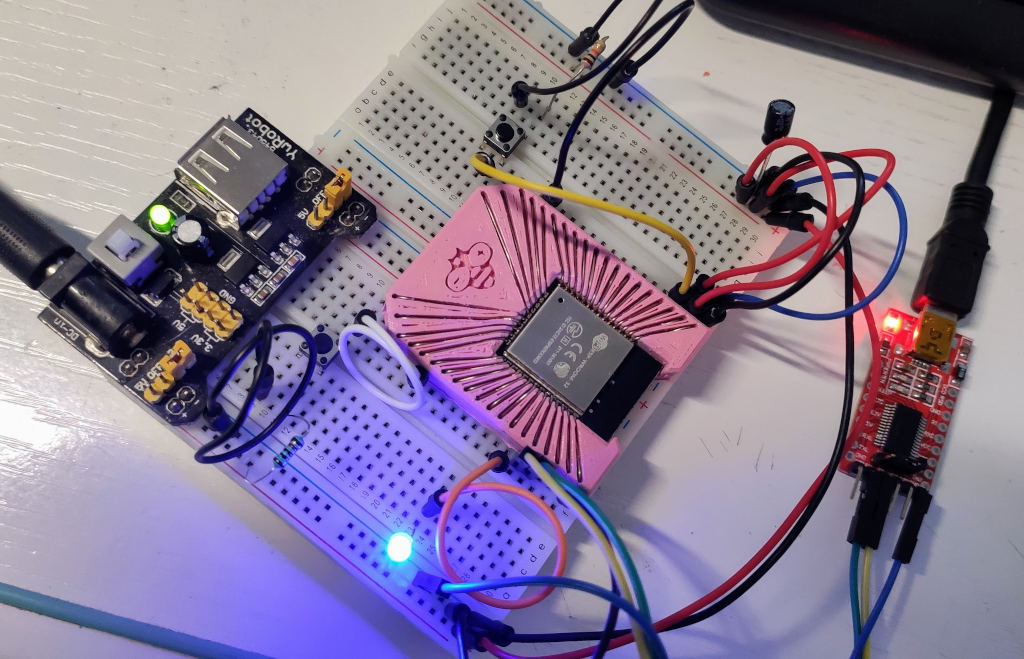
I will use esp32-wroom-32, but first I want to prototype my project on breadboard, the IC is not suitable for breadboard, so I go to make a 3D printed adapter and PCB to get a generic programming board.
You can find the esp32-wroom-32 and esp32-s on ESP32 Dev Kit v1 - TTGO T-Display 1.14 ESP32 - NodeMCU V3 V2 ESP8266 Lolin32 - NodeMCU ESP-32S - WeMos Lolin32 - WeMos Lolin32 mini - ESP32-CAM programmer - ESP32-CAM bundle - ESP32-WROOM-32 - ESP32-S
ESP32 programming board Aliexpress adapter esp8266 esp32
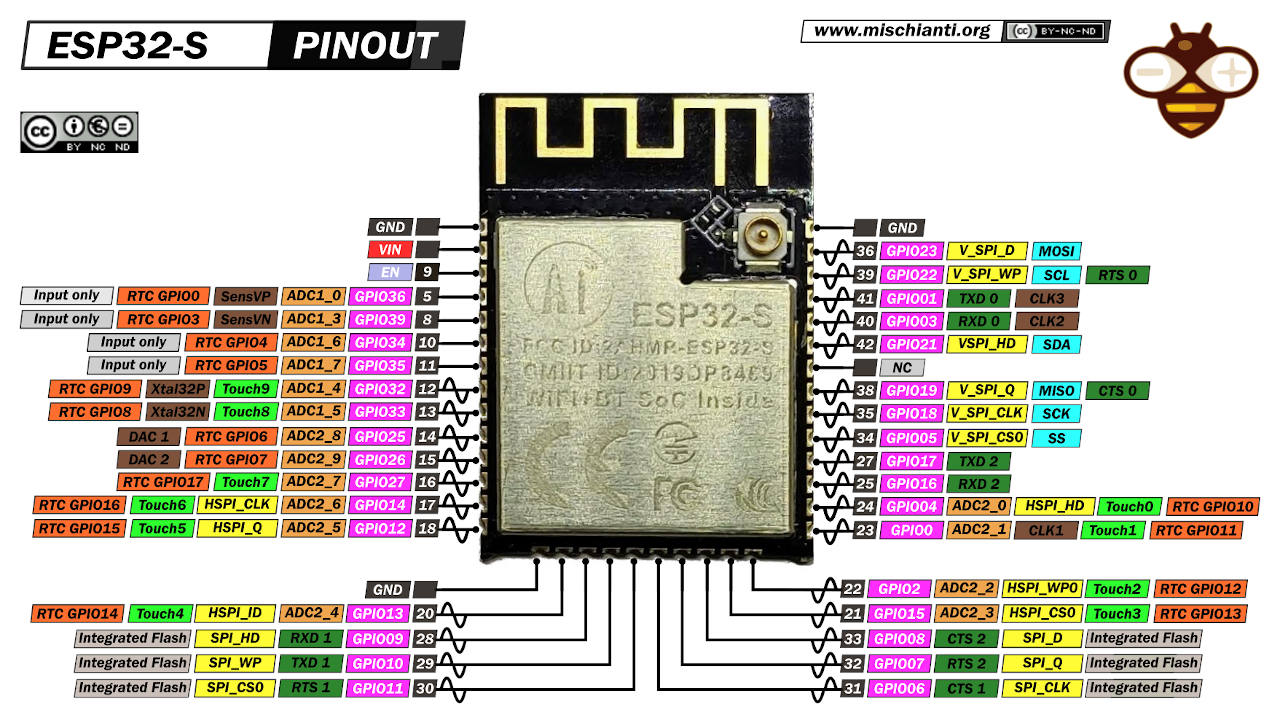
Specs and hight resolution pinout image
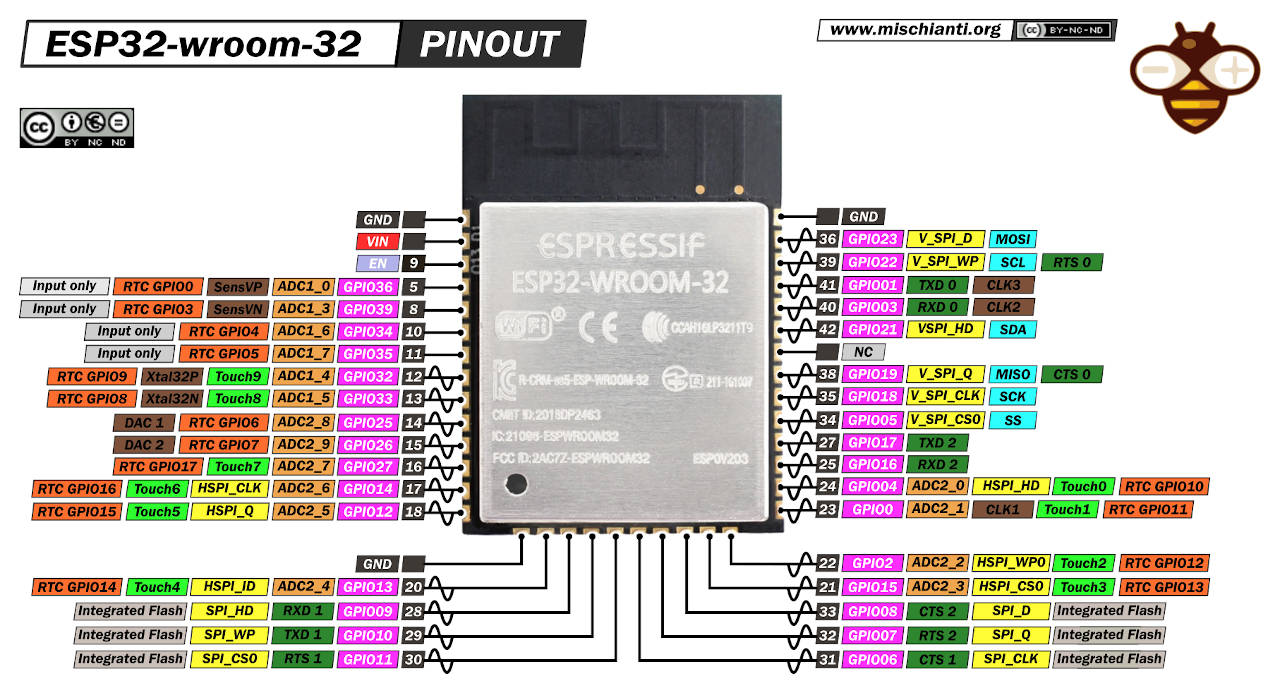
Specs and hight resolution pinout image
3D printed adapter
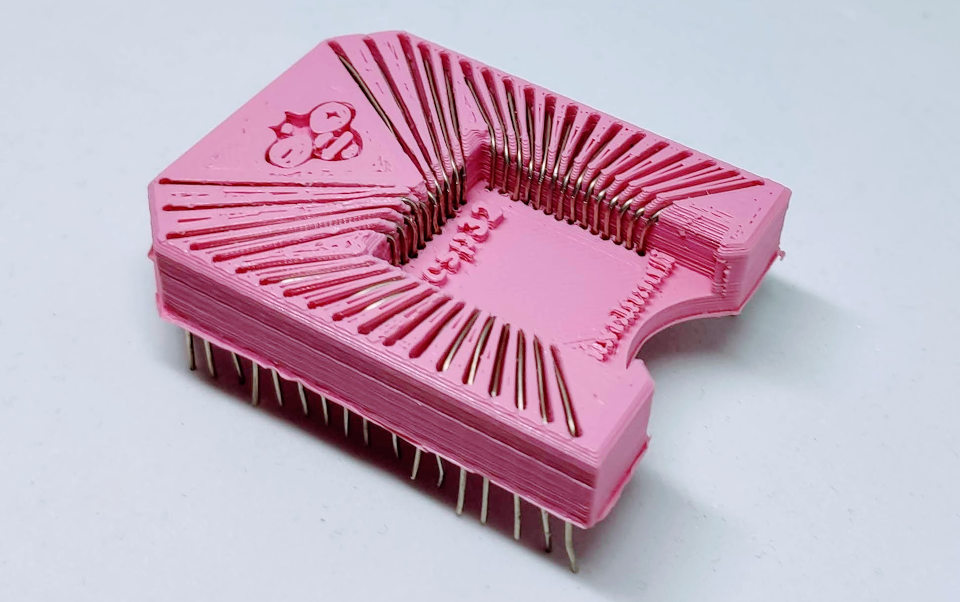
A good and fast solution is to print one adapeter. Exists a lot of adapter, but I think this is a good choice, you must print with reduced extruder size like 0.31 and reduce the flow to get a good print.
Socket for esp32-wroom-32 V base
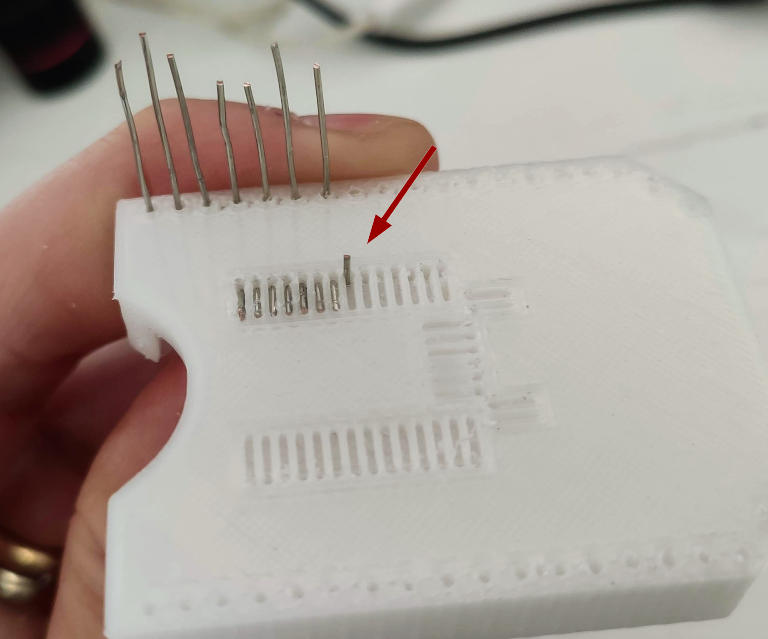
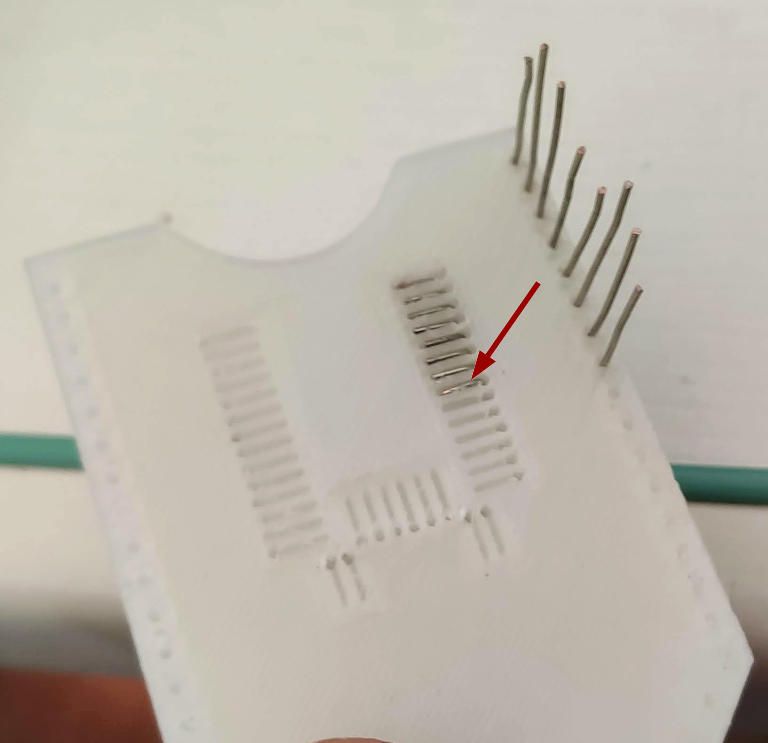
Now you must add the wire, but first probably your printer generate waste and close the little hole, usually I’m going to drill It to clear with 0.9mm bit of my CNC.
CNC drill bits on AliExpressI use a telephone wire that is a single copper wire with 0.6mm of diameter, and I’m going to insert in the adapter, but I recommend you to use a high conductivity copper wire.
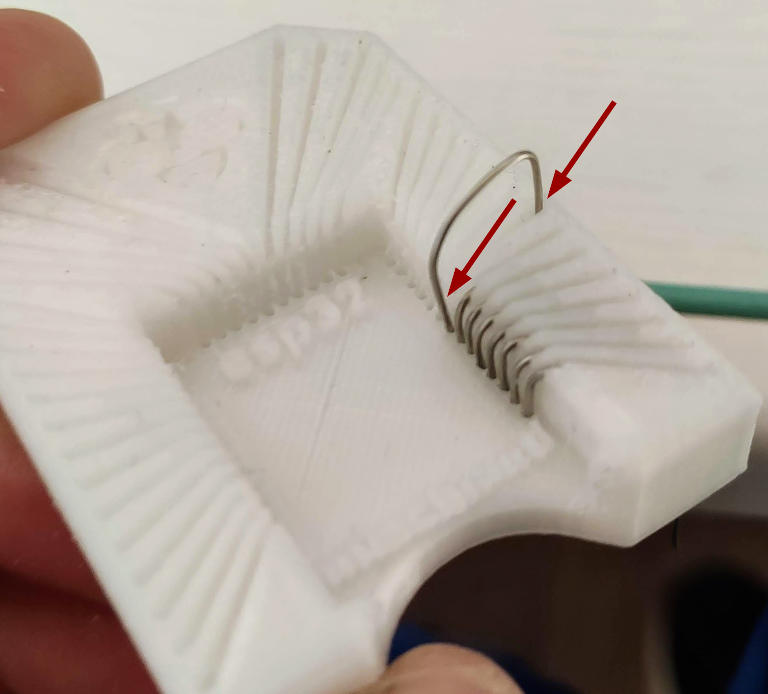
Insert it into the innermost holes and push it out about 3mm

Bend the wire to the external of the adapter.
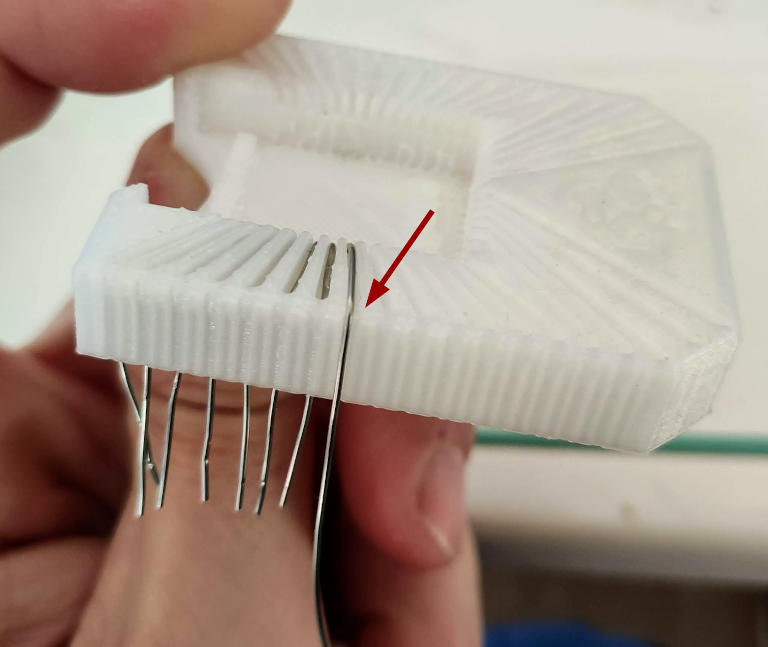
Cut external part of the wire, and extract,
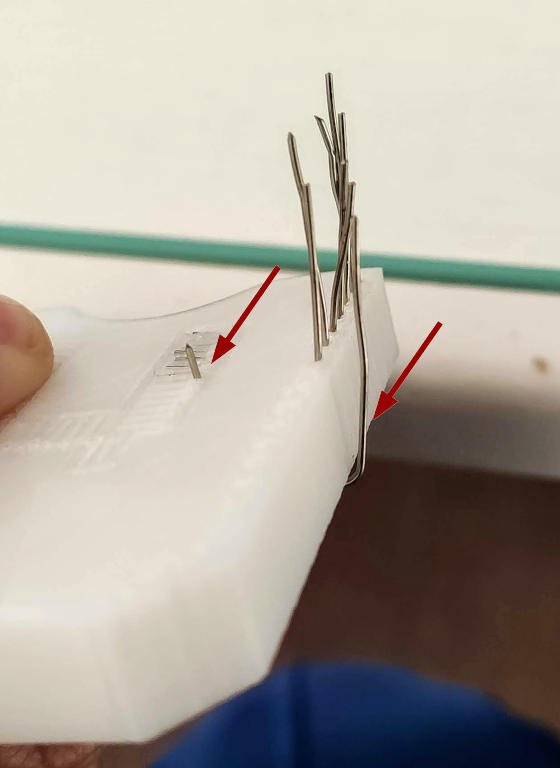
then reinsert in the internal and external hole.
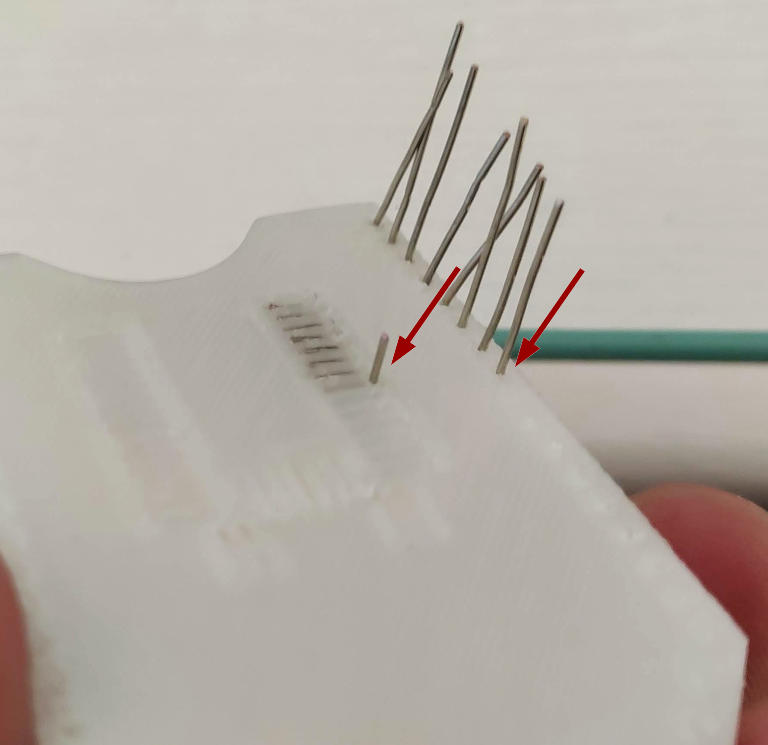
Now check if you need to cut more the wire of the internal hole, and bend It.
Repeat for all pins.
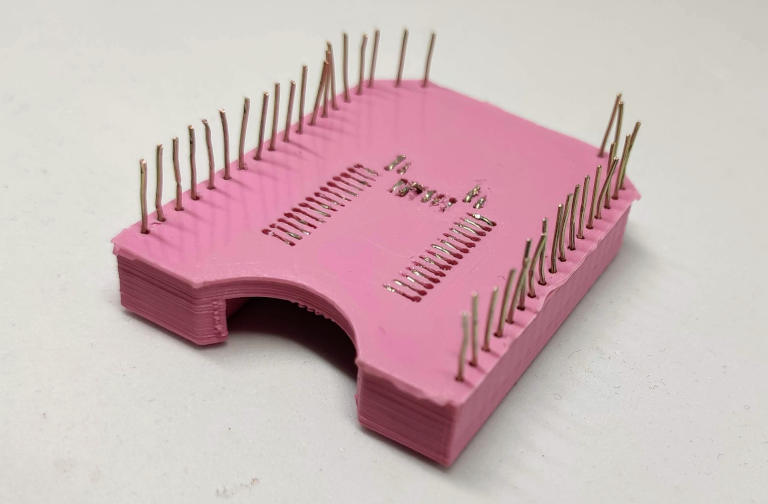
Now you can use It directly on the breadboard.
Programming board PCB
The next step is to do a PCB instead the breadboard to program the device, I’m going to use the adapter only to create/test new circuit.
Here the list of component:
Shopping List
| Amount | Part Type | Properties |
|---|---|---|
| 2 | Electrolytic Capacitor | capacitance 10µF; package 100 mil [THT, electrolytic] |
| 1 | Electrolytic Capacitor | capacitance 22µF; package 100 mil [THT, electrolytic] |
| 1 | FTDI Basic Programmer | voltage 3.3V; tipo Basic |
| 4 | Generic female header – 1 pins | package THT; form ♀ (female); row single; pins 1; pin spacing 0.1in (2.54mm); hole size 1.0mm,0.508mm |
| 4 | Generic female header – 14 pins | package THT; form ♀ (female); row single; pins 14; pin spacing 0.1in (2.54mm); hole size 1.0mm,0.508mm |
| 2 | Generic female header – 3 pins | package THT; form ♀ (female); row single; pins 3; pin spacing 0.1in (2.54mm); hole size 1.0mm,0.508mm |
| 2 | Pushbutton | package [THT] |
| 1 | Power Jack | variant slt; package power_jack_slot; tipo 5.5mm barrel |
| 1 | Generic male header – 3 pins | package THT; form ♂ (male); row single; pins 3; pin spacing 0.1in (2.54mm); hole size 1.0mm,0.508mm |
| 1 | Generic male header – 2 pins | package THT; form ♂ (male); row single; pins 2; pin spacing 0.1in (2.54mm); hole size 1.0mm,0.508mm |
| 2 | Generic female header – 5 pins | package THT; form ♀ (female); row single; pins 5; pin spacing 0.1in (2.54mm); hole size 1.0mm,0.508mm |
| 1 | Blue (505nm) LED | package 3 mm [THT]; leg yes; colore Blue (505nm) |
| 1 | LD1117V33 | voltage 3.3V; package 78xxl; chip LD1117VXX |
| 1 | ESP-WROOM-32 [ESP-32S] Module | variant variant 3; flippedsmd true; tipo ESP32 Module; part number ESP-WROOM-32 |
| 2 | 10kΩ Resistor | resistenza 10kΩ; package THT; tolerance ±5%; bands 4; pin spacing 400 mil |
| 1 | Toggle Switch | package THT; switching circuit SPDT |
Here some material more difficult to find:
Here the IC ESP32 Dev Kit v1 - TTGO T-Display 1.14 ESP32 - NodeMCU V3 V2 ESP8266 Lolin32 - NodeMCU ESP-32S - WeMos Lolin32 - WeMos Lolin32 mini - ESP32-CAM programmer - ESP32-CAM bundle - ESP32-WROOM-32 - ESP32-S
Barrel jack Aliexpress Breadboard friendly 5.5x2.1 - Aliexpress 5.5x2.1
Voltage regulator AliExpress SMD (AMS1117) - AliExpress 3.3v (LM1117) - AliExpress 5v (7805) - AliExpress 9v (7809)AliExpress 12v (7812) - AliExpress 3.3v TO-92 (78L33)
Here the FTDI USB to TTL CH340G - USB to TTL FT232RL
Based on the tutorial “ESP32-wroom-32: flash, pinout, specs and IDE configuration” I create a PCB.
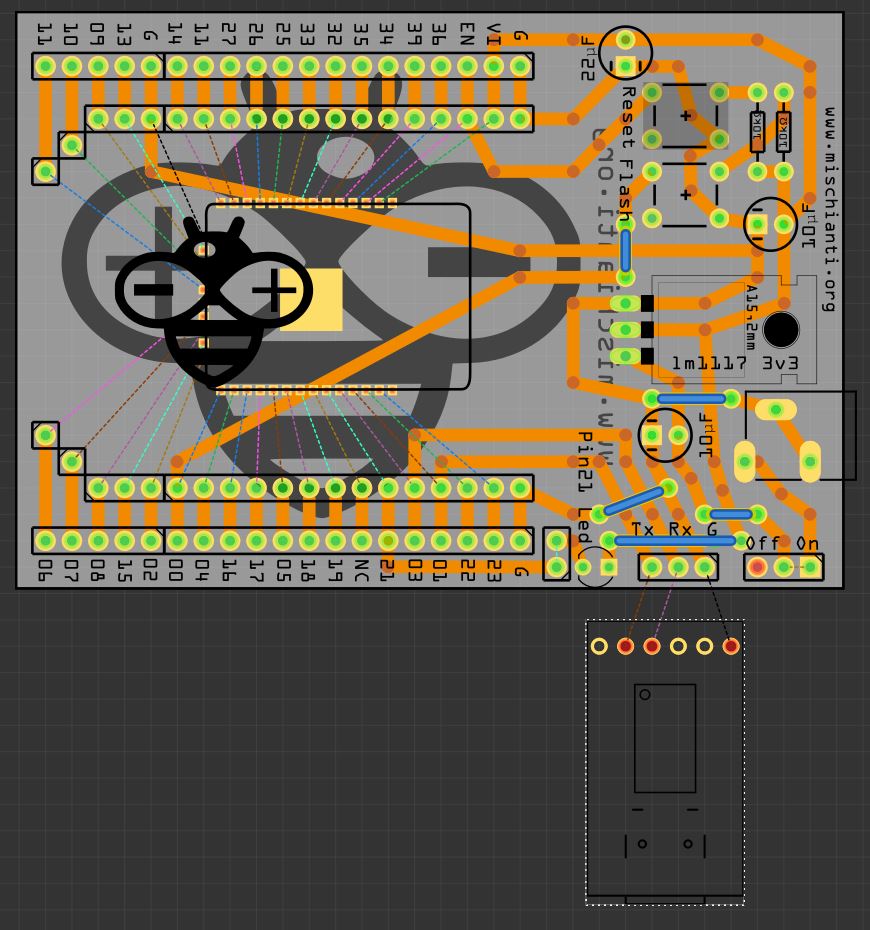
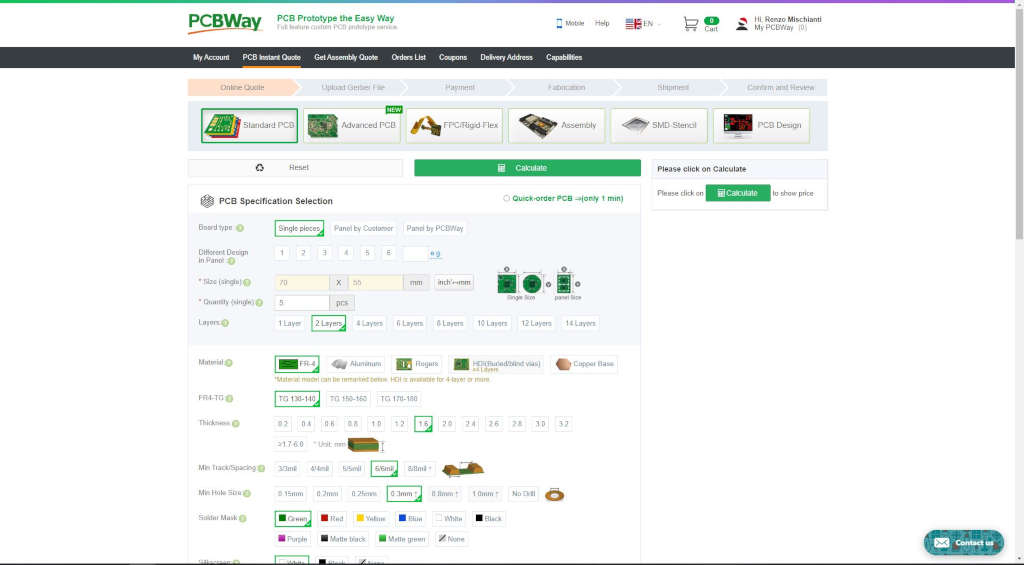
You can get pcb without additional costs here from PCBWay

I chose this manufacturer because at the same cost it offers excellent quality, in the first screen it is possible to make countless options suitable for every need.
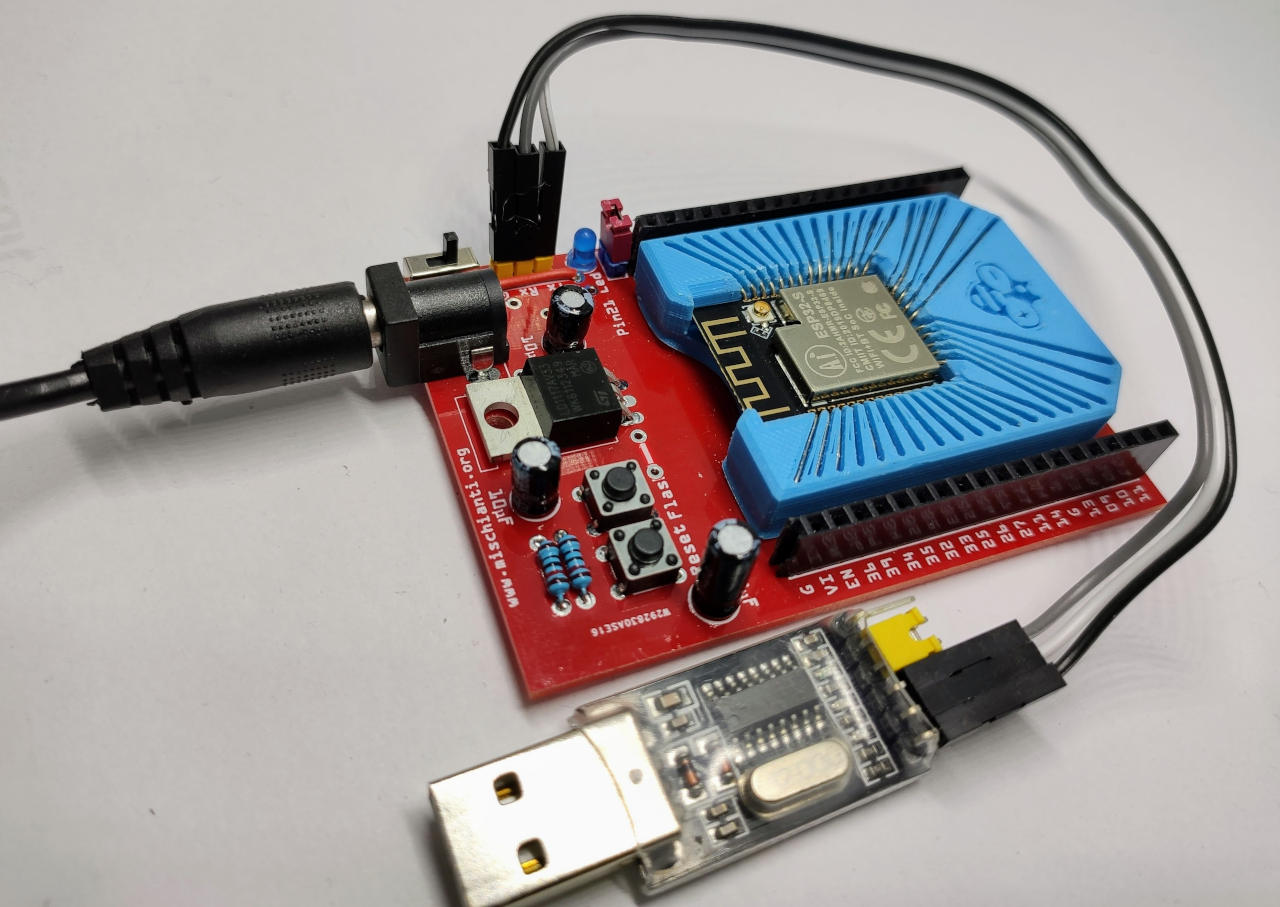
The board as you can see on various photo is very beautiful and simply to solder.
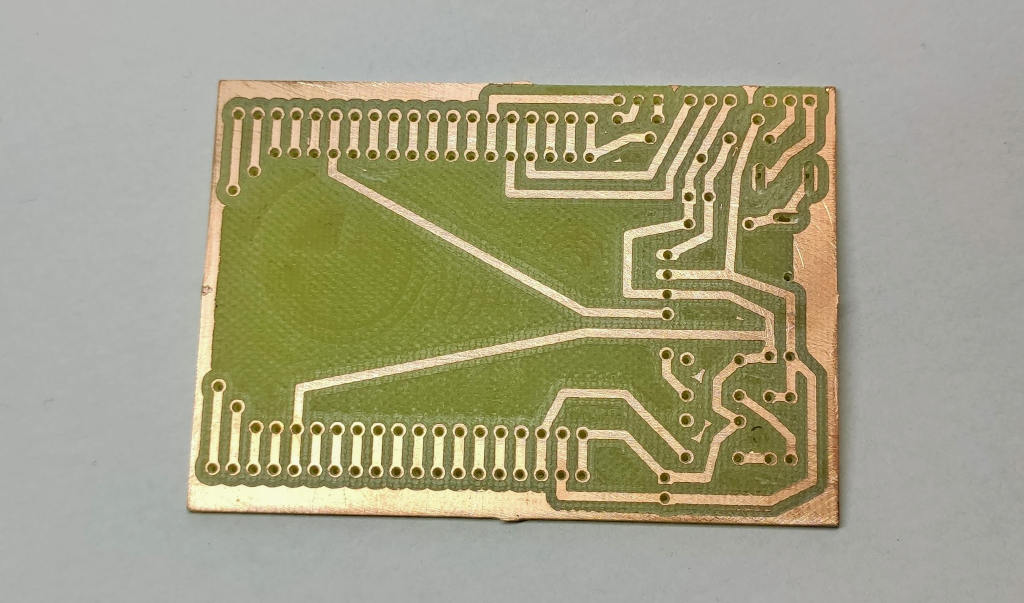
The PCB is fully tested with my standard process, first milling process like the tutorial (with my CNC):
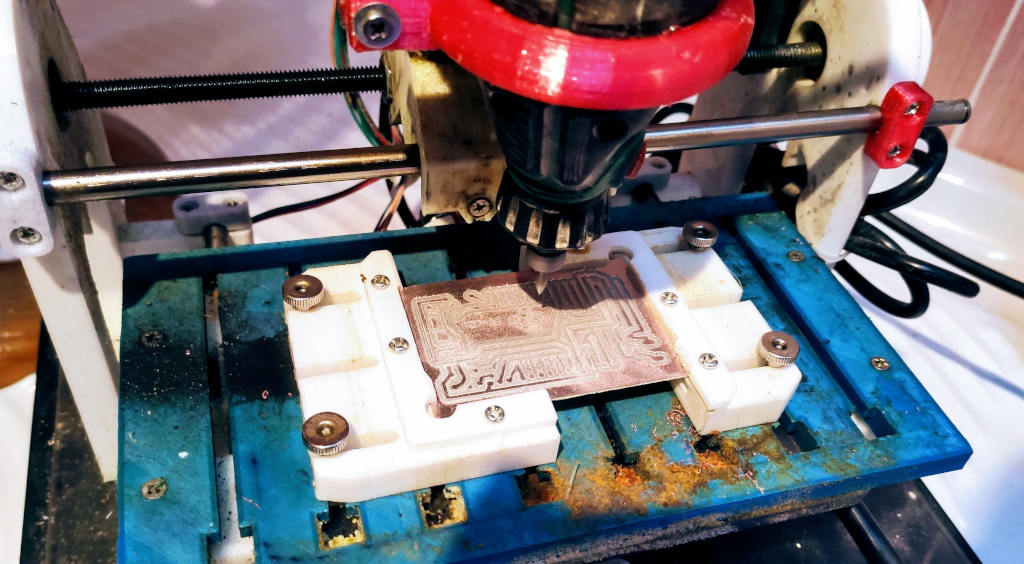
Here the milled PCB:
Here the assembly video
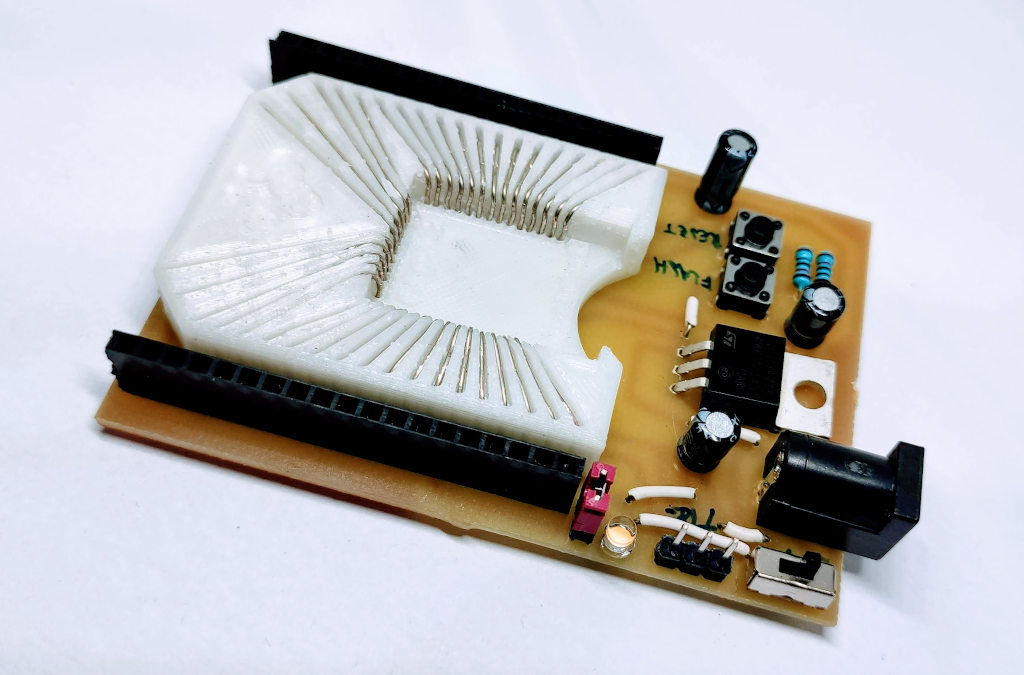
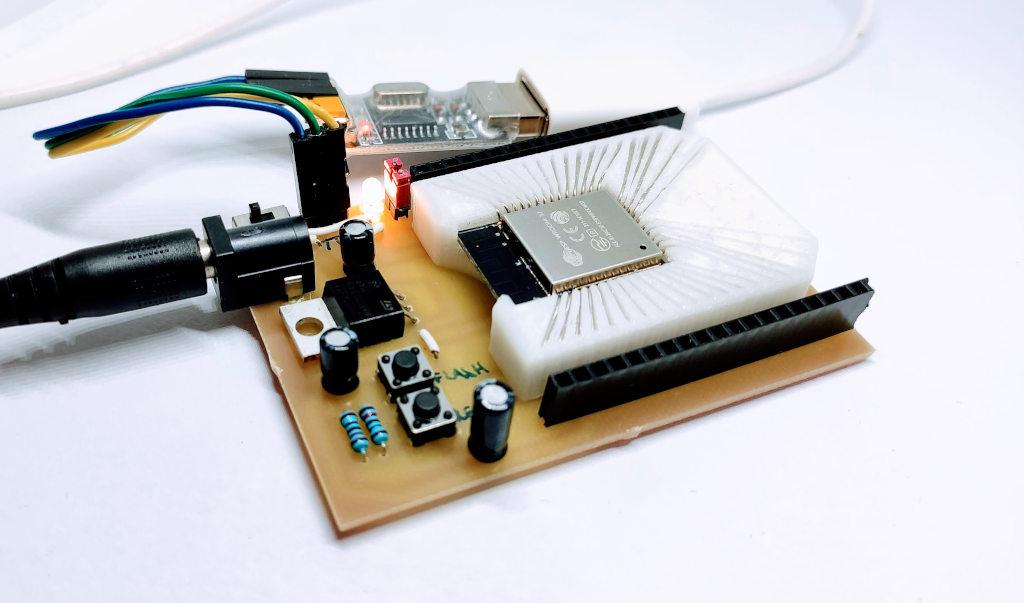
And here after assembly process:
Now we can upload the code, check the tutorial “ESP32-wroom-32: flash, pinout, specs and IDE configuration“.


Excellent job on designing this socket for ESP32 programming and prototyping. I made one using PLA filament with a 0.4mm nozzle width (luckily it wasn’t too wide). Then I used half-hard 26AWG copper wire. Thank you!
Thanks for your feedback BigGene.
Bye Renzo
Grazie. Cercavo qualcosa di simile da un bel po’.
Ho un dispositivo con l’ESP32 saldato a misura, i pin inferiori non sono accessibili, quindi sto adattando questo adattatore affinché possa accedere ai PIN di programmazione.
Ciao,
immagino, mi ha fatto penare un po’, soprattutto l’instabilità del segnale.
Ciao Renzo
Man You Inspired me to do it and it came out AWESOME.. THANK YOU.
Seed Xiao socket
HTML Article on Inserting image to the web page
Hi PJ,
Would you like to share your work with us in an article?
Bye Renzo
Man You Inspired me to do it and it came out AWESOME.. THANK YOU.
Hey.
Very nice project and really helpful.
Would it be possible to add a scematic
of the circuit diagram. It would be enough
to have one of your breadboard version.
Thank you so much.
Hi Yugeene,
you can find It here.
ESP32-wroom-32, esp32-S: flash, pinout, specs and IDE configuration – 1
Bye Renzo
Ah, i see. Thanks a lot. Very nice projects.
best regards yugeene
Идея прошивания ESP модулей отличная , респект инженеру. с наилучшими пожеланиями, Алексей