
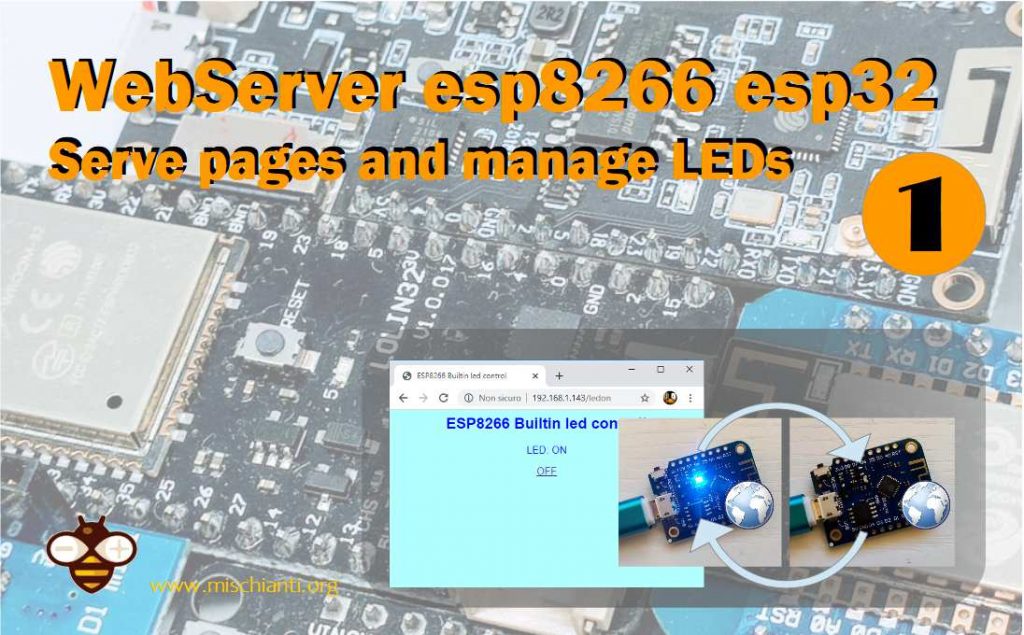
Web Server with esp8266 and esp32: serve pages and manage LEDs – 1
I am amazed at the enormous power that small WiFi devices, such as esp8266 and esp32, have.
They are capable of serving an entire website, and this allows us to do some really cool stuff.
A web server is server software, or hardware dedicated to running this software, that can satisfy client requests on the World Wide Web. A web server can, in general, contain one or more websites. A web server processes incoming network requests over HTTP and several other related protocols.
Wikipedia
The primary function of a web server is to store, process and deliver web pages to clients. The communication between client and server takes place using the Hypertext Transfer Protocol (HTTP). Pages delivered are most frequently HTML documents, which may include images, style sheets and scripts in addition to the text content.
You can programmatically manage web page (returning a string) or better solution is to put your page on SPIFFS filesystem, more information on SPIFFS on this article “WeMos D1 mini (esp8266), integrated SPIFFS Filesystem” or for esp32 “ESP32: integrated SPIFFS FileSystem“.
A web page is composed in a similar way to REST, you can learn more about REST calls in this article “How to create a REST server on esp8266 or esp32“.
Standard Library
For the standard example you must install from Library manager ESP8266WiFi and ESP8266WebServer for esp8266, WiFi and WebServer for the esp32.
Basics
Here a simple declarative example
/*
 *  WeMos D1 mini (esp8266)
 *  Simple web server
 *  URI served / and /inline
 *  by Mischianti Renzo <https://mischianti.org>
 *
 *  https://mischianti.org/category/tutorial/how-to-create-a-web-server-with-esp8266-and-esp32/
 *
 */

#include <ESP8266WiFi.h>
#include <ESP8266WebServer.h>

const char* ssid = "<YOUR-SSID>";
const char* password = "<YOUR-PASSWD>";

ESP8266WebServer server(80);

void setup(void) {
  Serial.begin(115200);
  WiFi.mode(WIFI_STA);
  WiFi.begin(ssid, password);
  Serial.println("");

  // Wait for connection
  while (WiFi.status() != WL_CONNECTED) {
    delay(500);
    Serial.print(".");
  }
  Serial.println("");
  Serial.print("Connected to ");
  Serial.println(ssid);
  Serial.print("IP address: ");
  Serial.println(WiFi.localIP());

  server.on("/", []() {
	  server.send(200, "text/plain", "Hello from esp8266 server web!");
  });

  server.on("/inline", []() {
    server.send(200, "text/plain", "this works as well");
  });

  server.onNotFound([]() {
	  server.send(404, "text/plain", "Uri not found "+server.uri());
  });

  server.begin();
  Serial.println("HTTP server started");
}

void loop(void) {
  server.handleClient();
}
For esp32 you must only change this lines
#include <ESP8266WiFi.h>
#include <ESP8266WebServer.h>
[...]
ESP8266WebServer server(80);
to
#include <WiFi.h>
#include <WebServer.h>
[...]
WebServer server(80);
The code is quite simple, here the declaration of the server
ESP8266WebServer server(80);
Where 80 is the port, and It’is also the HTTP default port so you can omit It when you write the url.
  server.on("/", []() {
	  server.send(200, "text/plain", "Hello from esp8266 server web!");
  });

  server.on("/inline", []() {
    server.send(200, "text/plain", "this works as well");
  });

  server.onNotFound([]() {
	  server.send(404, "text/plain", "Uri not found "+server.uri());
  });
Than you must specify witch uri you can manage, you will use server.on with the path.
So if you write http://192.168.1.143/ you will go to server.on("/" if you write http://192.168.1.143/inline you will go to server.on ("/inline".
Another important thing is the management of not found with server.onNotFound and and we will return the http status 404 and a message to warn the user.
As you can see the response is managed by server.send where the first parameter is http status code than mime type and next the message.
mime type tell to the browser what kind of response is arrived, and so browser activate the correct parser of the message.
You must connect with serial port to discover the ip to write on browser.
.......
Connected to reef-casa-sopra
IP address: 192.168.1.143
HTTP server started
You can try to use the base url http://192.168.1.143 which is the same thing as http://192.168.1.143:80/ and you retrieve the relative url /
AsyncWebServer
Another very popular library is AsyncWebServer, exist a version for esp8266 and esp32, you must only change the base library.
For ESP8266 it requires ESPAsyncTCP To use this library you might need to have the latest git versions of ESP8266 Arduino Core
For ESP32 it requires AsyncTCP to work To use this library you might need to have the latest git versions of ESP32 Arduino Core
This is fully asynchronous server and as such does not run on the loop thread.
Here the previous example for esp32 with this library.
/*
 *  ESP32
 *  Simple web server
 *  URI served / and /inline
 *
 *  by Mischianti Renzo <https://mischianti.org>
 *
 *  https://mischianti.org/
 *
 */
#include <WiFi.h>
#include <AsyncTCP.h>
#include <ESPAsyncWebServer.h>
#include <SPIFFS.h>

const char* ssid = "<YOUR-SSID>";
const char* password = "<YOUR-PASSWD>";

AsyncWebServer server(80);

void setup(void) {
  Serial.begin(115200);
  WiFi.mode(WIFI_STA);
  WiFi.begin(ssid, password);
  Serial.println("");

  // Wait for connection
  while (WiFi.status() != WL_CONNECTED) {
    delay(500);
    Serial.print(".");
  }
  Serial.println("");
  Serial.print("Connected to ");
  Serial.println(ssid);
  Serial.print("IP address: ");
  Serial.println(WiFi.localIP());

  server.on("/", [](AsyncWebServerRequest *request) {
	  request->send(200, "text/plain", "Hello from esp8266 server web!");
  });

  server.on("/inline", [](AsyncWebServerRequest *request) {
	  request->send(200, "text/plain", "this works as well");
  });

  server.onNotFound([](AsyncWebServerRequest *request) {
	  request->send(404, "text/plain", "Uri not found "+request->url());
  });

  server.begin();
  Serial.println("HTTP server started");
}

void loop(void) {
//  server.handleClient();
}
Manage HTML pages
Of course, we need to better organize our code and manage more complex behavior perhaps in a separate function.
Now we are going to do a simple html page.
/*
 *  WeMos D1 mini (esp8266)
 *  Simple web server an html page served
 *  URI served / and /inline
 *  by Mischianti Renzo <https://mischianti.org>
 *
 *  https://mischianti.org/category/tutorial/how-to-create-a-web-server-with-esp8266-and-esp32/
 *
 */

#include <ESP8266WiFi.h>
#include <ESP8266WebServer.h>

const char* ssid = "<YOUR-SSID>";
const char* password = "<YOUR-PASSWD>";

ESP8266WebServer server(80);

void handleRoot() {
  char temp[400];
  int sec = millis() / 1000;
  int min = sec / 60;
  int hr = min / 60;

  snprintf(temp, 400,

           "<html>\
			  <head>\
				<meta http-equiv='refresh' content='5'/>\
				<title>ESP8266 Demo</title>\
				<style>\
				  body { background-color: #00ffff4d; font-family: Arial, Helvetica, Sans-Serif; Color: blue; }\
				</style>\
			  </head>\
			  <body>\
           		<center>\
				<h1>Hi from your esp8266 HTML page!</h1>\
				<p>Uptime: %02d:%02d:%02d</p>\
				</center>\
				</body>\
			</html>",

           hr, min % 60, sec % 60
          );
  server.send(200, "text/html", temp);
}

void handleNotFound() {
  String message = "File Not Found\n\n";
  message += "URI: ";
  message += server.uri();
  message += "\nMethod: ";
  message += (server.method() == HTTP_GET) ? "GET" : "POST";
  message += "\nArguments: ";
  message += server.args();
  message += "\n";

  for (uint8_t i = 0; i < server.args(); i++) {
    message += " " + server.argName(i) + ": " + server.arg(i) + "\n";
  }

  server.send(404, "text/plain", message);
}

void setup(void) {
  Serial.begin(115200);
  WiFi.mode(WIFI_STA);
  WiFi.begin(ssid, password);
  Serial.println("");

  // Wait for connection
  while (WiFi.status() != WL_CONNECTED) {
    delay(500);
    Serial.print(".");
  }

  Serial.println("");
  Serial.print("Connected to ");
  Serial.println(ssid);
  Serial.print("IP address: ");
  Serial.println(WiFi.localIP());

  server.on("/", handleRoot);

  server.on("/inline", []() {
    server.send(200, "text/plain", "this works as well");
  });

  server.onNotFound(handleNotFound);
  server.begin();
  Serial.println("HTTP server started");
}

void loop(void) {
  server.handleClient();
}
First you can see that I put the send inside a function to have a better code, and now mime type is text/html for error also.
server.send(200, "text/html", temp);
To return an html page I must add text/html to mime type, and the browser get the text you send and parse It like an HTML page, n the html I also insert a variable element (the uptime) and every time the page is generated that value will change.
Uptime: 00:10:10
The directive < meta http-equiv='refresh' content='5' /> on head tell to the browser to refres the page every 5 secs so you have updated uptime in automatic.
AsyncWebServer
Here the previous version with AsyncWebServer library.
/*
 *  ESP32
 *  Simple web server an html page served
 *  URI served / and /inline
 *
 *  by Mischianti Renzo <https://mischianti.org>
 *
 *  https://mischianti.org/category/tutorial/how-to-create-a-web-server-with-esp8266-and-esp32/
 *
 */
#include <WiFi.h>
#include <AsyncTCP.h>
#include <ESPAsyncWebServer.h>
#include <SPIFFS.h>

const char* ssid = "<YOUR-SSID>";
const char* password = "<YOUR-PASSWD>";

AsyncWebServer server(80);

void handleRoot(AsyncWebServerRequest *request) {
  char temp[400];
  int sec = millis() / 1000;
  int min = sec / 60;
  int hr = min / 60;

  snprintf(temp, 400,

           "<html>\
			  <head>\
				<meta http-equiv='refresh' content='5'/>\
				<title>ESP8266 Demo</title>\
				<style>\
				  body { background-color: #00ffff4d; font-family: Arial, Helvetica, Sans-Serif; Color: blue; }\
				</style>\
			  </head>\
			  <body>\
           		<center>\
				<h1>Hi from your esp8266 HTML page!</h1>\
				<p>Uptime: %02d:%02d:%02d</p>\
				</center>\
				</body>\
			</html>",

           hr, min % 60, sec % 60
          );
  request->send(200, "text/html", temp);
}

void handleNotFound(AsyncWebServerRequest *request) {
  String message = "File Not Found\n\n";
  message += "URI: ";
  message += request->url();
  message += "\nMethod: ";
  message += (request->method() == HTTP_GET) ? "GET" : "POST";
  message += "\nArguments: ";
  message += request->args();
  message += "\n";

  for (uint8_t i = 0; i < request->args(); i++) {
    message += " " + request->argName(i) + ": " + request->arg(i) + "\n";
  }

  request->send(404, "text/plain", message);
}

void setup(void) {
  Serial.begin(115200);
  WiFi.mode(WIFI_STA);
  WiFi.begin(ssid, password);
  Serial.println("");

  // Wait for connection
  while (WiFi.status() != WL_CONNECTED) {
    delay(500);
    Serial.print(".");
  }

  Serial.println("");
  Serial.print("Connected to ");
  Serial.println(ssid);
  Serial.print("IP address: ");
  Serial.println(WiFi.localIP());

  server.on("/", handleRoot);

  server.on("/inline", [](AsyncWebServerRequest *request) {
	  request->send(200, "text/plain", "this works as well");
  });

  server.onNotFound(handleNotFound);
  server.begin();
  Serial.println("HTTP server started");
}

void loop(void) {

}
Call end point to activate a BUILTIN LED
It’s important to get data but It’s important to send information also, and this behavior normally It’s obtained using REST protocol, but now we are going to create 2 different endpoint with different behavior without send parameter.
That is, we will add 2 endpoints served as 2 separate web pages.
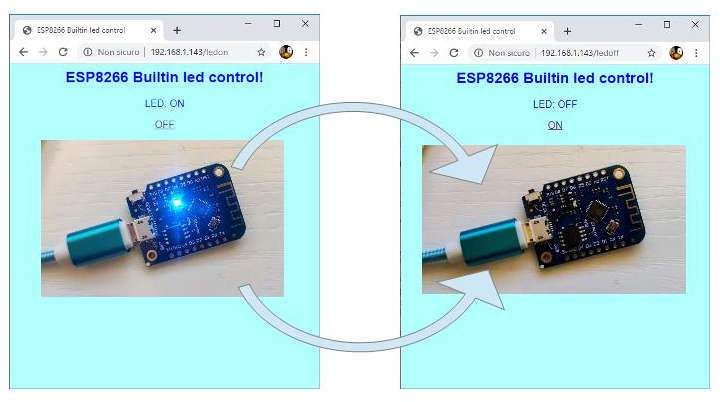
In this sketch we add 2 button to activate and deactivate a led, they work like a link to a simple web page that change status of the micro controller also.
/*
 *  WeMos D1 mini (esp8266)
 *  Simple web server an html page served with 2 end point
 * that change status of builtin LED
 *  URI served / /ledon /ledoff
 *  by Mischianti Renzo <https://mischianti.org>
 *
 *  https://mischianti.org/category/tutorial/how-to-create-a-web-server-with-esp8266-and-esp32/
 *
 */
#include <ESP8266WiFi.h>
#include <ESP8266WebServer.h>

#define LED_PIN LED_BUILTIN
#define LED_ON LOW
#define LED_OFF HIGH

const char* ssid = "<YOUR-SSID>";
const char* password = "<YOUR-PASSWD>";

ESP8266WebServer server(80);

bool ledStatus = false;

String handleRoot(bool ledStatus = false) {
	String ptr =
			"<html>\
			  <head>\
				<title>ESP8266 Demo</title>\
				<style>\
				  body { background-color: #00ffff4d; font-family: Arial, Helvetica, Sans-Serif; Color: blue; }\
				</style>\
			  </head>\
			  <body>\
           		<center>\
				<h1>Hi from your esp8266 HTML page!</h1>\
				";

	if (ledStatus) {
		ptr +=
				"<p>LED: ON</p><a class=\"button button-off\" href=\"/ledoff\">OFF</a>\n";
	} else {
		ptr +=
				"<p>LED: OFF</p><a class=\"button button-on\" href=\"/ledon\">ON</a>\n";
	}

	ptr += "</center>\
			</body>\
			</html>";

	return ptr;
}

void handleRootDefault(){
	ledStatus = false;
	digitalWrite(LED_PIN, LED_OFF);
	Serial.println("LED Status: OFF");

	server.send(200, "text/html", handleRoot(ledStatus));
}

void handleLedOn() {
  ledStatus = true;
  Serial.println("LED Status: ON");
  digitalWrite(LED_PIN, LED_ON);
  server.send(200, "text/html", handleRoot(ledStatus));
}

void handleLedOff() {
  ledStatus = LOW;
  Serial.println("LED Status: OFF");
  digitalWrite(LED_PIN, LED_OFF);
  server.send(200, "text/html", handleRoot(ledStatus));
}

void handleNotFound() {
  String message = "File Not Found\n\n";
  message += "URI: ";
  message += server.uri();
  message += "\nMethod: ";
  message += (server.method() == HTTP_GET) ? "GET" : "POST";
  message += "\nArguments: ";
  message += server.args();
  message += "\n";

  for (uint8_t i = 0; i < server.args(); i++) {
    message += " " + server.argName(i) + ": " + server.arg(i) + "\n";
  }

  server.send(404, "text/plain", message);
}

void setup(void) {
  Serial.begin(115200);
  WiFi.mode(WIFI_STA);
  WiFi.begin(ssid, password);
  Serial.println("");

  // Wait for connection
  while (WiFi.status() != WL_CONNECTED) {
    delay(500);
    Serial.print(".");
  }

  pinMode(LED_PIN, OUTPUT);

  Serial.println("");
  Serial.print("Connected to ");
  Serial.println(ssid);
  Serial.print("IP address: ");
  Serial.println(WiFi.localIP());

  server.on("/", handleRootDefault);

  server.on("/ledon", handleLedOn);
  server.on("/ledoff", handleLedOff);

  server.onNotFound(handleNotFound);
  server.begin();
  Serial.println("HTTP server started");
}

void loop(void) {
  server.handleClient();
}
So if we write http://192.168.1.143:80/ledon
server.on("/ledon", handleLedOn);
we call the relative function handleLedOn that first do a digitalWrite of the led value
void handleLedOn() {
  ledStatus = true;
  Serial.println("LED Status: ON");
  digitalWrite(LED_PIN, LED_ON);
  server.send(200, "text/html", handleRoot(ledStatus));
}
at the end of the function it calls the command that generates the response html code with a different appearance if the ledStatus parameter is true or false.
AsyncWebServer
Now with AsyncWebserver.
/*
 *  ESP32
 *  Simple web server an html page served with 2 end point
 * that change status of builtin LED
 *  URI served / /ledon /ledoff
 *
 *  by Mischianti Renzo <https://mischianti.org>
 *
 *  https://mischianti.org/category/tutorial/how-to-create-a-web-server-with-esp8266-and-esp32/
 *
 */
#include <WiFi.h>
#include <AsyncTCP.h>
#include <ESPAsyncWebServer.h>
#include <SPIFFS.h>

#define LED_PIN LED_BUILTIN
#define LED_ON LOW
#define LED_OFF HIGH

const char* ssid = "<YOUR-SSID>";
const char* password = "<YOUR-PASSWD>";

AsyncWebServer server(80);


bool ledStatus = false;

String handleRoot(bool ledStatus = false) {
	String ptr =
			"<html>\
			  <head>\
				<title>ESP8266 Builtin led control</title>\
				<style>\
				  body { background-color: #00ffff4d; font-family: Arial, Helvetica, Sans-Serif; Color: blue; }\
				</style>\
			  </head>\
			  <body>\
           		<center>\
				<h2>ESP8266 Builtin led control!</h2>\
				";

	if (ledStatus) {
		ptr +=
				"<p>LED: ON</p><a class=\"button button-off\" href=\"/ledoff\">OFF</a>\n";
	} else {
		ptr +=
				"<p>LED: OFF</p><a class=\"button button-on\" href=\"/ledon\">ON</a>\n";
	}

	ptr += "</center>\
			</body>\
			</html>";

	return ptr;
}

void handleRootDefault(AsyncWebServerRequest *request){
	ledStatus = false;
	digitalWrite(LED_PIN, LED_OFF);
	Serial.println("LED Status: OFF");

	request->send(200, "text/html", handleRoot(ledStatus));
}

void handleLedOn(AsyncWebServerRequest *request) {
  ledStatus = true;
  Serial.println("LED Status: ON");
  digitalWrite(LED_PIN, LED_ON);
  request->send(200, "text/html", handleRoot(ledStatus));
}

void handleLedOff(AsyncWebServerRequest *request) {
  ledStatus = LOW;
  Serial.println("LED Status: OFF");
  digitalWrite(LED_PIN, LED_OFF);
  request->send(200, "text/html", handleRoot(ledStatus));
}

void handleNotFound(AsyncWebServerRequest *request) {
  String message = "File Not Found\n\n";
  message += "URI: ";
  message += request->url();
  message += "\nMethod: ";
  message += (request->method() == HTTP_GET) ? "GET" : "POST";
  message += "\nArguments: ";
  message += request->args();
  message += "\n";

  for (uint8_t i = 0; i < request->args(); i++) {
    message += " " + request->argName(i) + ": " + request->arg(i) + "\n";
  }

  request->send(404, "text/plain", message);
}

void setup(void) {
  Serial.begin(115200);
  WiFi.mode(WIFI_STA);
  WiFi.begin(ssid, password);
  Serial.println("");

  // Wait for connection
  while (WiFi.status() != WL_CONNECTED) {
    delay(500);
    Serial.print(".");
  }

  pinMode(LED_PIN, OUTPUT);

  Serial.println("");
  Serial.print("Connected to ");
  Serial.println(ssid);
  Serial.print("IP address: ");
  Serial.println(WiFi.localIP());

  server.on("/", handleRootDefault);

  server.on("/ledon", handleLedOn);
  server.on("/ledoff", handleLedOff);

  server.onNotFound(handleNotFound);
  server.begin();
  Serial.println("HTTP server started");
}

void loop(void) {

}
Thanks
Naturally this is a too simple use of a Web Server, so in the next chapter we are going to go in deep.
- Web Server with esp8266 and esp32: serve pages and manage LEDs
- Web Server with esp8266 and esp32: byte array gzipped pages and SPIFFS
- Web Server with esp8266 and esp32: multi purpose generic web server
- Web Server with esp8266 and esp32: manage security and authentication
- Web Server with esp8266 and esp32: add secure REST back-end
- Web Server with esp8266 and esp32: DHT temperature humidity on protected Web Interface
Code and examples on this repository GitHub


