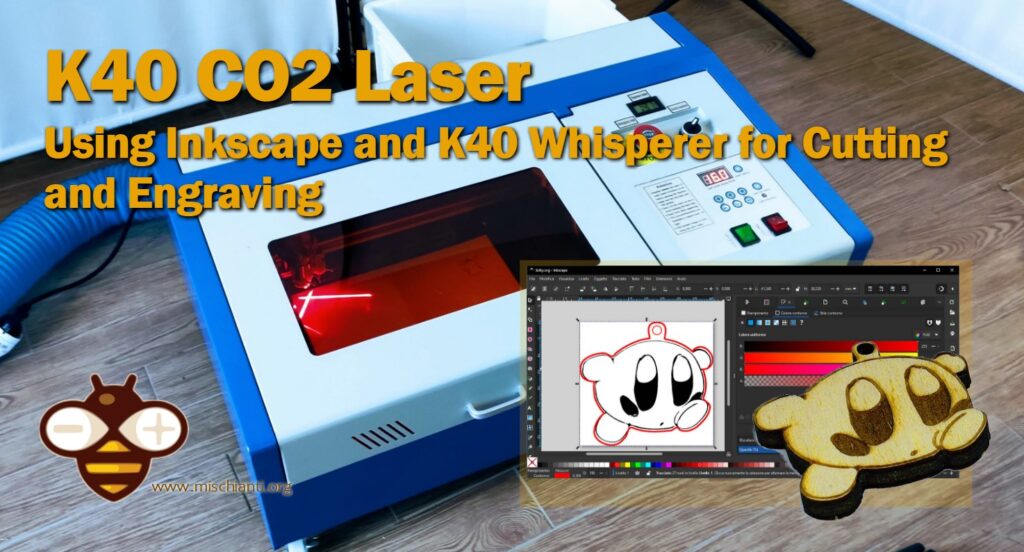
Using Inkscape and K40 Whisperer for Cutting and Engraving with a K40 CO2 Laser
In the world of laser cutting, having the right software to create and manage your designs is crucial. Inkscape, an open-source vector graphics editor, is highly regarded in the laser cutting community for its versatility and compatibility with the K40 laser cutter. When used in conjunction with K40 Whisperer, a software developed specifically to control the K40 Laser Cutter, Inkscape becomes a useful tool. This article explores using Inkscape to create models tailored for execution by K40 Whisperer, enhancing the laser cutting process.
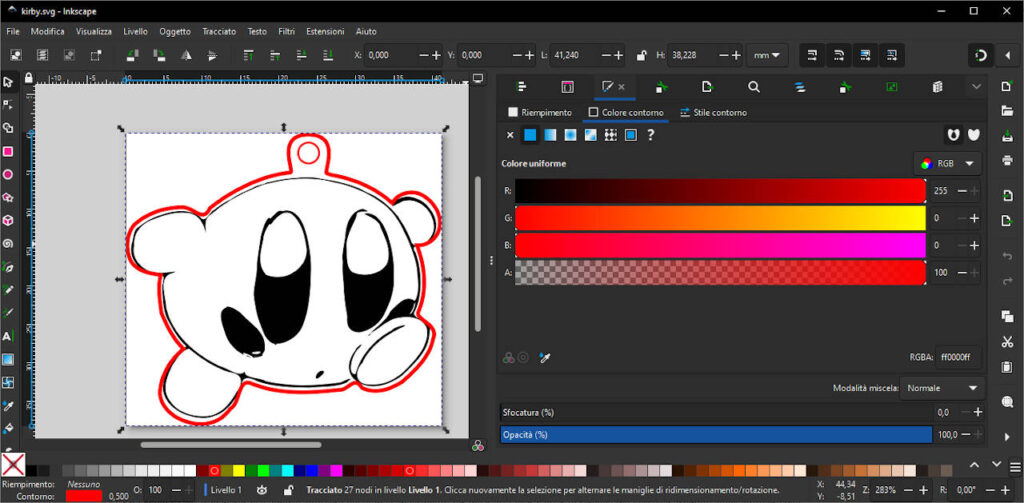
Inkscape is favored for its ability to produce “Scalable Vector Graphics” (SVG) files, which are ideal for the precise demands of laser cutting. SVG files are preferred because they maintain clarity when scaled, crucial for ensuring that the cuts and engravings are accurate. K40 Whisperer directly accepts SVG files from Inkscape, streamlining the process from design to production.
I have chosen and tested this K40 CO2 Laser K40 Laser CO2 Laser Head with air assist
Inkscape
Inkscape is an open-source vector graphics editor that offers a wide array of features comparable to premium software like Adobe Illustrator but at no cost. It is particularly favored in the laser-cutting community due to its versatility and compatibility with various file formats essential for laser work.
Key Features for Laser Cutting:
- SVG File Creation: Inkscape specializes in creating and editing SVG files, the preferred format for K40 Whisperer, ensuring smooth compatibility.
- Layer Management: Organizing different parts of your design into layers within Inkscape allows for more controlled and efficient cutting and engraving processes.
- Path Operations: Complex designs can be simplified into paths that are easily interpreted by laser cutting software, optimizing the machine’s motion and improving cut quality.
Usage in Laser Cutting: Before sending a design to the K40 Whisperer, it’s typically created or finalized in Inkscape. Users can adjust dimensions, define cutting lines, and convert images to vector paths, making Inkscape an indispensable tool for preparing laser-ready artwork.
You can download it from here.
K40 Whisperer
K40 Whisperer is a control software developed specifically for the K40 Laser Cutter to replace the less user-friendly stock software that comes with the machine. It’s known for its simplicity and effectiveness in managing the K40’s capabilities.
Key Features for Laser Operation:
- Direct Control: It directly interprets SVG files from Inkscape, handling both vector and raster data seamlessly.
- Layered Cutting and Engraving: Supports setting different power and speed settings for different layers defined in Inkscape, allowing intricate multi-layer operations.
- User Interface: Provides a straightforward, intuitive interface that displays the laser cutter’s bed and the positioning of the material.
Usage in Laser Cutting: K40 Whisperer acts as the interface between your design and the machine. After designing in Inkscape, users load their SVG files into K40 Whisperer to set up the laser operations, including cutting speed, power levels, and the sequence of cuts and engravings. The software also allows for real-time monitoring and adjustments during the cutting process.
You can download It from here.
Model in Inkscape
To explain better how to use Inkscape, we are going to use the K40 Wishperer test file.

The K40 Whisperer test file is designed to comprehensively evaluate and calibrate the performance of a K40 laser cutter. Here’s an overview of what the file typically represents and tests within the scope of laser cutting operations:
Components of the K40 Whisperer Test File
- Vector Lines and Shapes:
- The test file includes a variety of geometric shapes and lines. These are used to assess the laser’s ability to follow vector paths accurately. The shapes might include circles, squares, triangles, and complex polygons, which are essential for determining the precision and accuracy of the laser’s motion system.
- Color-coded Layers:
- The file uses different colors to distinguish between various cutting and engraving operations. Each color represents a different laser power and speed setting in K40 Whisperer. This setup tests the machine’s responsiveness to software settings and its ability to switch between different operation modes.
- Gradients and Raster Effects:
- If included, gradient fills are used to test how the laser handles changes in intensity within a single job. This checks the laser’s power modulation capabilities, which are crucial for creating depth and shading in engravings.
The format is SVG, the standard saving format of Inkscape, so when you create your own file you must only save It in Inkscape format.
K40 Whisperer
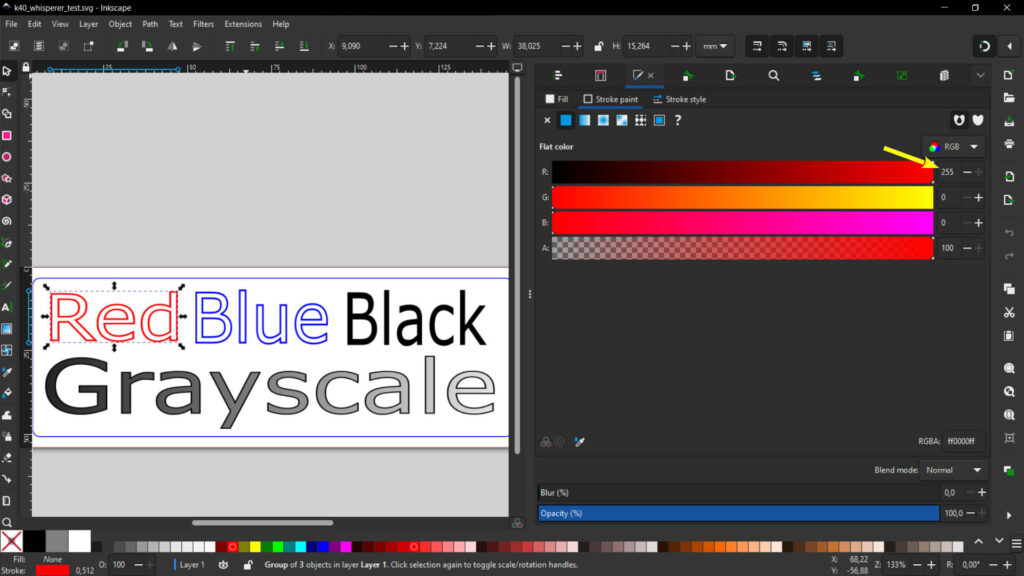
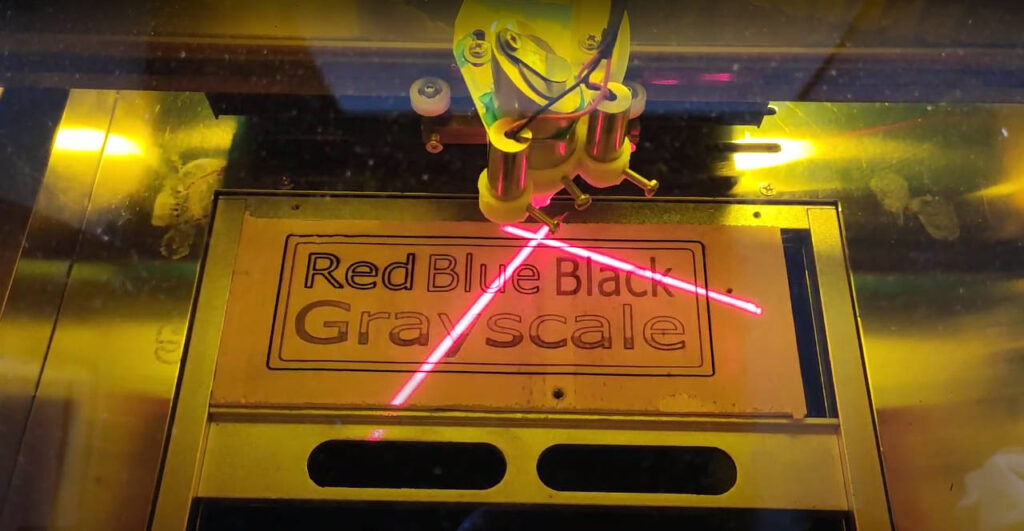
In general, use the color with these settings.
– Use RED lines to indicate cutting.
– Use BLUE lines to indicate vector engraving.
– Use BLACK to indicate raster engraving (this can be shapes, paths, or images)
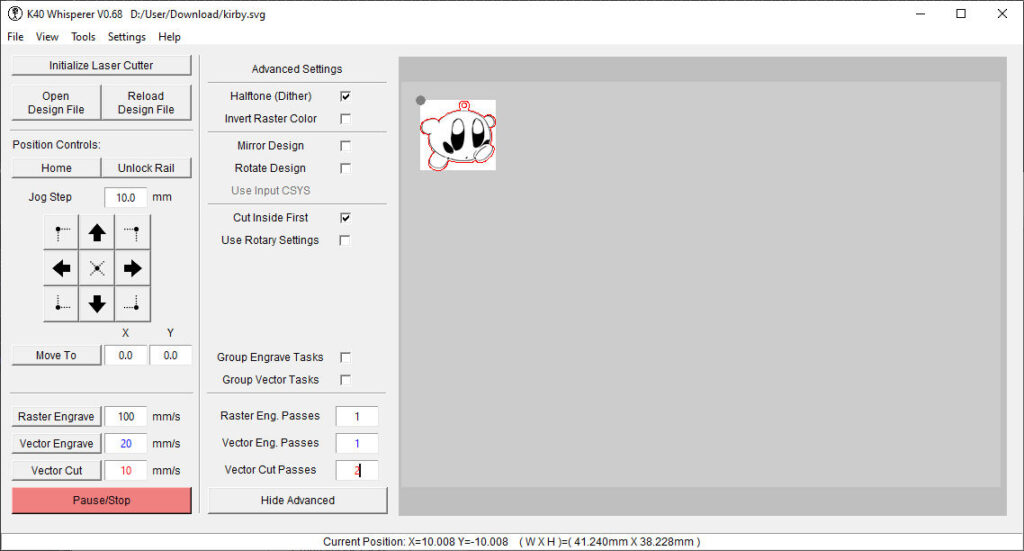
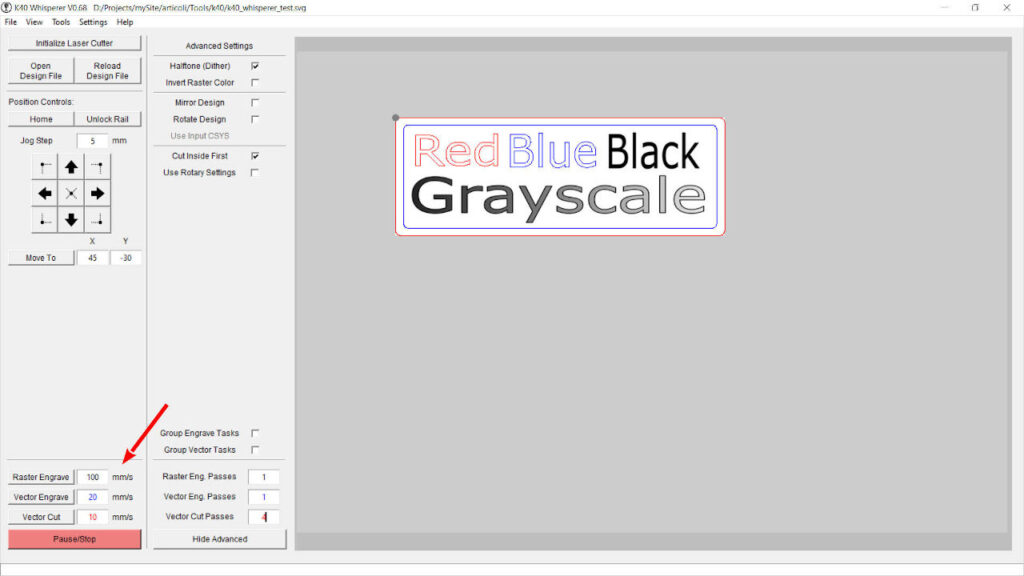
Main window
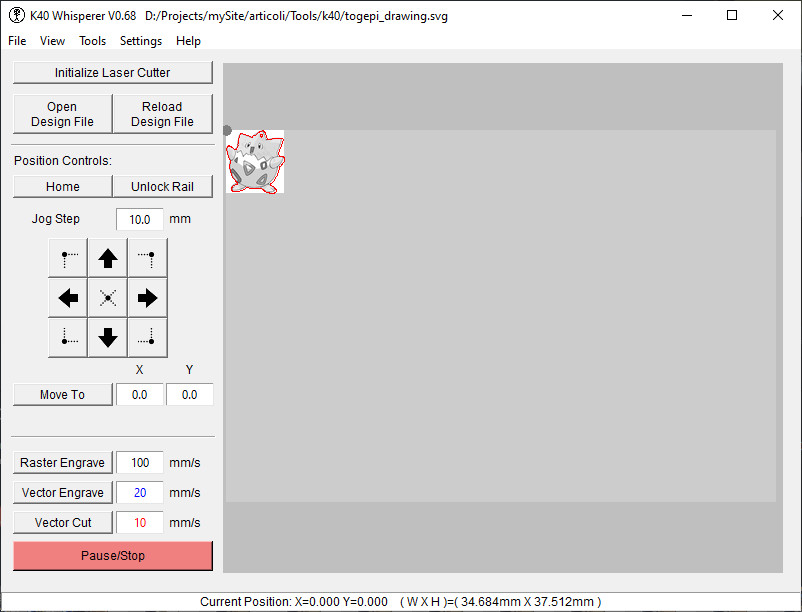
Here are the First visible settings.
| Item | Description |
|---|---|
| Initialize Laser | Establish connection with the laser controller board, and optionally Home the laser depending on the setting in the General settings window for “Home Upon initialize” |
| Open Design File | Opens a dialog box to select a design file to open. K40 Whisperer can open SVG, DXF and G-Code files using file open. |
| Reload Design File | Reloads the current design. (Re-read the design file information from the storage location) |
| Home | Sends the laser to its Home position. |
| Unlock Rail | Turns the stepper motors attached to the X and Y axes off. This allows the user to move the laser head manually. |
| Jog Step | The distance the laser head will move when the laser head is moved (jogged) when the arrow buttons are pressed. |
| Arrows | The four arrow buttons move (jog) the laser head in the indicated direction the distance entered in the Jog Step entry field. |
| Corners and Center | The four corner buttons and the center button are used to move the laser head to the corners of the loaded design. This is useful to verify that the design will fit in the space available on the material you are using. |
| Move To | The Move To button will home the laser then move the laser head to the X and Y position entered in the X and Y fields. |
| Raster Engrave | Start the raster engrave process. This will start the laser. |
| Vector Engrave | Start the vector engrave process. This will start the laser. |
| Vector Cut | Start the vector cut process. This will start the laser. |
| Stop | Stop the running laser job. Pressing this button will pause sending the current job data to the laser and pop up a dialog box asking if you want to cancel the remainder of the job. The laser head may not stop instantly because there is some data that has already been sent to the laser controller board. The laser will finish running the data it has received before it stops. |
Advanced settings
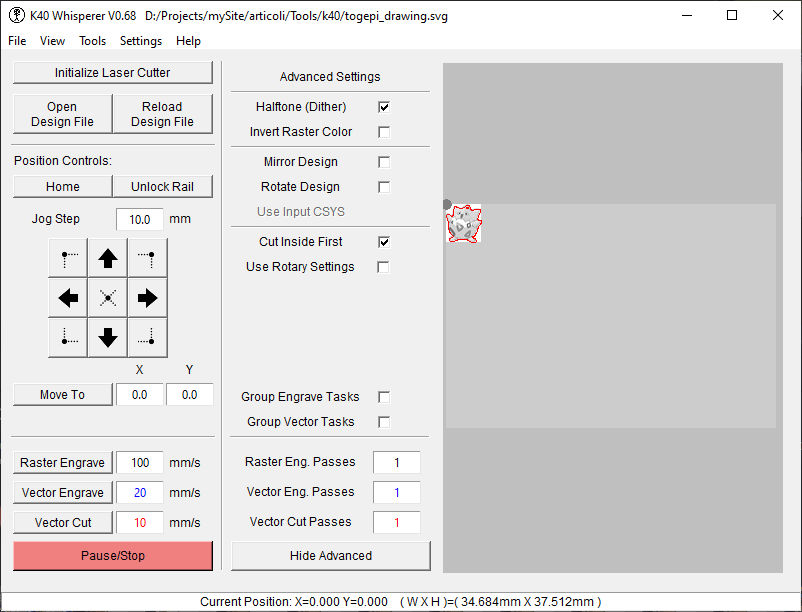
And here are the advanced parameters.
| Item | Description |
|---|---|
| Halftone (Dither) | Turn on or off halftone (dither). Turning this option on tells K40 Whisperer to convert any input grayscale images into dots that are spaced to approximate a grayscale image when engraved. This is similar to the process used to produce images for newsprint. The stock controller board does not have the capability to control the laser power so dithering is the only way to get grayscale images using the stock controller. You can also dither the image before loading it into K40 Whisperer, in that case you would want to have dithering turned off in K40 Whisperer. |
| Invert Raster Color | Inverts the colors in the raster image. This has the effect of turning the raster image into the negative of the original image so white is black and so on. |
| Mirror Design | Mirrors the input design. This option is useful for making stamps or engraving on the back of mirrors. |
| Rotate Design | Simple rotate the input design by 90 degrees. |
| Use Input CSYS (coordinate system) | This option causes the reference point for a design to be the origin of the coordinate system of the input DXF file. |
| Cut inside First | When this option is on the paths that are inside of other closed paths will be cut first. This is important sometimes because if the outside part is cut first it can fall out or shift on the cutting table resulting in a misaligned cut for the internal features if they are cut after the outside features. |
| Use Rotary Settings | This option causes K40 Whisperer to use the settings in the rotary settings window intended to be used with a rotary devices attached to the y-axis connector on the controller board. |
| Group Engrave Tasks | This option combines the buttons for the raster and vector engraving tasks so both tasks are performed with one button click. If the “Group Vector Tasks” is also selected all three buttons are combined into one. |
| Group Vector Tasks | This option combines the buttons for the vector engraving and cutting tasks so both tasks are performed with one button click. If the “Group Engrave Tasks” is also selected all three buttons are combined into one. |
| Raster Eng. Passes | Set the number of time to repeat the raster engrave paths. |
| Vector Eng. Passes | Set the number of time to repeat the vector engrave paths. |
| Vector Cut Passes | Set the number of time to repeat the vector cut paths. |
| Hide Advanced | Button to hide the advanced options pane. |
Piece positioning
When you put the material to work on the base, first of all, position the laser head to the top left of the cutting area. Pay attention to the reference to the position being at the top left.
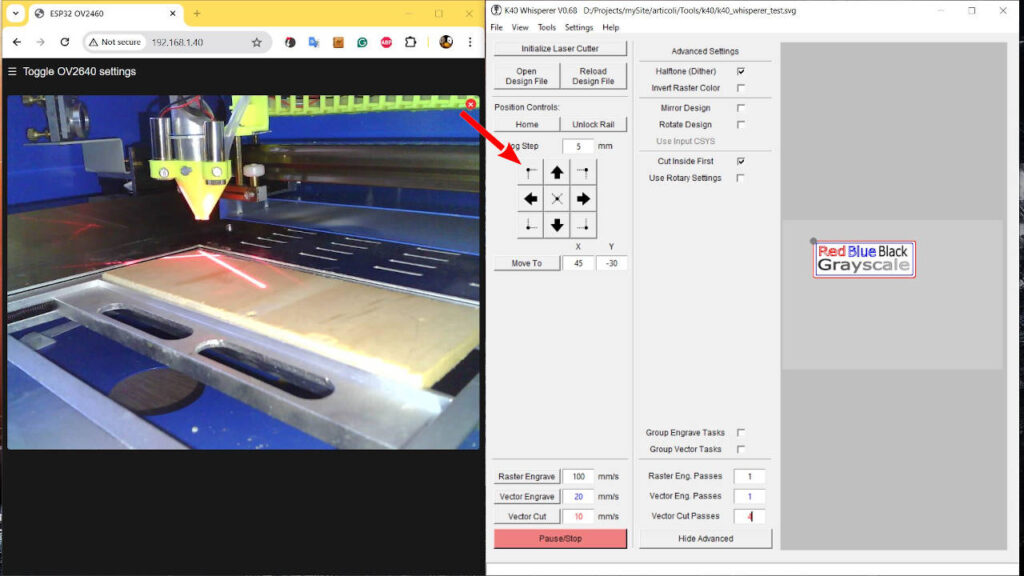
After that, It’s a good practice to check if the end part of the cutting/engraving material is in the image area.
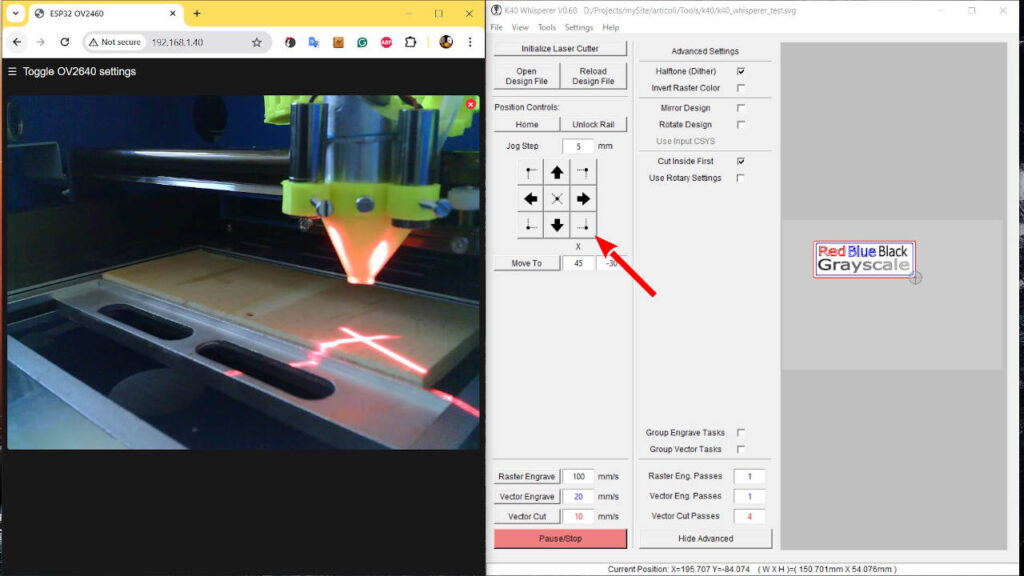
This can be very useful when the material must fit the image.
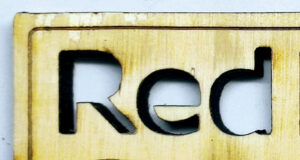
Cutting
In K40 Whisperer, red is designated as the color for cutting operations, you must apply It on line and borders. Therefore, you should select the line or border in your design and apply the red color to indicate that these elements are to be cut. This ensures the software correctly interprets your design for the cutting process.
Then, remember to set the correct power and speed on the laser in the K40 Whisperer.
If all’s ok, you obtain something similar to this.
Vector engraving
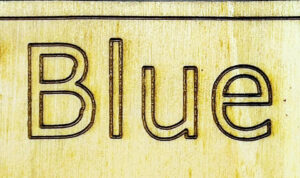
Vector engraving, also known as vector marking or scoring, is a precise laser engraving process that follows the paths of vector graphics. This technique is particularly favored for creating detailed and clean designs on various materials. The color used by K40 Whisperer is blue, and you must use it on line and border.
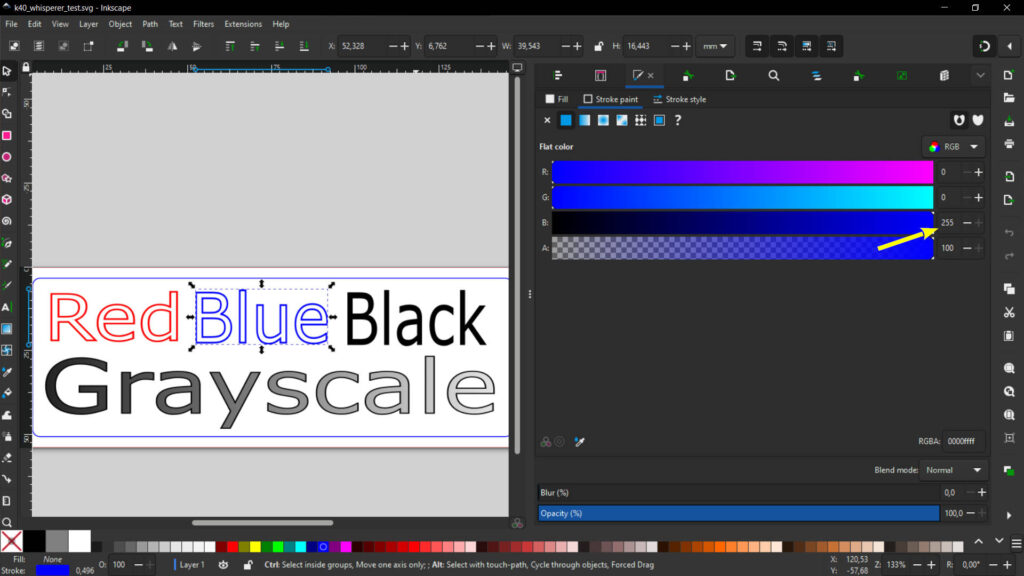
The result with the correct power is this.
Raster engraving
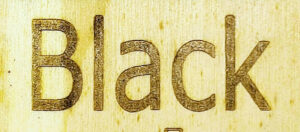
Raster engraving is a laser process that converts images into a grid of dots, much like printing an image with an inkjet printer. This technique is ideal for detailed and complex images, such as photographs or intricate graphics, that involve varying shades and intensities. The K40 Whisperer uses the color black to designate areas for raster engraving. This color can be applied to both the borders (outlines) of shapes and the fills, allowing for a versatile range of artistic expressions.
The outcome of using a black fill in a design is determined by the laser’s power settings. The intensity of the engraving is directly influenced by how much power the laser emits. Darker fills correspond to higher power usage, resulting in deeper and more intense engravings.
K40 Whisperer also supports the use of gradients in raster engraving. By using grayscale shades in your design, you can control the intensity of the laser beam. Lighter shades result in less laser power, creating lighter engravings, while darker shades increase the power, producing deeper and more pronounced engravings. This capability allows for subtle variations and shading within the engraved image, enhancing the visual depth and realism of the finished product.
In this instance, the intensity of the gray varies with the power settings of the laser. Here’s an example using low power: you’ll notice that the engraving in the latter part is much less defined, appearing faint and less distinct.

Conversely, when I increase the power of the laser, the gradient becomes more defined and consistent from start to finish, resulting in a clearer and more visually distinct engraving.

From test file to cutting engraving material
Here is the final outcome of our test file, we began with this specific file as our starting point.
From there, we successfully achieved precise cuts and detailed engravings on the material.
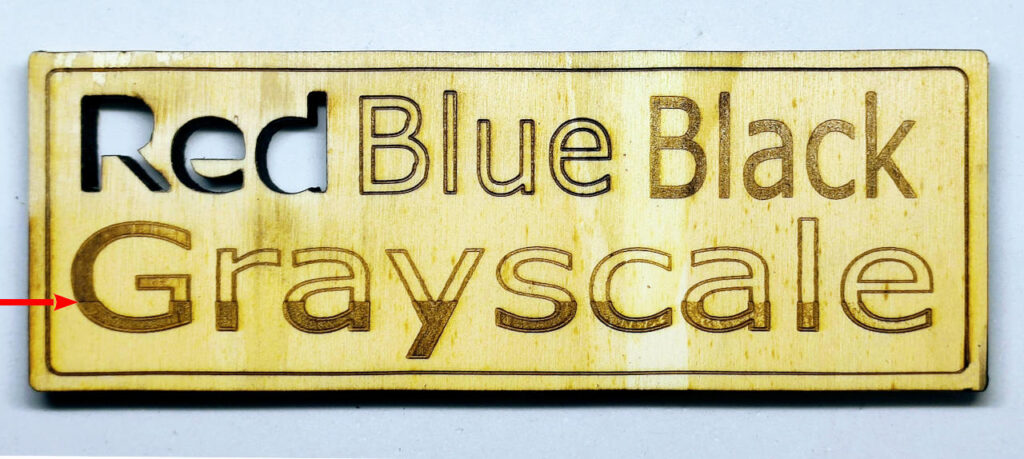
The intensity and the power can vary in the base of the material and the laser upgrade.
Thanks
- K40 40w CO2 Laser cutter engraver: review, first usage, and upgrades (all you need to know)
- Using Inkscape and K40 Whisperer for Cutting and Engraving with a K40 CO2 Laser
- Enhance Your K40 CO2 Laser: 3d printed nozzle head with air assist and laser crosshairs
- Enhance Your K40 CO2 Laser: ESP32-CAM with 3D printed case to monitor your device