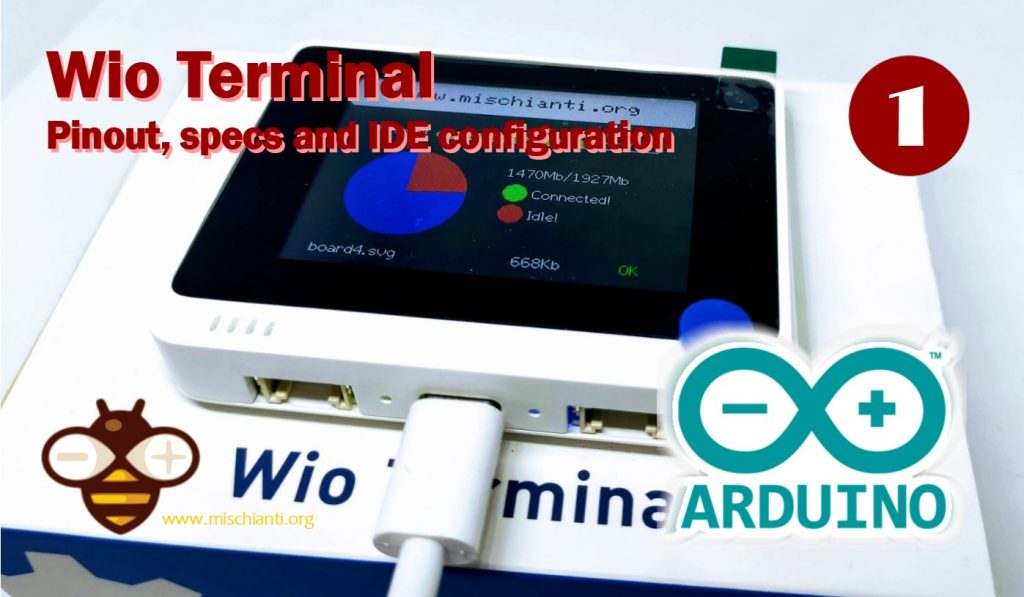
Wio Terminal: pinout, specs and Arduino IDE configurations – 1
Wio Terminal is a complete system, compared to a normal development board it is equipped with screen + development board + input / output interface + container, which makes it an efficient product and ready for the final product.
Compatible with Arduino and Micropython, Wio Terminal is an ATSAMD51-based microcontroller with wireless connectivity powered by Realtek RTL8720DN. Currently, wireless connectivity is only supported by Arduino. Its CPU speed runs at 120MHz (Boost up to 200MHz).
You can find the device here on SeeedStudio Aliexpress
Realtek RTL8720DN chip supports both Bluetooth and Wi-Fi providing the backbone for IoT projects.
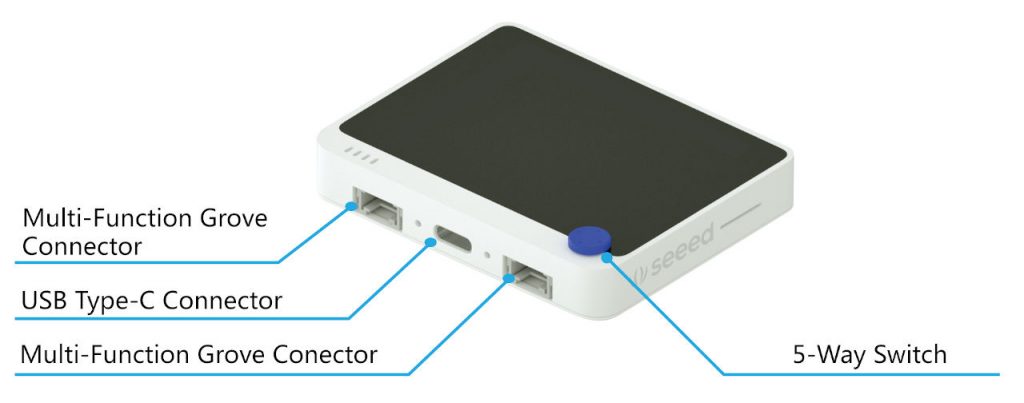
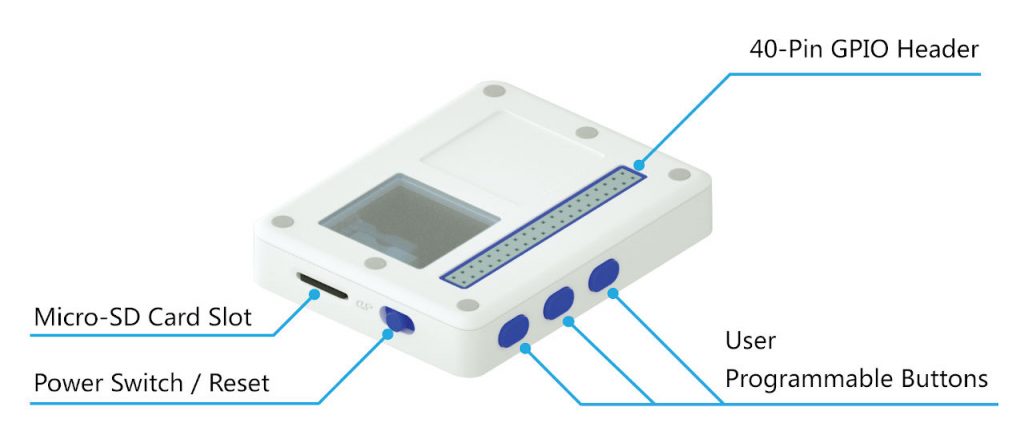
The Wio Terminal itself is equipped with a 2.4” LCD Screen, onboard IMU(LIS3DHTR), microphone, buzzer, microSD card slot, light sensor, and infrared emitter(IR 940nm). On top of that, it also has two multifunctional Grove ports for Grove Ecosystem and Raspberry pi 40-pin compatible GPIO for more add-ons.
Specs
Microchip ATSAMD51P19
- ARM Cortex-M4F core running at 120MHz (Boost up to 200MHz)
- 4 MB External Flash, 192 KB RAM
- Comprehensive Protocol Support
- SPI, I2C, I2S, ADC, DAC, PWM, UART(Serial)
Reliable Wireless Connectivity (supported only by Arduino)
- Powered by Realtek RTL8720DN
- Dual Band 2.4Ghz / 5Ghz Wi-Fi (802.11 a/b/g/n)
- BLE / BLE 5.0
USB OTG Support
- Accessible Devices(as USB-Host): read data or signals from a mouse, keyboard, MIDI devices, Xbox/PS gaming controllers, 3D printers
- Simulated Devices(as USB-Client): emulate a mouse, keyboard or MIDI devices to Host PC
- When using USB Host/Client function, you can use the 40-pin on the back of Wio Terminal for power supply.
Pinout
All the button and protocol pin are defined by a constant so if you need the first button on the top you can refer BUTTON1 define, for the led you can refere BUILTIN_LED, for the frontal joystick UP position WIO_5S_UP or SWITCH_X and so on.
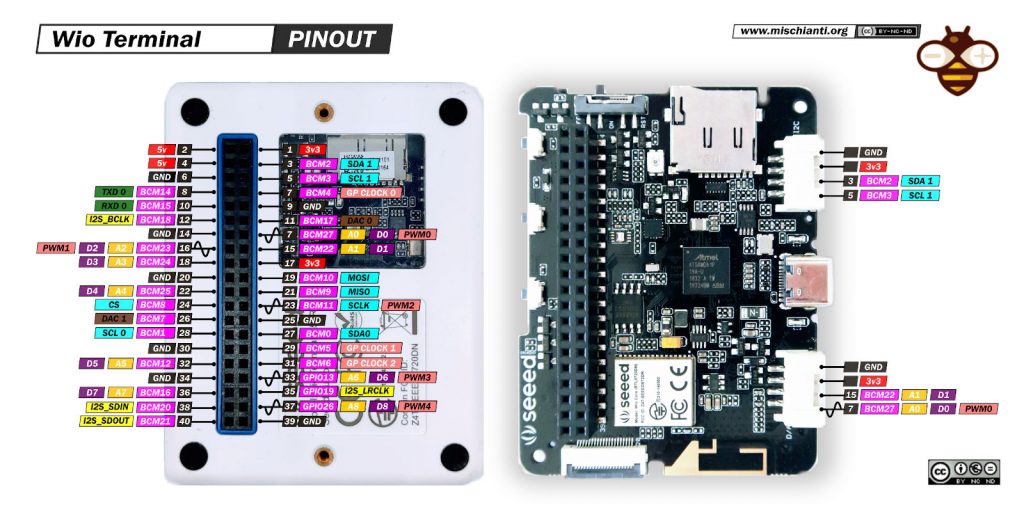
Link to high resolution pinout image
Configure your Arduino IDE
Than you must configure your Arduino IDE
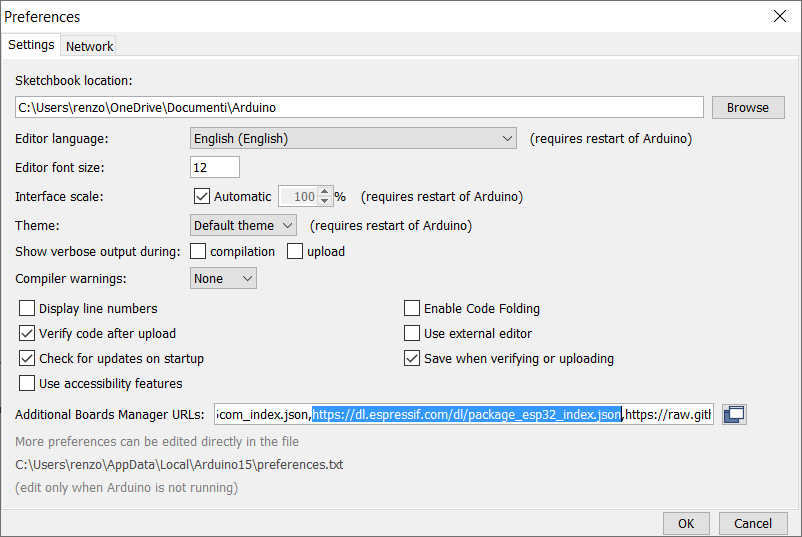
First you must add seeedstudio url descriptor to your IDE
https://files.seeedstudio.com/arduino/package_seeeduino_boards_index.json
Go to File –> Preferences and add the url on “Additional Boards Manager URLs”
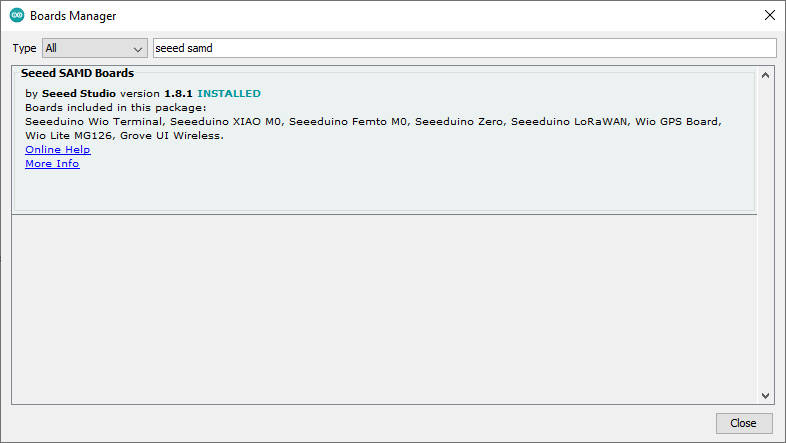
Than you must add new board in Boards Manager
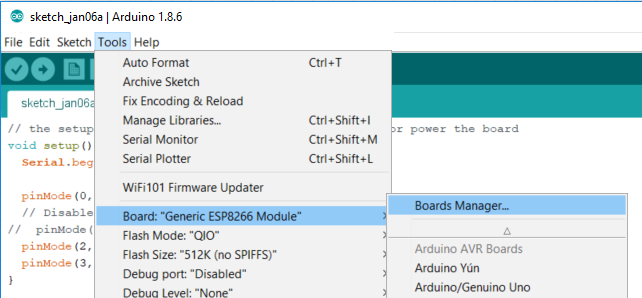
The boards to select is Seeed SAMD Boards
Now you can select (if you have like me that model) the Wio Terminal
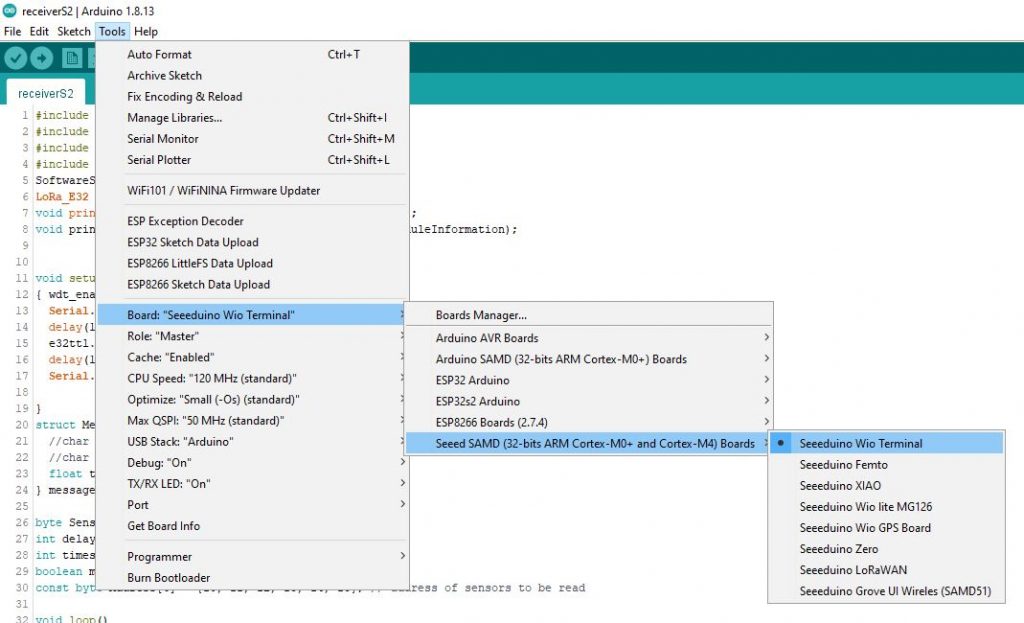
Now you can upload your sketch.
Upload sketch
We are going to upload a classic blink sketch.
void setup() {
  // initialize digital pin LED_BUILTIN as an output.
  pinMode(LED_BUILTIN, OUTPUT);
}

// the loop function runs over and over again forever
void loop() {
  digitalWrite(LED_BUILTIN, HIGH);   // turn the LED on (HIGH is the voltage level)
  delay(1000);                       // wait for a second
  digitalWrite(LED_BUILTIN, LOW);    // turn the LED off by making the voltage LOW
  delay(1000);                       // wait for a second
}
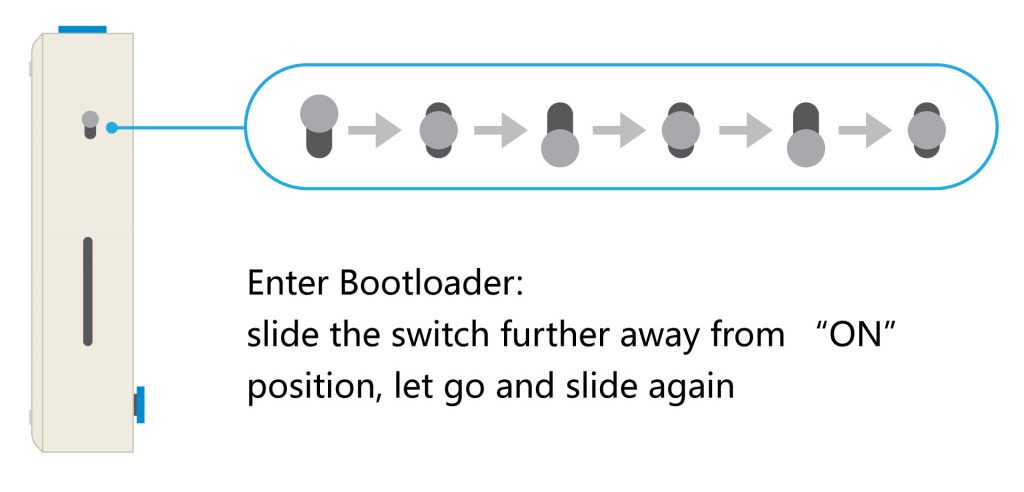
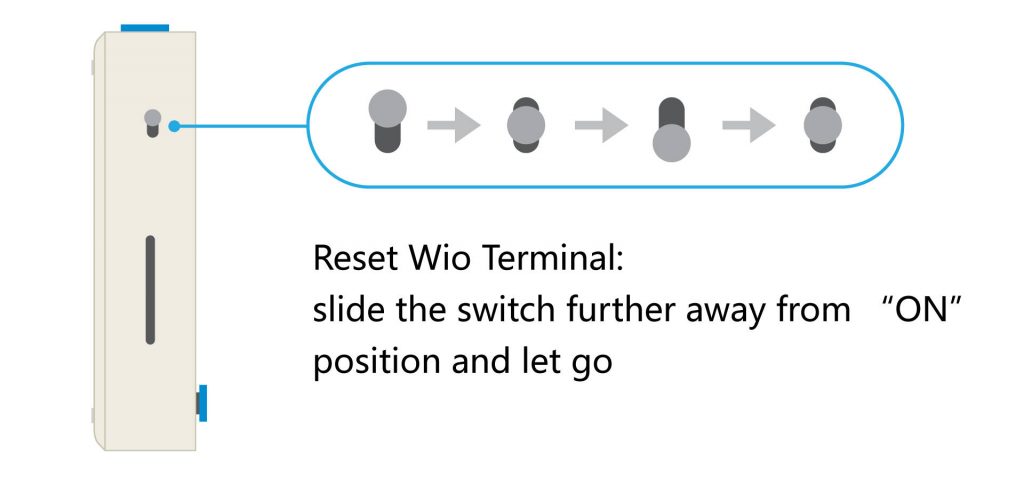
When you try to upload you must put on boot mode the device with double push down the power/reset button.