MKS WIFI for Makerbase Robin: boards and how to wiring esp12 & NodeMCU – 1
I bought a FlyingBear Ghost 5 with an integrated WiFi module, but I discovered no web interface. I don’t know why they can’t add a basic user interface. Then I went to see the web interface of the high-end Makerbase cards and realized that it was better they didn’t develop it.
My solution was to modify the firmware to support the Web Socket and develop the Web interface. This feature is compatible with all Makerbase cards with an MKS WiFi module.
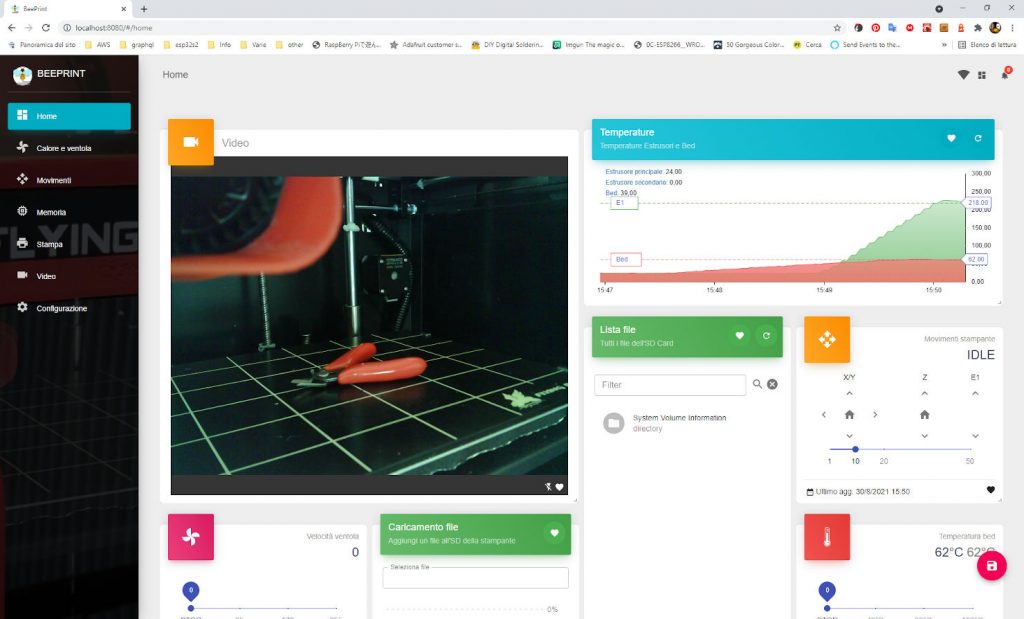
The result of the BeePrint Web interface is in this screenshot.
I also decided to explain all the development phases of the project. In this article, I would like to expose the hardware infrastructure of the MKS WiFi card that interfaces with the Makerbase Robin Nano.
MKS Robin Nano v1
But first, we are going to analyze the MKS Robin boards from MakerBase.
You can find MKS Robin Nano kit here AliExpress v1.2
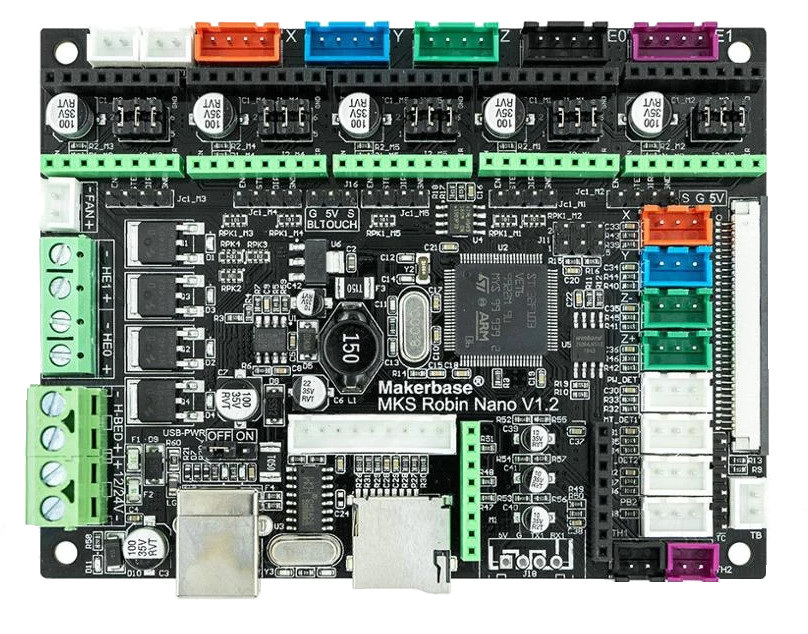
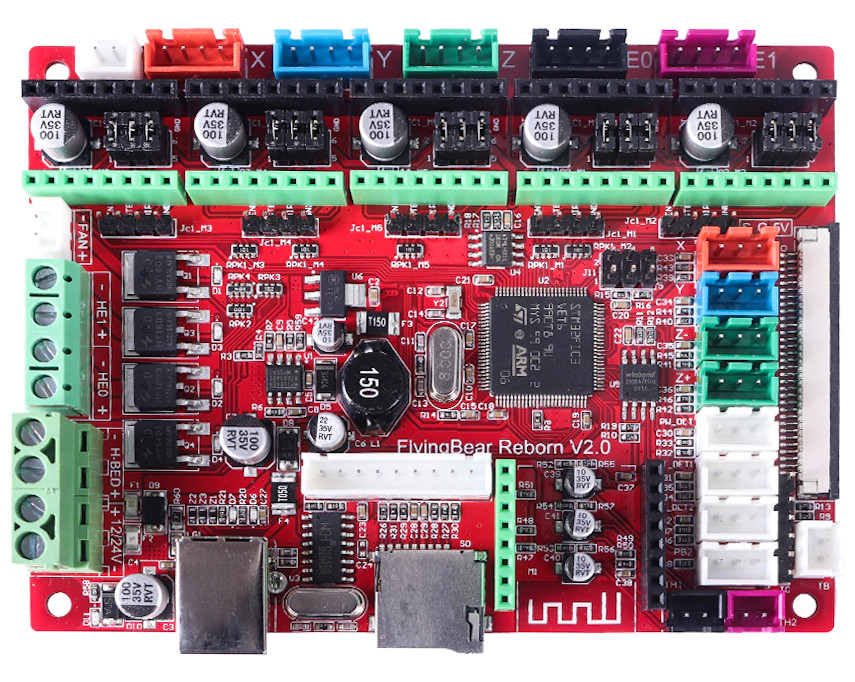
Here is the board of FlyingBear Ghost 5, an MKS Robin Nano v1.1, but in the most recent can be v1.2 also.
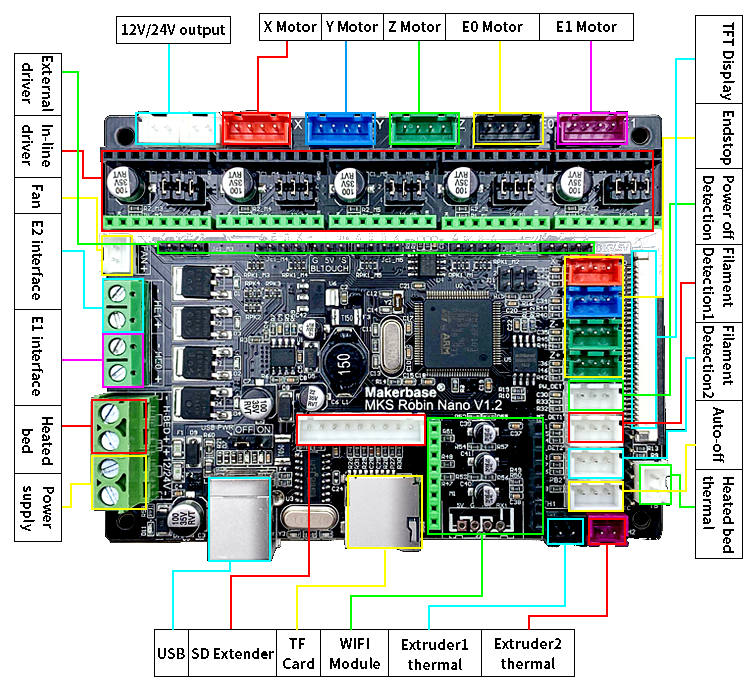
This board has many connectors, and here there is a connection schema.
MKS WiFi module
But the part that interests us in this article is the WiFi module in this photo.
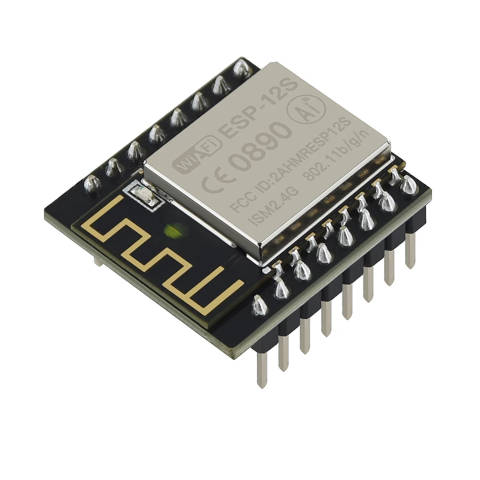
Here the last MKS WiFi module AliExpress
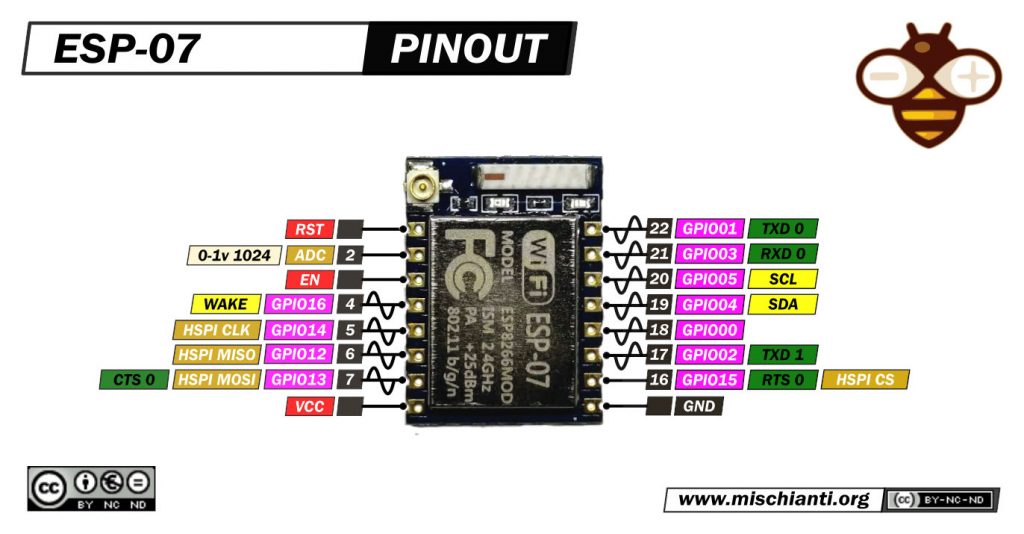
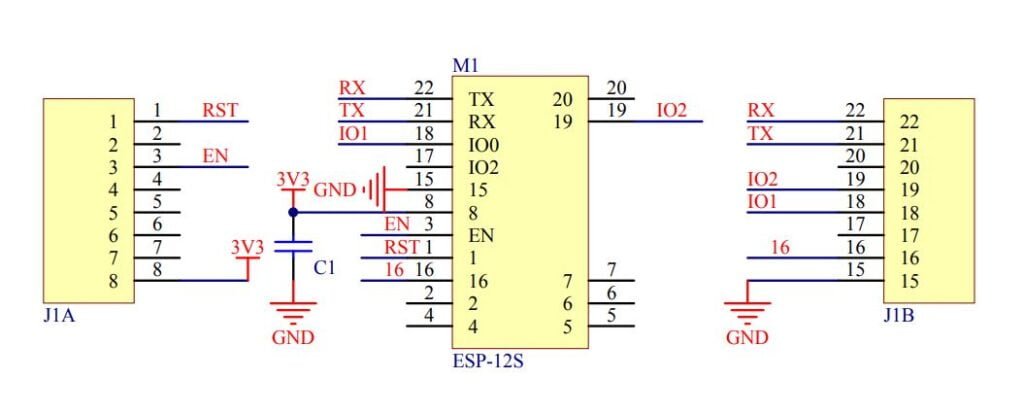
This is a simple esp12 S that have the same pinout as esp07 or esp12 E
And can be programmed by following this guide “esp12 esp07 (esp8266): flash, pinout, specs, and Arduino IDE configuration“.
esp12S respect the other have a better WiFi strength, with fewer pins.
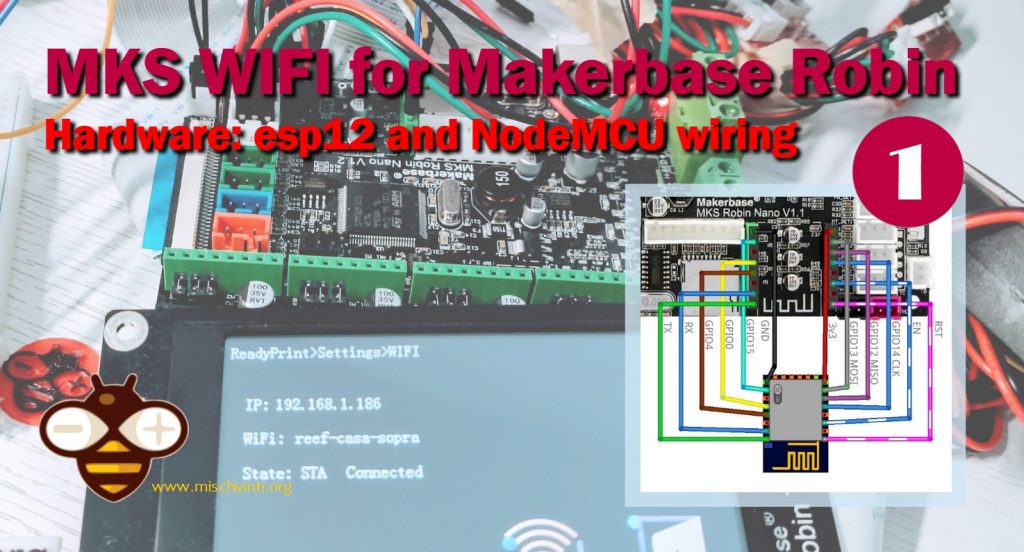
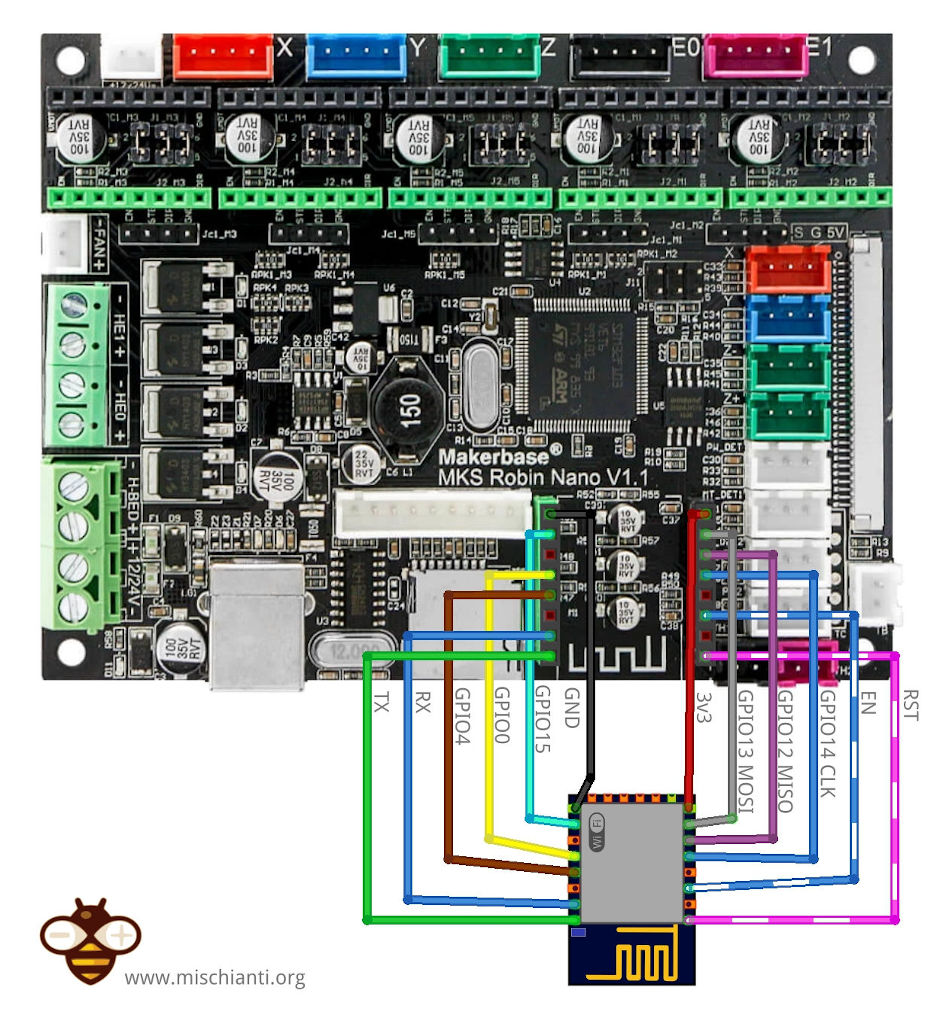
The connection becomes like this.
MKS WiFi has two types: mks robin WiFi and mks TFT WiFi. They are the same electronic connect with the MCU of the host-board, using different sockets. The WiFi module is designed to connect to the host-board with the following signals:
- Uart Tx/Rx : for uart data transferring
- Reset : for reseting the wifi by the host-board
- GPIO4 : for the wifi module to read whether the host-board is ready to receive data on serial(low level valid)
- GPIO0 : for switching the wifi module to boot mode(high level) or firmware flash mode(low level) by the host-board
As you can see in the schema, there are four free pins,
- ADC
- GPIO16
- GPIO05
- GPIO02 (I use It to debug the code, very usefully, read this article)
so I already thought of creating an adapter to use that pins.
You can find some schema on the MKS WiFi repository.
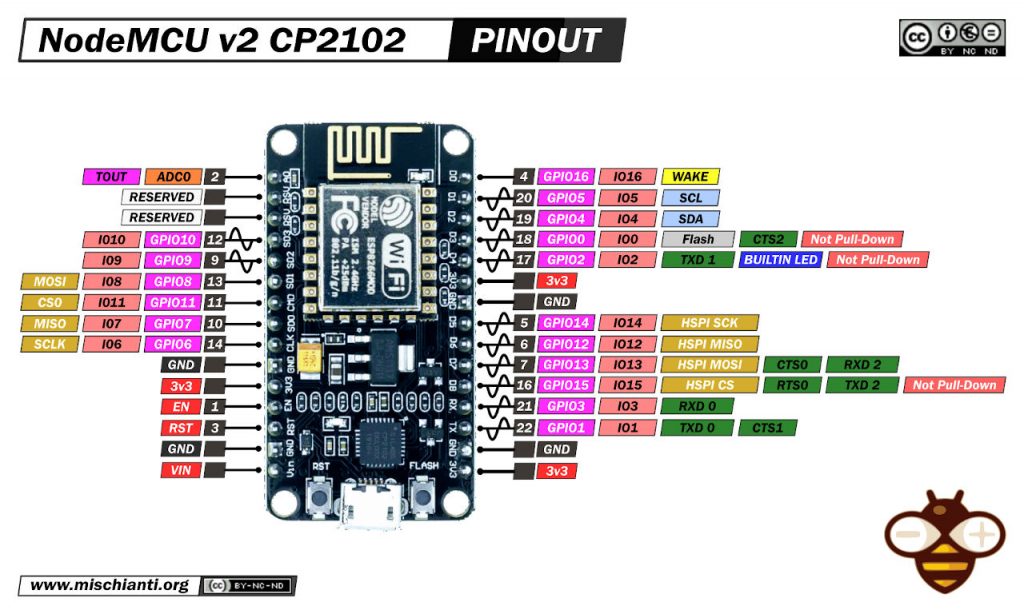
Using NodeMCU instead MKS WiFi module
Select NodeMCU with the version you want WeMos D1 mini - NodeMCU V2 V2.1 V3 - esp01 - esp01 programmer
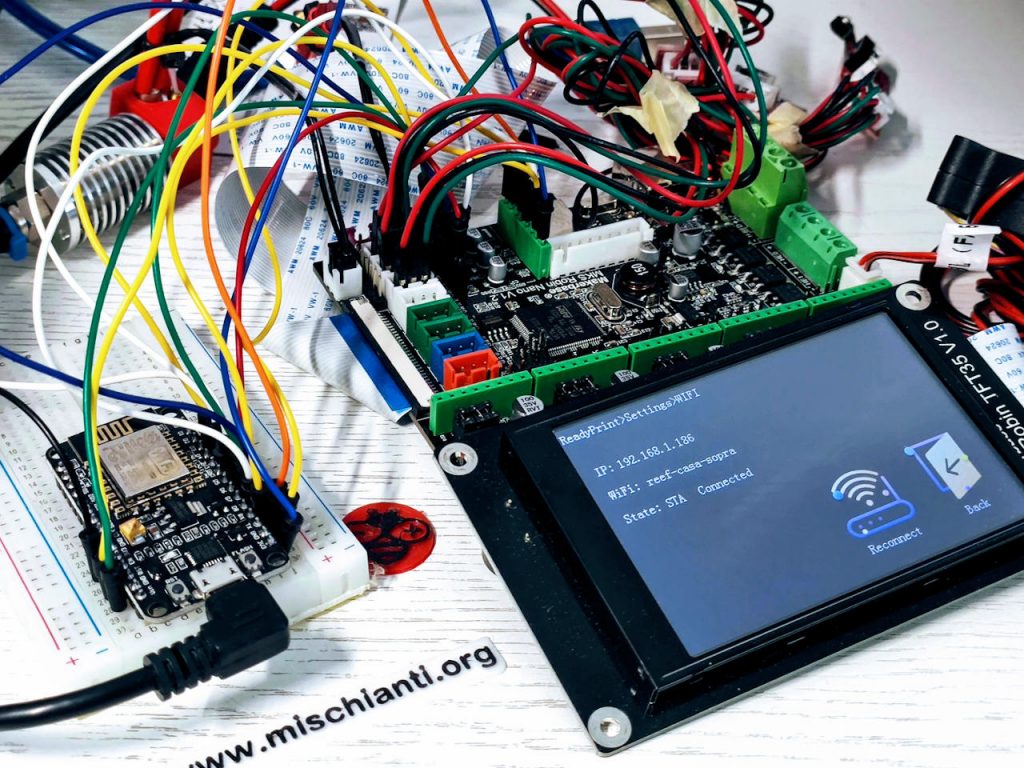
You can use a simple esp8266 NodeMCU module as a WiFi module.
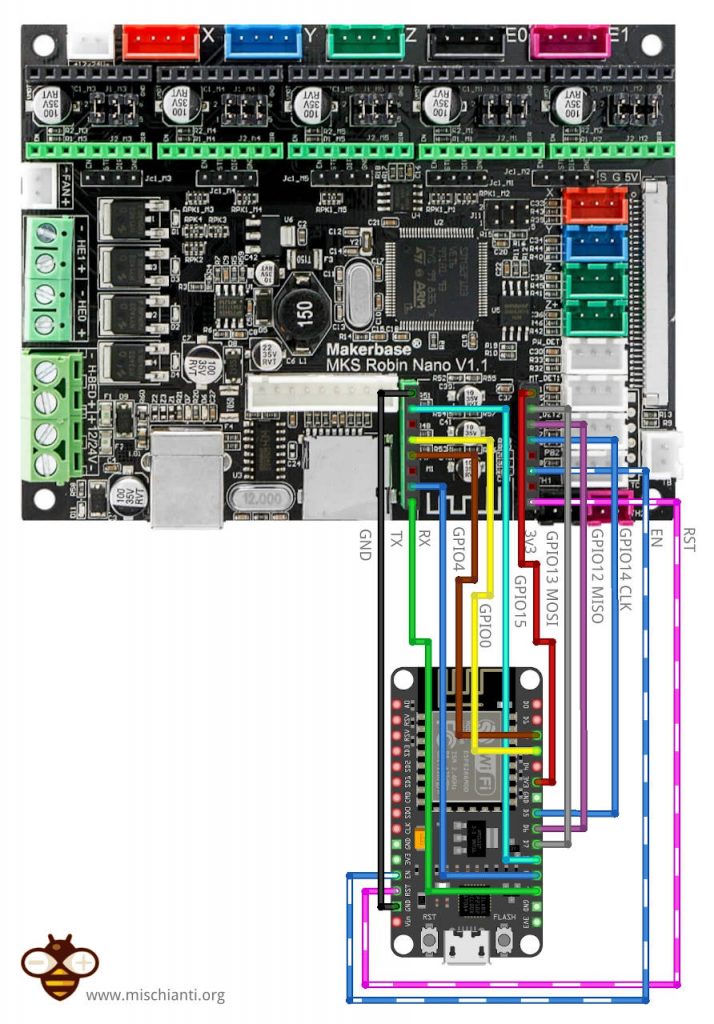
Here is the connection schema.
You can connect D4 as Serial debug (Serial1), and the upload process is the same as esp12.
Thanks
- MKS WIFI for Makerbase Robin: boards and how to wiring esp12 & NodeMCU
- MKS WIFI for Makerbase Robin: PCB and how to compile & upload firmware
- MKS WIFI for Makerbase Robin: communication protocol and Cura plugin
- MKS WIFI for Makerbase Robin: firmware upgrade and new Web Socket features
- MKS WIFI for Makerbase Robin: BeePrint web interface with Camera on Flying Bear Ghost






Hi there! First, awesome job…
Now, i have a maybe crazy question? The J18 pinout on the Nano Robin v1.2 (at the bootom of the wifi connector), can be used for something usefull? It looks a lot to a USB port…. so maybe for pendrive support? or to make direct connection to a Raspberry Pi? Do you have any insight about it? Thanks!!
Hi Julian,
first of all, where is the J18 connector?
But I think that It’s impossible to upgrade with similar features without rewriting the firmware.
Bye Renzo
Greetings… why do you connect the MISO, MOSI and SLK terminals if (according to MKS) those pins have no connection in the robin nano V1.2?
Hi,
In the universe of documentations, if I remember, that pins control the ad card.
Bye Renzo
hi Renzo!
I also have a wifi module installed for the MKS TFT35 screen. Is the project you made for MKS Robin? Will I have a problem?
Hi Talha,
sorry I don’t know, I tested It only on my FlyngBear Ghost, but a lot of people send me It’s success on installing It in other Pritner.
Bye Renzo
Hi Renzo, you’ve done a great work! But unf I can’t upload WebView select file for uploading, click upload – and after some pause browser shows empty page “The connection was reset”. The connection was reset. When I refresh – just the same “green” webpage again. There’s no “Updated successfully” message….
Hi Talha,
you must upload webview and firmware to put on work.
Bye Renzo
The Wi-Fi stopped working. It says ‘the Wi-Fi module is being configured, please wait’. I have been waiting for hours
Hi,
Try to reupload all.
Bye Renzo