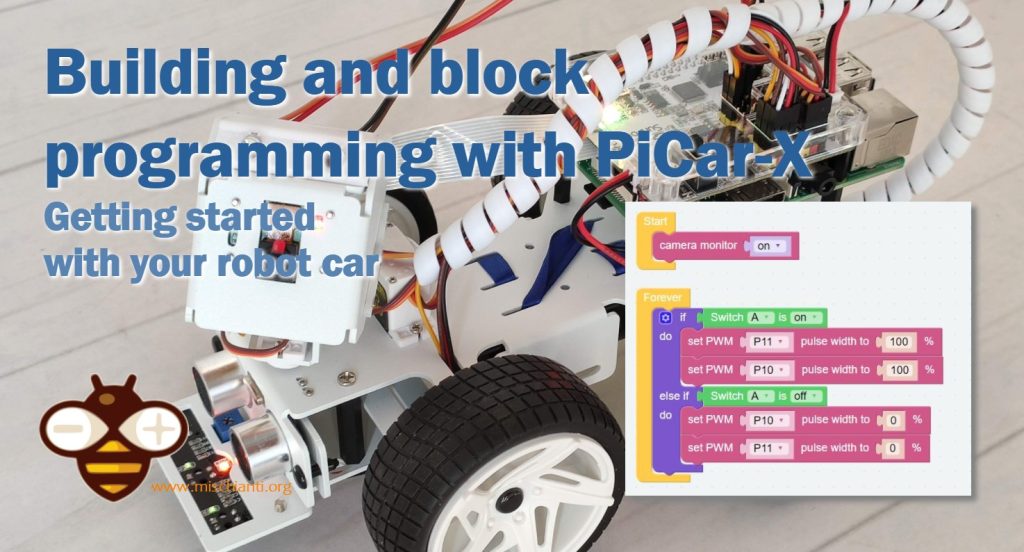
Building and programming PiCar-X: getting started with your robot car
The PiCar-X is a self-driving robot car designed specifically for the Raspberry Pi platform. It’s a versatile robot car that comes with a 2-axis camera module, ultrasonic module, and line tracking modules, providing a wide range of functions such as color/face/traffic-signs detection, automatic obstacle avoidance, and automatic line tracking. The PiCar-X supports two programming languages – Blockly and Python – catering to beginners and advanced programmers alike.
In this in-depth review, we will discuss the key features of the PiCar-X, its programming capabilities, and the educational content provided in its documentation.
Here is the SunFounder PiCar-X page with the link to buy, or you can choose Aliexpress, Amazon Italy, Amazon Germany, Amazon France, Amazon USA store
Key Features
- Programming Languages: The PiCar-X supports both Blockly and Python programming languages, catering to users with varying programming skills. Blockly is an excellent choice for beginners, younger users, or those who want to test the PiCar-X quickly, while Python offers more advanced control and flexibility for experienced programmers.
- Camera Module: The 2-axis camera module allows the PiCar-X to perform a wide range of computer vision tasks, including color detection, face detection, and traffic sign detection. This feature enables users to explore and experiment with various computer vision algorithms and applications.
- Ultrasonic and Line Tracking Modules: The ultrasonic module equips the PiCar-X with automatic obstacle avoidance capabilities, while the line tracking module allows for automatic line tracking. These features enable users to learn about robotics and real-world applications of autonomous navigation.
- Mobile App Control: The SunFounder Controller app provides a convenient way for users to remotely control the PiCar-X on their mobile devices. This feature adds to the accessibility and user-friendliness of the PiCar-X.
- Educational Content: The PiCar-X documentation offers a wealth of educational content, covering topics such as the history of self-driving cars, deep learning, neural networks, component assembly, and more. This makes the PiCar-X an excellent learning resource for users interested in robotics, programming, and AI.
- Multilingual Support: The PiCar-X documentation is available in English, with the company working on adding support for other languages. This demonstrates the company’s commitment to making the PiCar-X accessible to a global audience.
Assembly
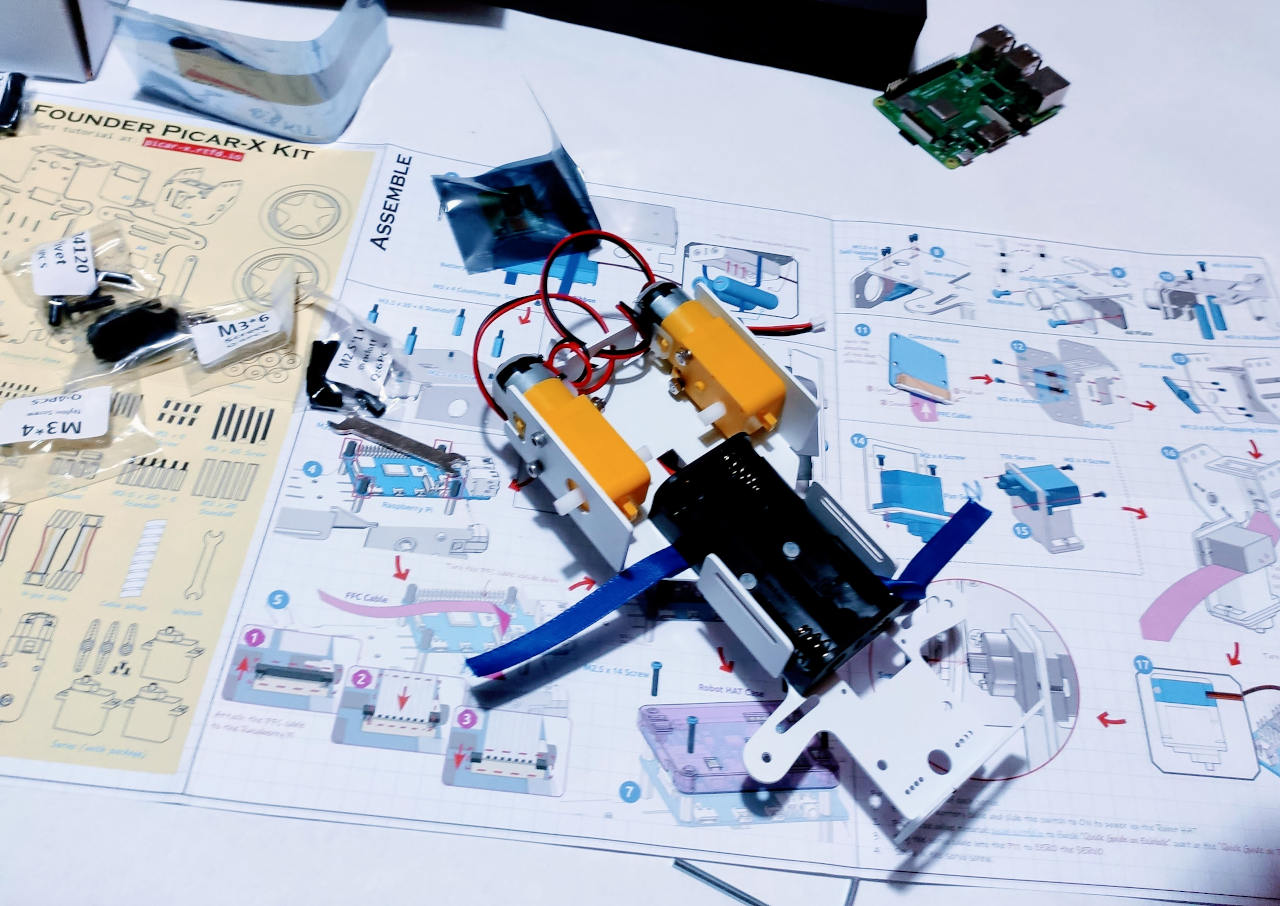
SunFounder provides a comprehensive sheet with all the information about assembly instruction.
Remember, the Raspberry Pi isn’t included, It’s work with version 3b+ e 4. And you need 2*18650 lithium battery.
Here the batteries&nbps;AliExpress 18650 3.7v 3400mah
Requirements:
- PiCar-X kit
- Raspberry Pi (Preferably 3B+/4B)
- MicroSD card (16GB or higher, Class 10 or higher)
- Power supply for Raspberry Pi (5V/3A for Pi 4 or 5V/2.5A for Pi 3)
- Internet connection
- Laptop/PC with Windows, macOS, or Linux
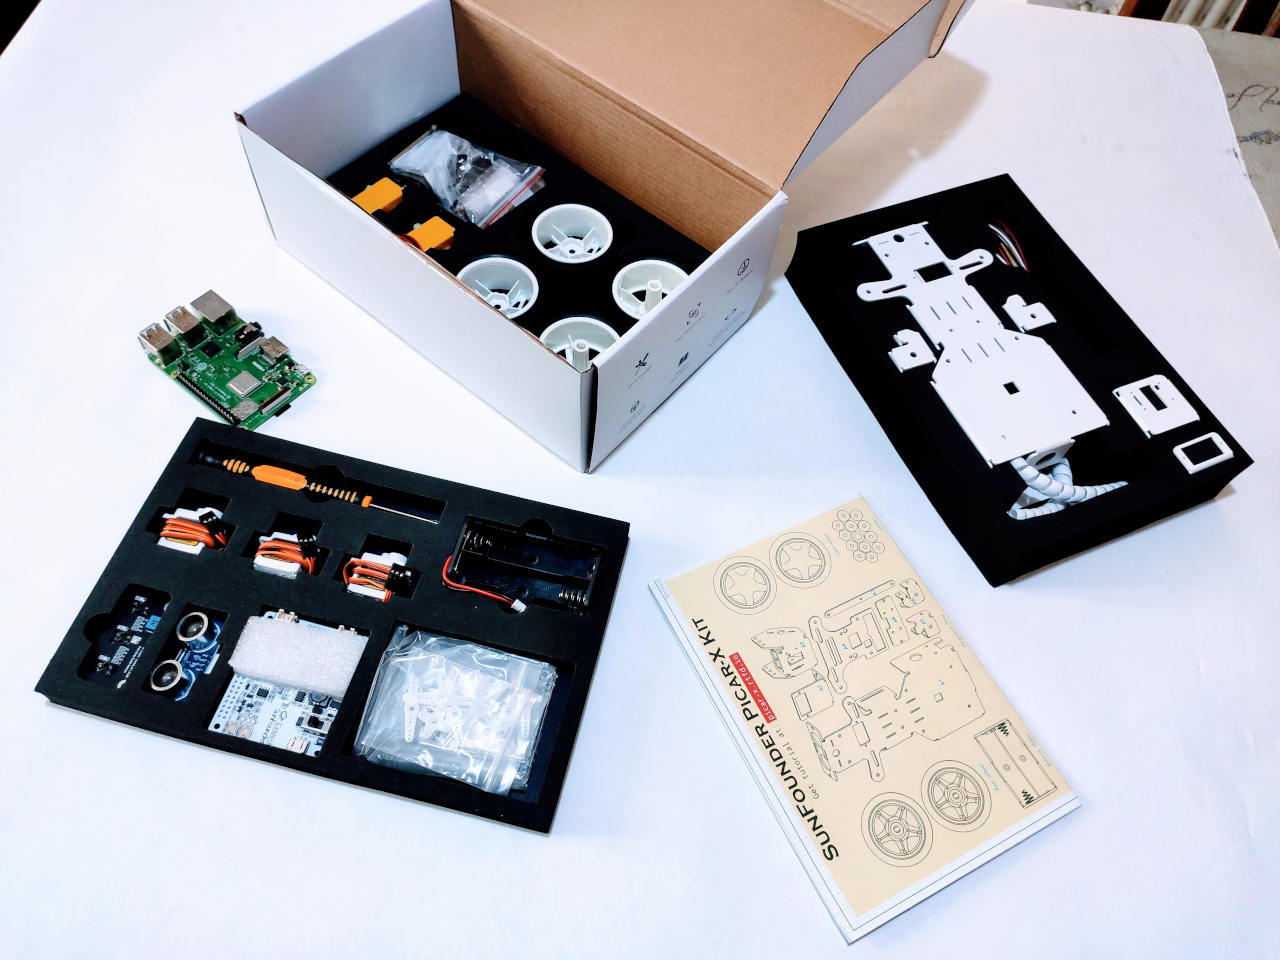
Here is the box and my Raspberry Pi 3B+.
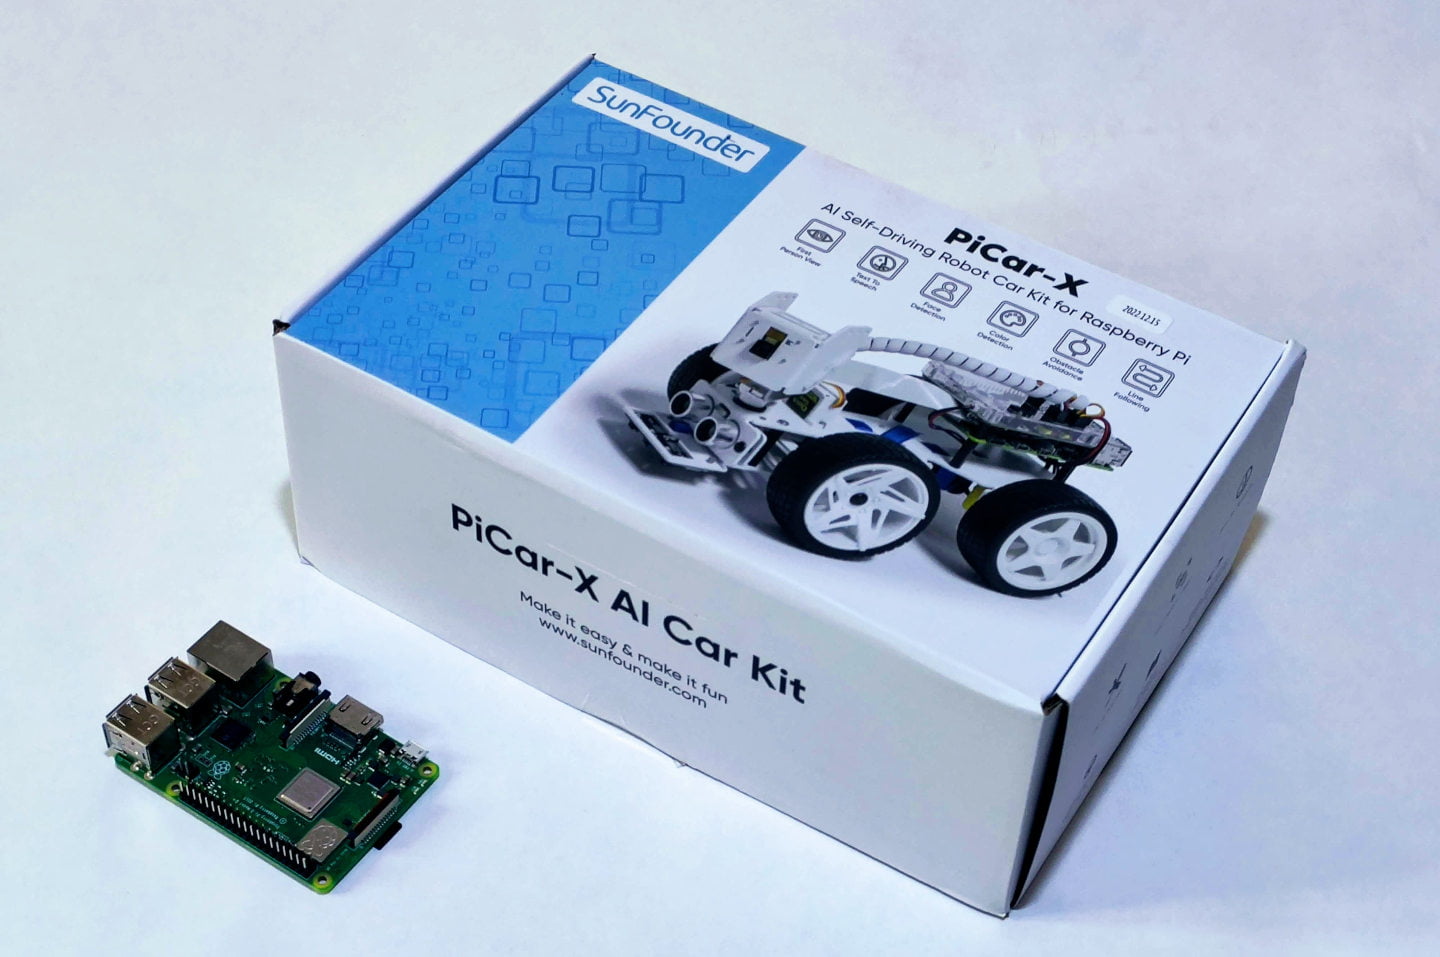
As you can see that they are all well-packed, and I’m very surprised that all the body parts are metal.
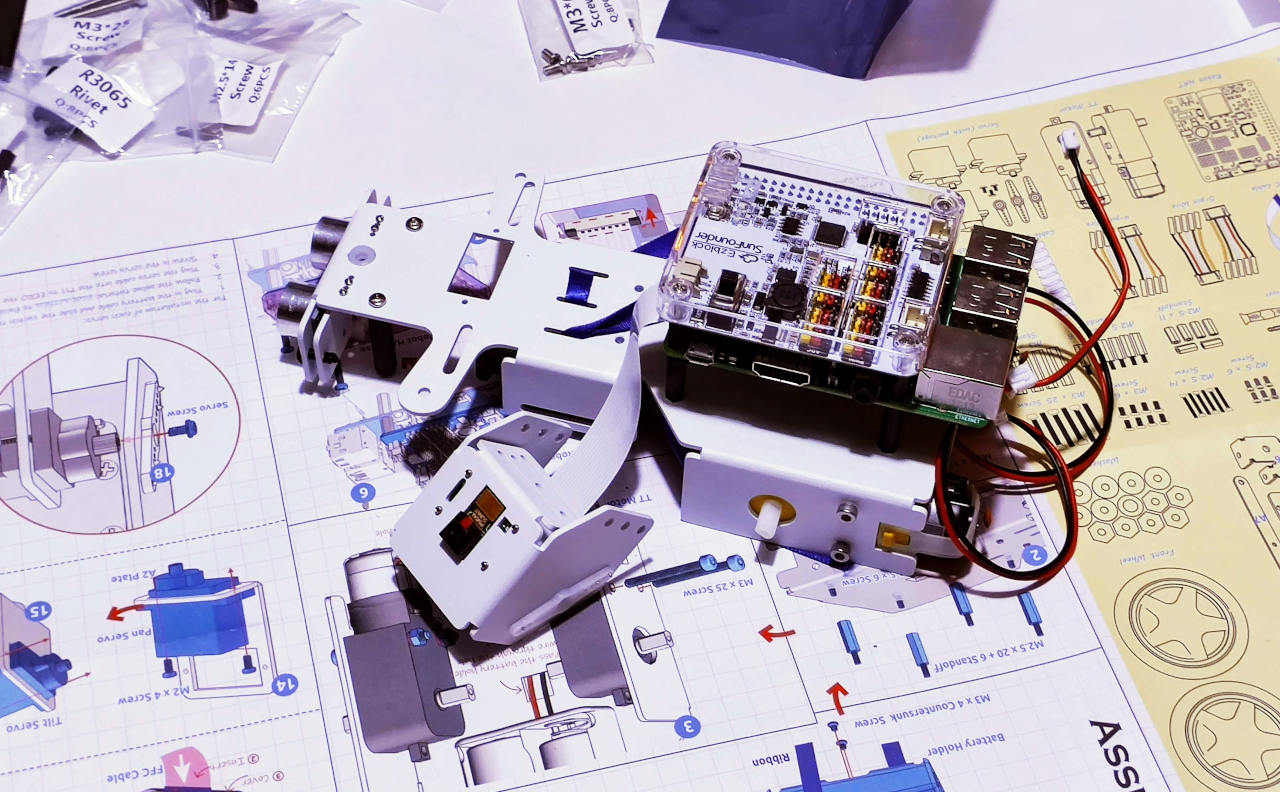
All the steps are very easy.
Also, the Raspberry Pi with HAT fit perfectly.
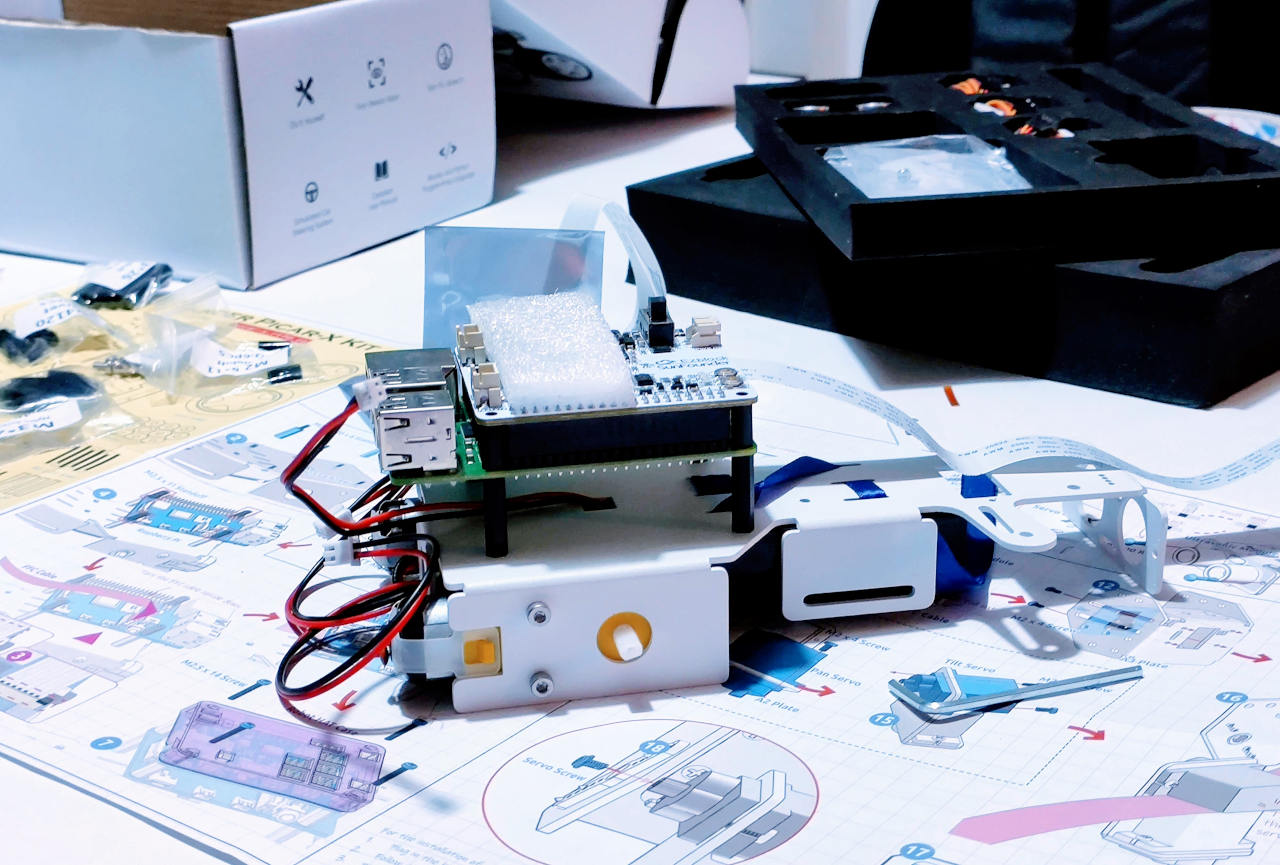
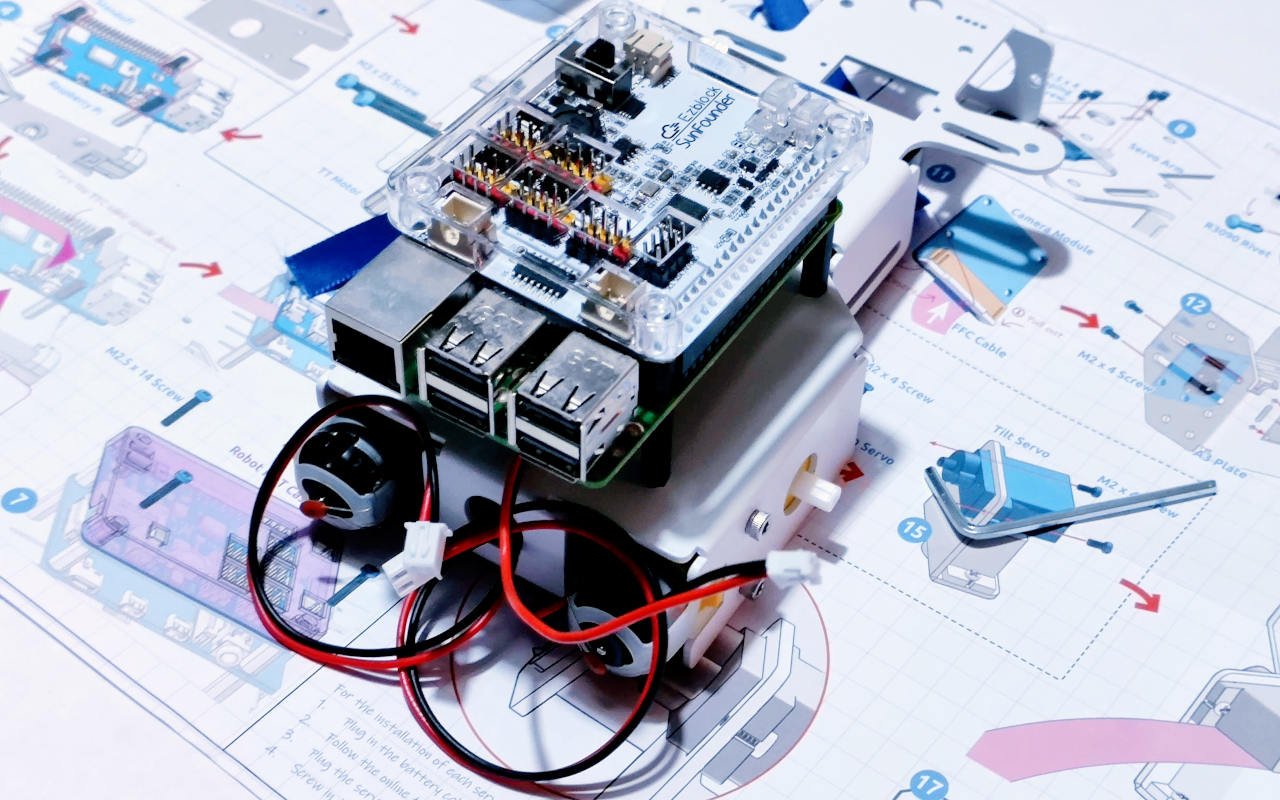
Here is a better view of the HAT.
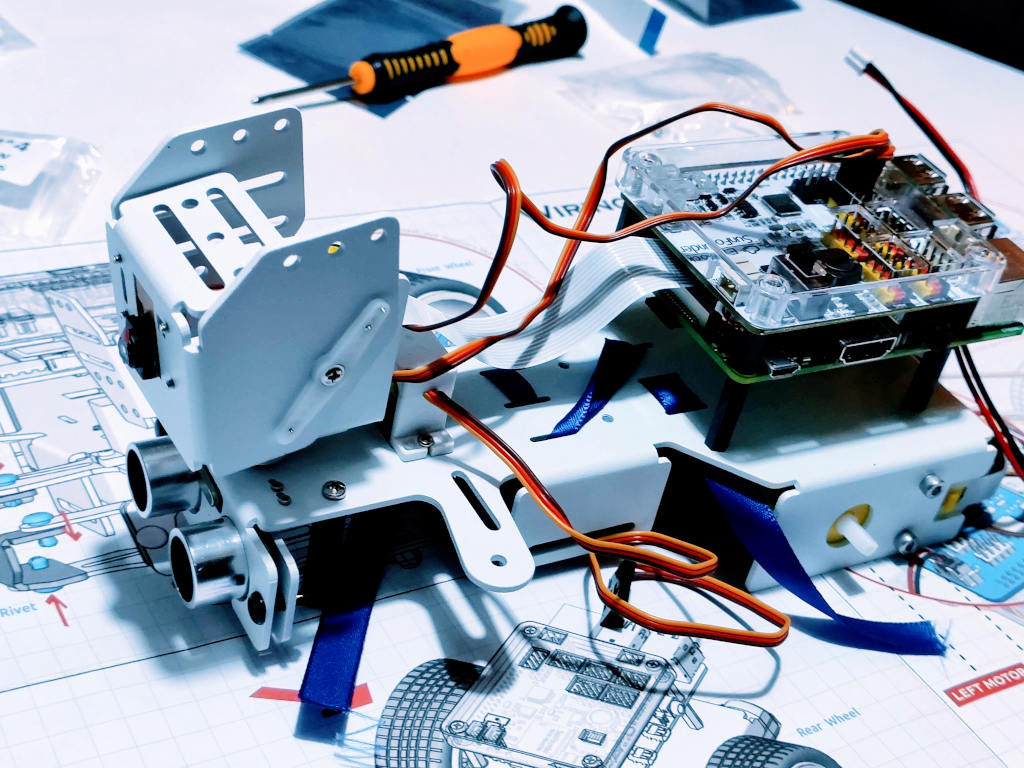
The head of the car with the camera is very small.
It is mounted over two servo motors that allow the camera to move independently in all directions.
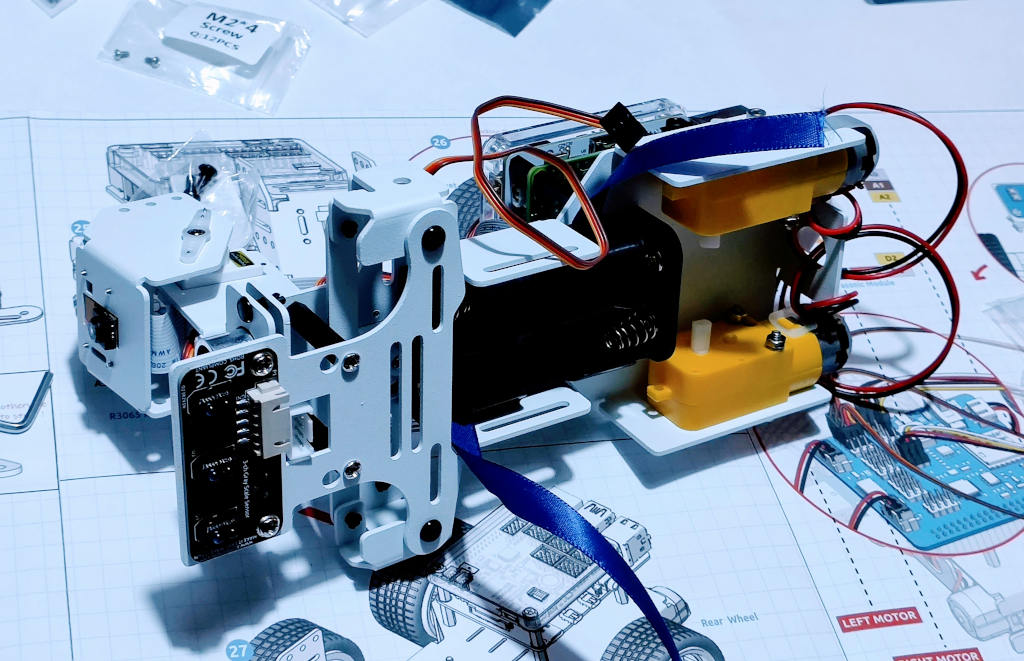
Here is a detail of the wheel studs.
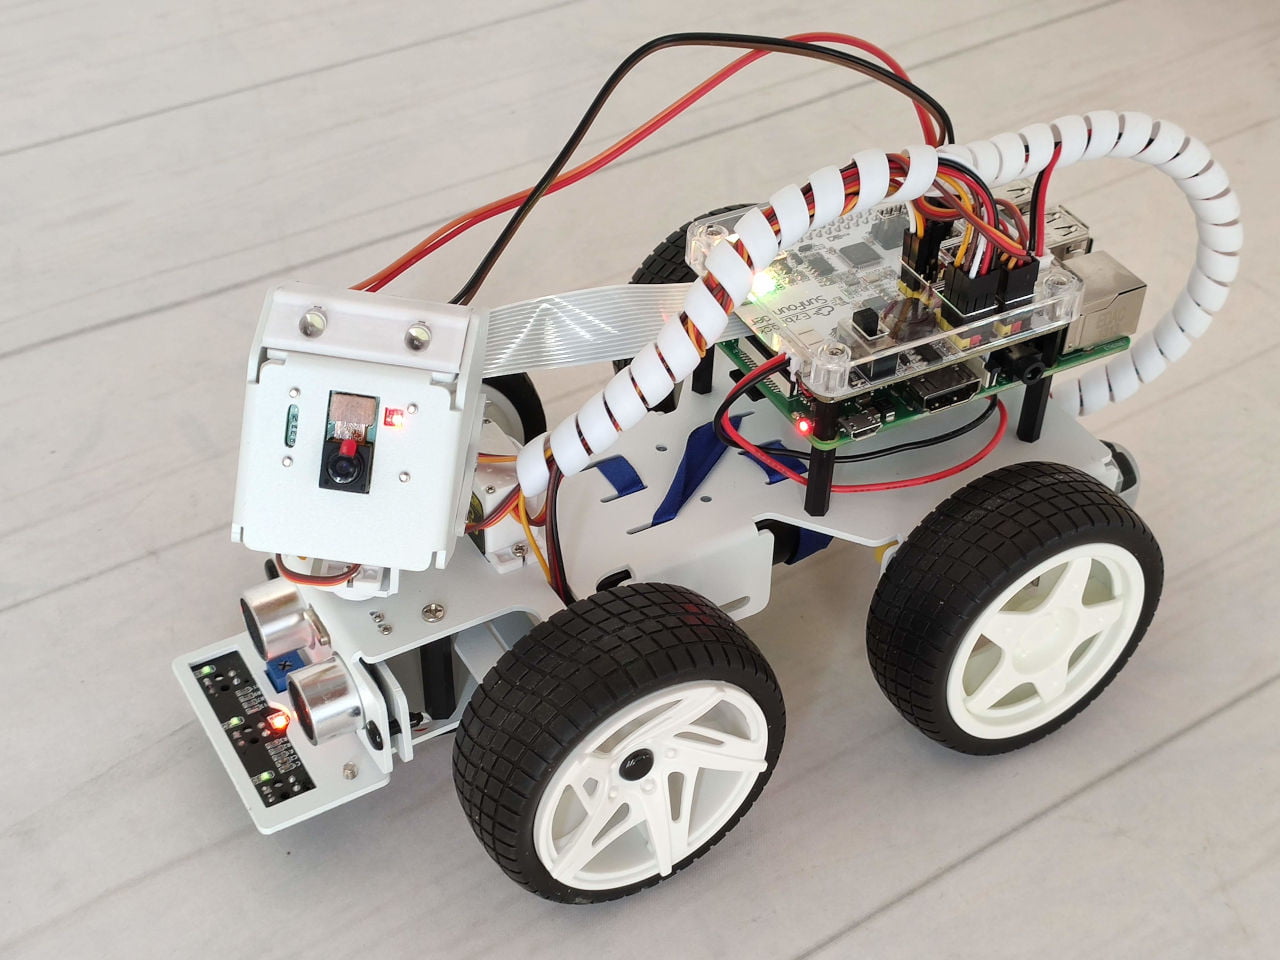
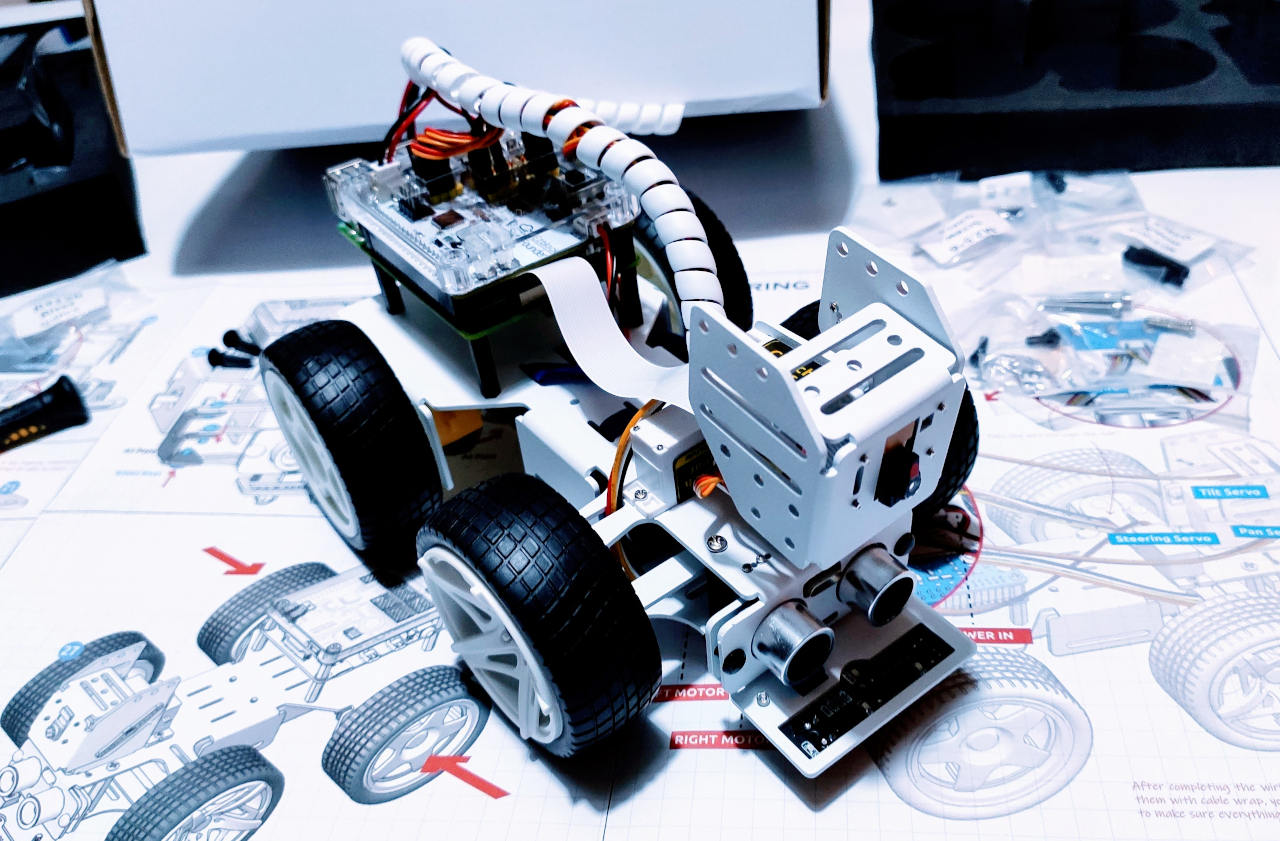
Finally, the car with all elements is very beautiful.
Setting up the Raspberry Pi for EzBlock
Now we have our PiCar-X ready, but we must add the software. There is a dedicated page for the firmware.
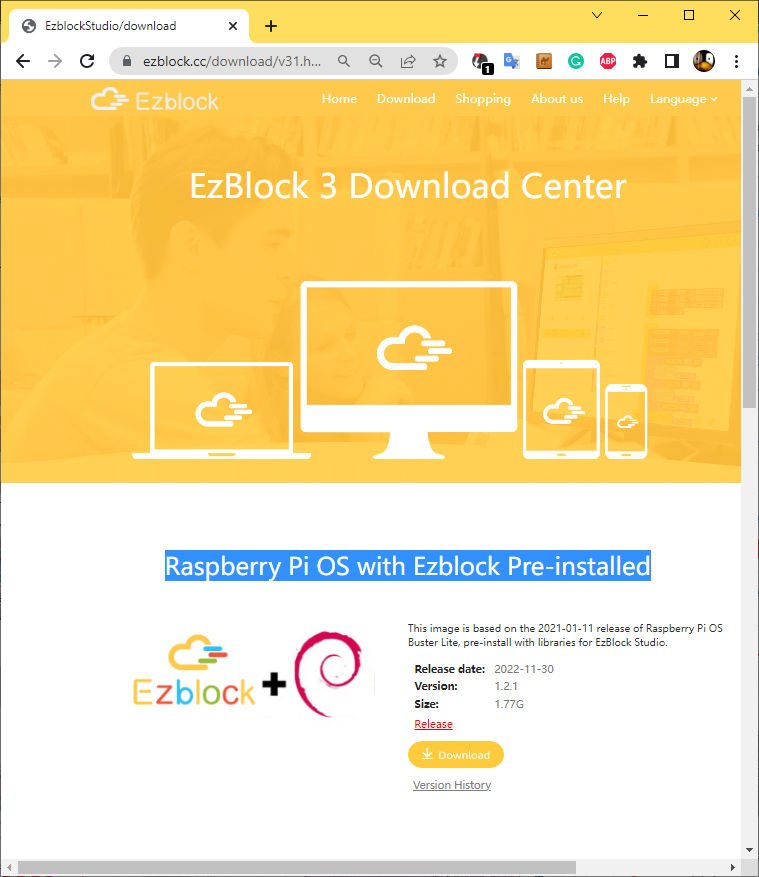
- Download the Raspberry Pi OS with EzBlock firmware preinstalled from here.
- Use an image writing tool like Raspberry Pi Imager to write the downloaded image to your microSD card.
- Insert the microSD card into the Raspberry Pi, connect the power supply, and power it up.
Connecting Ezblock Studio to PiCar-X
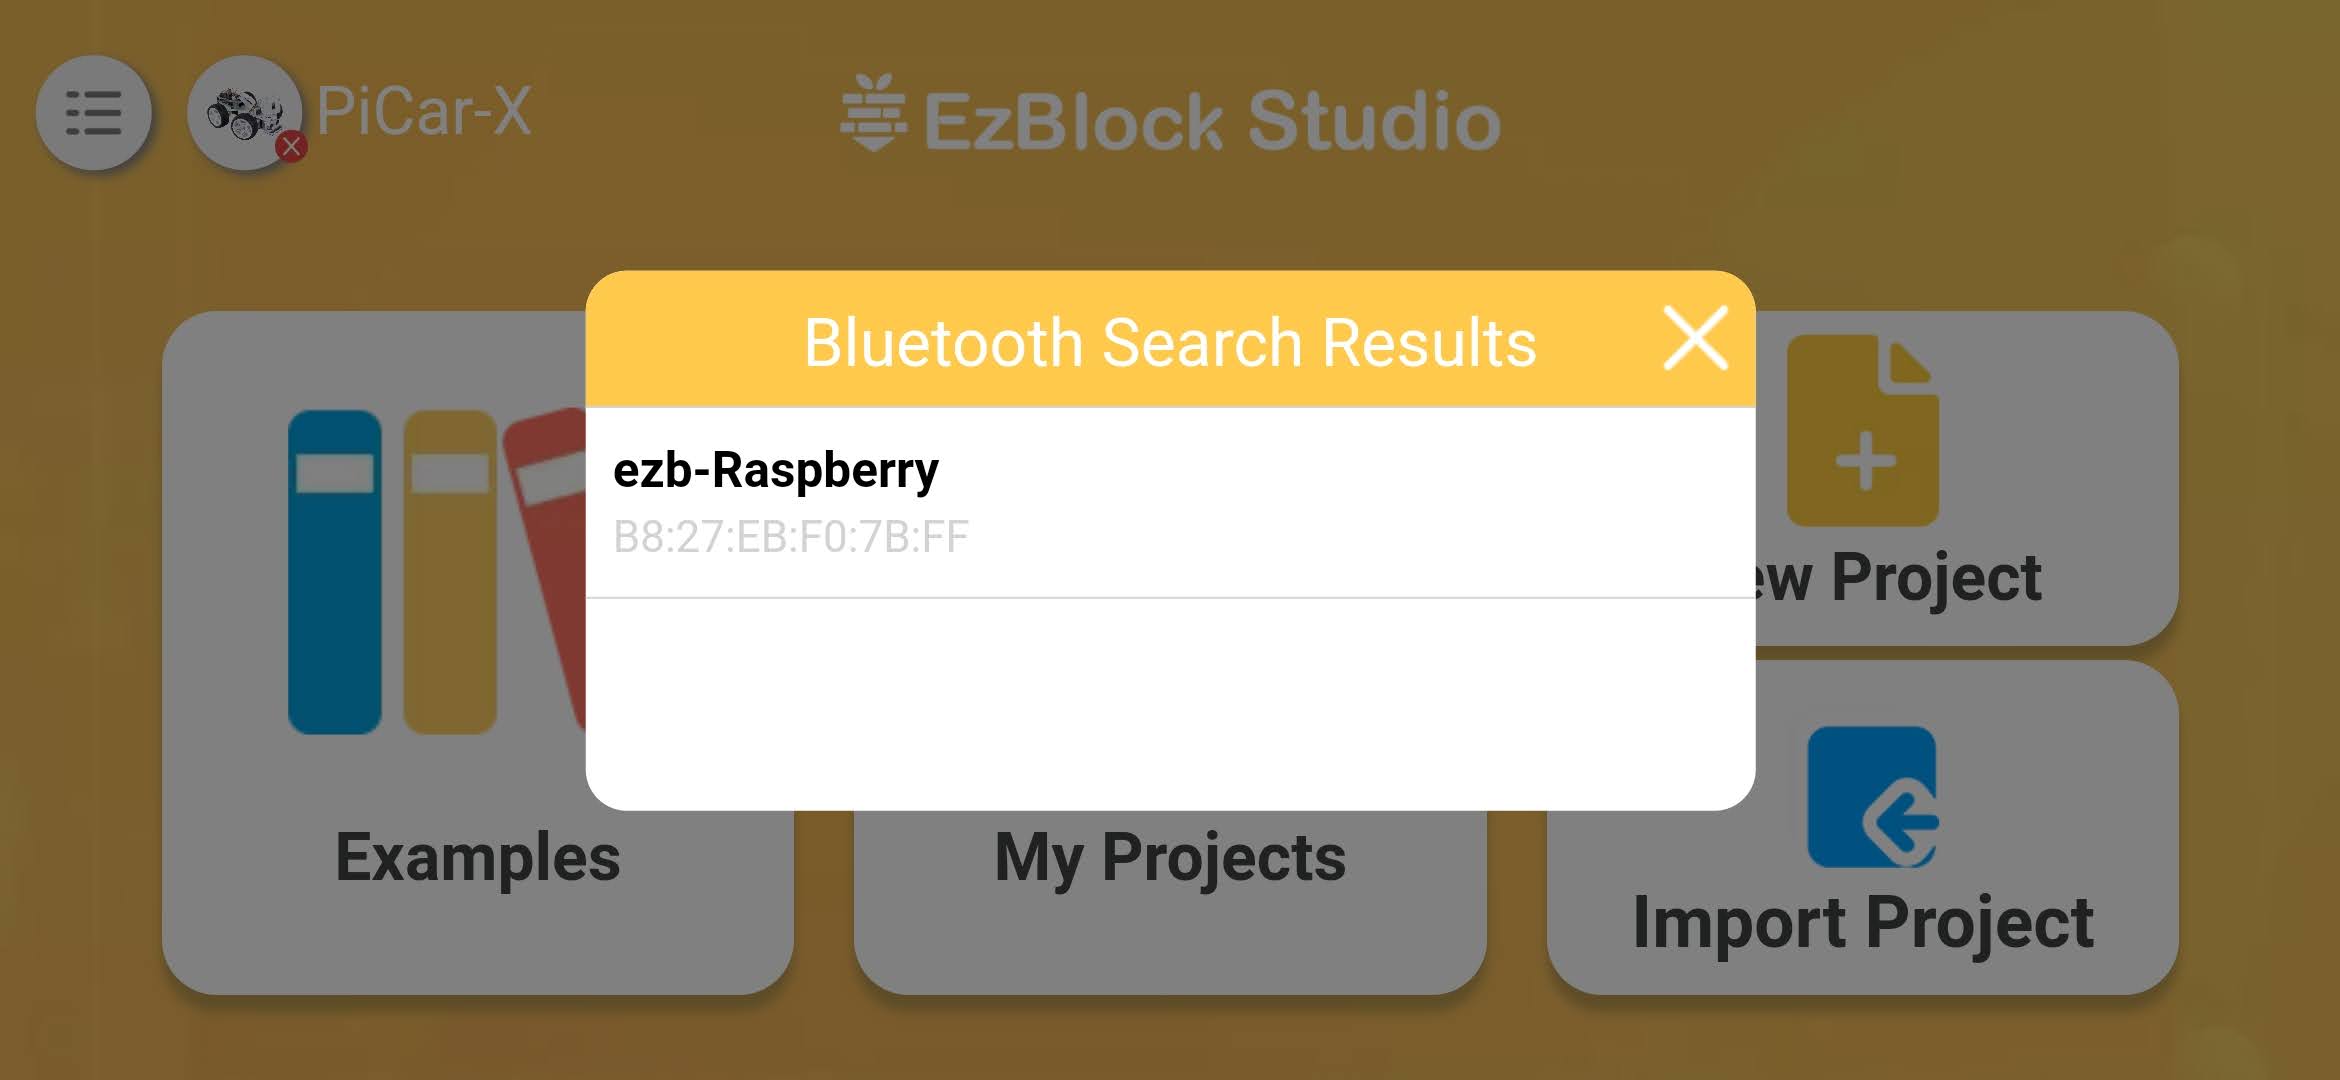
The first time I encourage you to use a mobile device with the EzBlock studio app, because we can use Bluetooth to set the IP address.
- Open the app and select the device.
- Press connect via Bluetooth device are immediately recognized. Click on It.
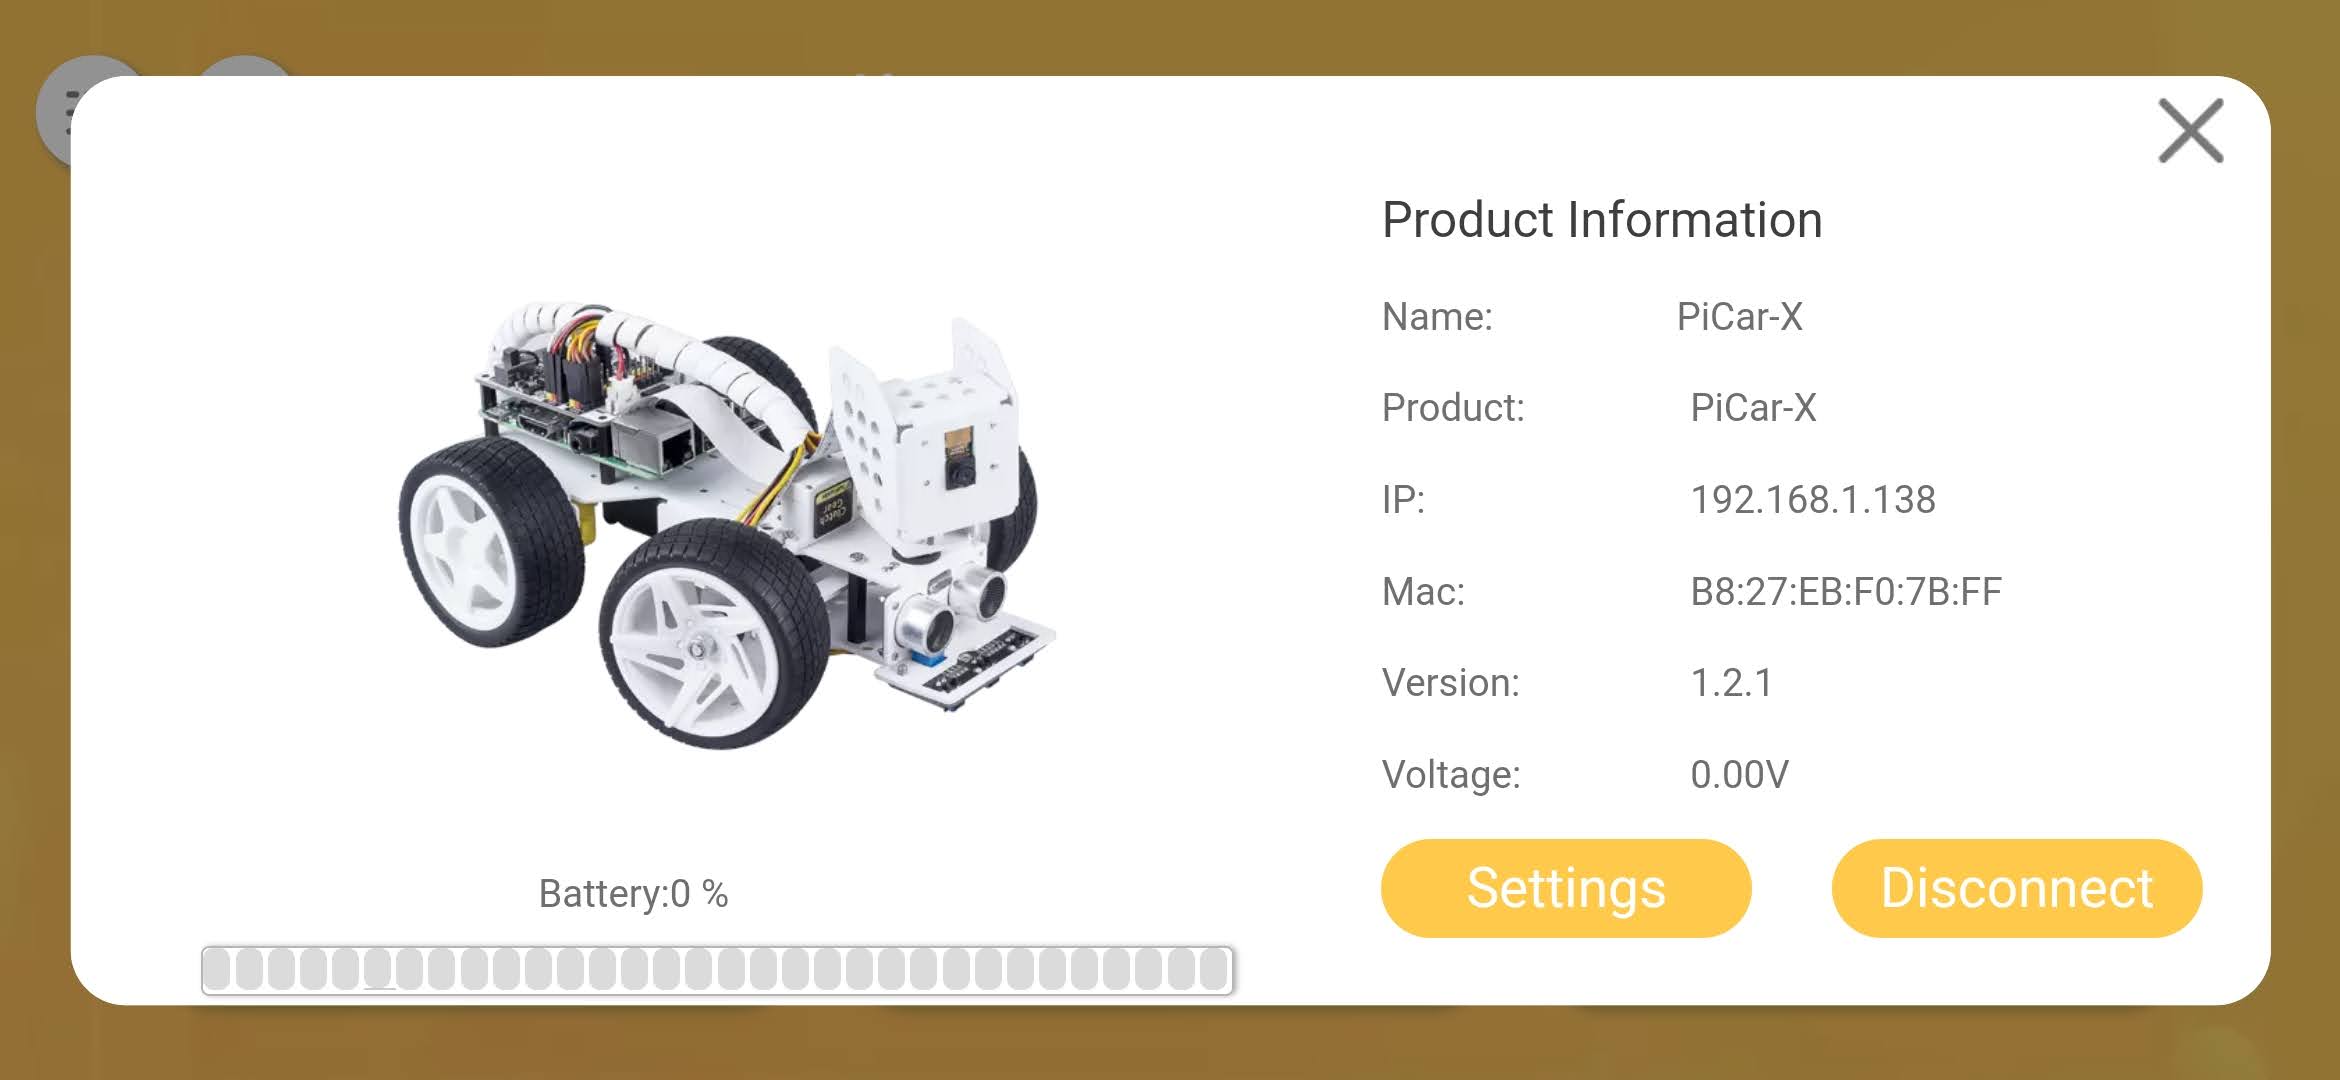
- Now we can go to configure the wifi connection.

- So we can get the IP.
You can start the calibration via the app, but I prefer doing it on my PC.
- Launch the Ezblock Studio on your computer.
- Click on the icon up left and select your device
- On the icon up left and click “Connect.”
- Insert the IP address.
- Once connected, the status should change to “Connected” in the Devices tab.
Start programming with EzBlock
What is EzBlock?
EzBlock is a graphical programming language designed specifically for the PiCar-X. It is an intuitive and easy-to-use programming environment that allows users to create complex programs using drag-and-drop blocks. This means that users do not need to learn a complicated programming language or syntax to create functional programs for the PiCar-X. Instead, they can use a visual interface to design and code their programs.
How does EzBlock work?
EzBlock is based on the Blockly visual programming language. Blockly is an open-source project developed by Google that allows users to create programs using blocks that represent code. These blocks can be dragged and dropped onto a canvas, and they can be connected to form a program. EzBlock takes the Blockly concept and adds PiCar-X specific blocks to create a user-friendly programming environment for the PiCar-X.

EzBlock allows users to control the PiCar-X’s motors, sensors, and other components by dragging and dropping blocks onto a canvas. For example, to make the PiCar-X move forward, users can drag a “set motor speed” block onto the canvas and set the speed value to a positive number. Similarly, to turn the PiCar-X left or right, users can drag a “set motor speed” block onto the canvas and set the speed values for each motor accordingly.
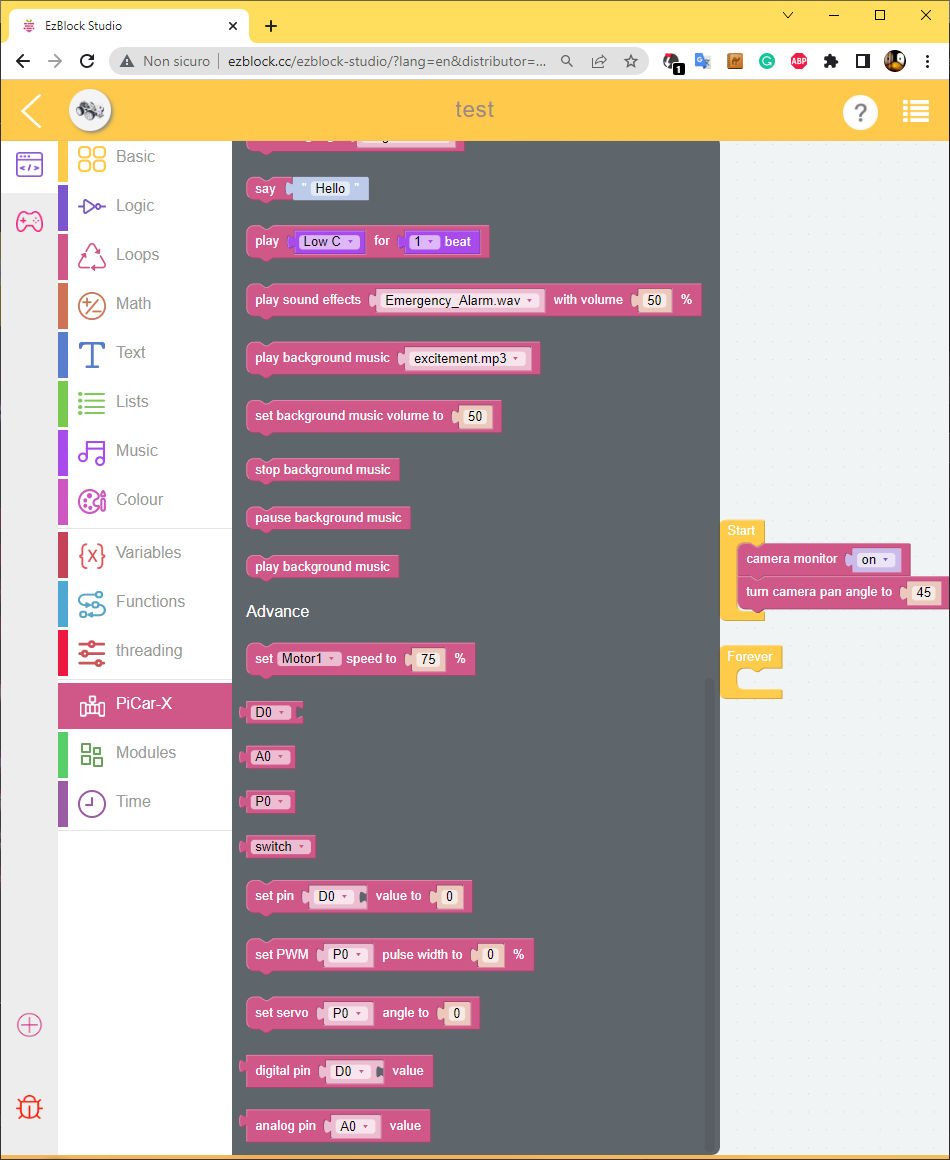
EzBlock also includes blocks for controlling the PiCar-X’s sensors. For example, to use the PiCar-X’s ultrasonic sensor, users can drag a “read ultrasonic sensor” block onto the canvas and specify which sensor port to use. The sensor value can then be used in conditional statements or other blocks to create more complex programs.
The EzBlock programming IDE includes an instrument section that provides users with various tools to control and interact with their PiCar-X. The instrument section can be found on the right-hand side of the IDE and includes several components, such as the joystick, slider, video, and more.
The joystick component allows users to control the movement of the PiCar-X using a virtual joystick. This joystick can be dragged around the screen to control the direction of the PiCar-X, and users can adjust the sensitivity of the joystick to fine-tune their control.
The slider component provides users with a way to adjust the speed of the PiCar-X. This slider can be dragged left or right to adjust the speed of the PiCar-X, and users can set the maximum and minimum speed values for their specific needs.
The video component displays live video feed from the PiCar-X’s camera. This allows users to see what the PiCar-X sees and can be used for remote control and autonomous driving.
Overall, the instrument section of the EzBlock programming IDE provides users with a variety of tools to control and interact with their PiCar-X. These components make it easy for users to program and control the PiCar-X without having to write complex code or use external hardware.
Why use EzBlock for programming the PiCar-X?
There are several reasons why EzBlock is a great option for programming the PiCar-X:
Easy to use
EzBlock’s drag-and-drop interface makes it easy for users to create functional programs for the PiCar-X without having to learn a complex programming language or syntax.
PiCar-X specific blocks
EzBlock includes PiCar-X specific blocks that allow users to control the PiCar-X’s motors, sensors, and other components without having to write low-level code.
Raspberry Pi HAT
Now we are going to do a simple example. First of all I’d like to show the HAT and Its specs.
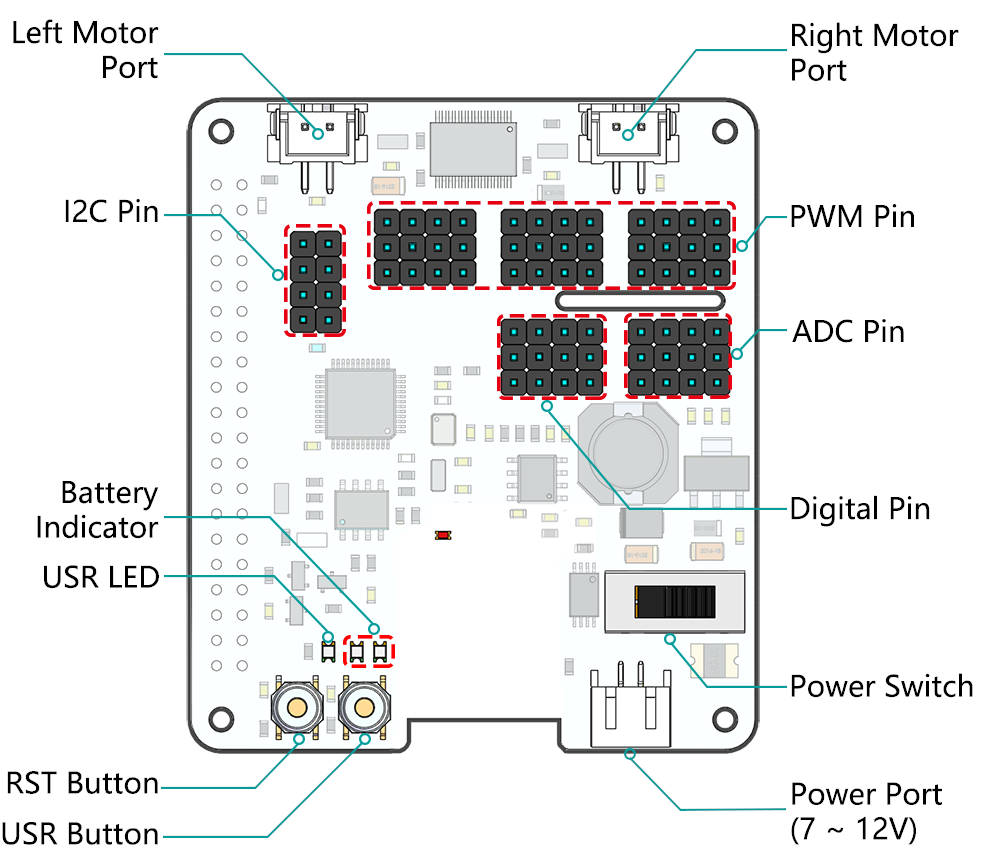
Left/Right Motor Port
- 2-channel XH2.54 motor ports.
- The left port is connected to GPIO 4 and the right port is connected to GPIO 5.
I2C Pin
- 2-channel I2C pins from Raspberry Pi.
PWM Pin
- 12-channel PWM pins, P0-P12.
ADC Pin
- 4-channel ADC pins, A0-A3.
Digital Pin
- 4-channel digital pins, D0-D3.
Battery Indicator
- Two LEDs light up when the voltage is higher than 7.8V.
- One LED lights up in the 6.7V to 7.8V range.
- Below 6.7V, both LEDs turn off.
USR LED
- Set by your program. (Outputting 1 turns the LED on; Outputting 0 turns it off.)
RST Button
- Short pressing RST Button causes program resetting.
- Long press RST Button till the LED lights up then release, and you will disconnect the Bluetooth.
USR Button
- The functions of USR Button can be set by your programming. (Pressing down leads to a input “0”; releasing produces a input “1”. )
Power Switch
- Turn on/off the power of the robot HAT.
- When you connect power to the power port, the Raspberry Pi will boot up. However, you will need to switch the power switch to ON to enable Robot HAT.
Power Port
- 7-12V PH2.0 2pin power input.
- Powering the Raspberry Pi and Robot HAT at the same time.
Simple example
I’d like to add two led to have light when I want, so we will “upgrade” the PiCar-X. We use the PWM pins so we can manage the light intensity.
3D printed led adapter
I created a simple adapter to add two led in the head of PiCar-X.
Code
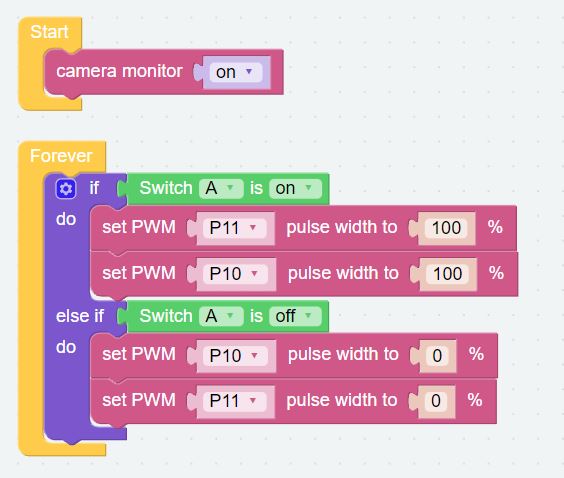
Here is a simple Blink sketch with two LEDs connected to P11 (anode on yellow and cathode on black) and P10.
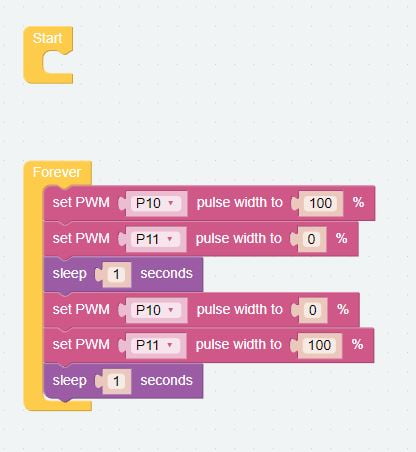
The result is this.
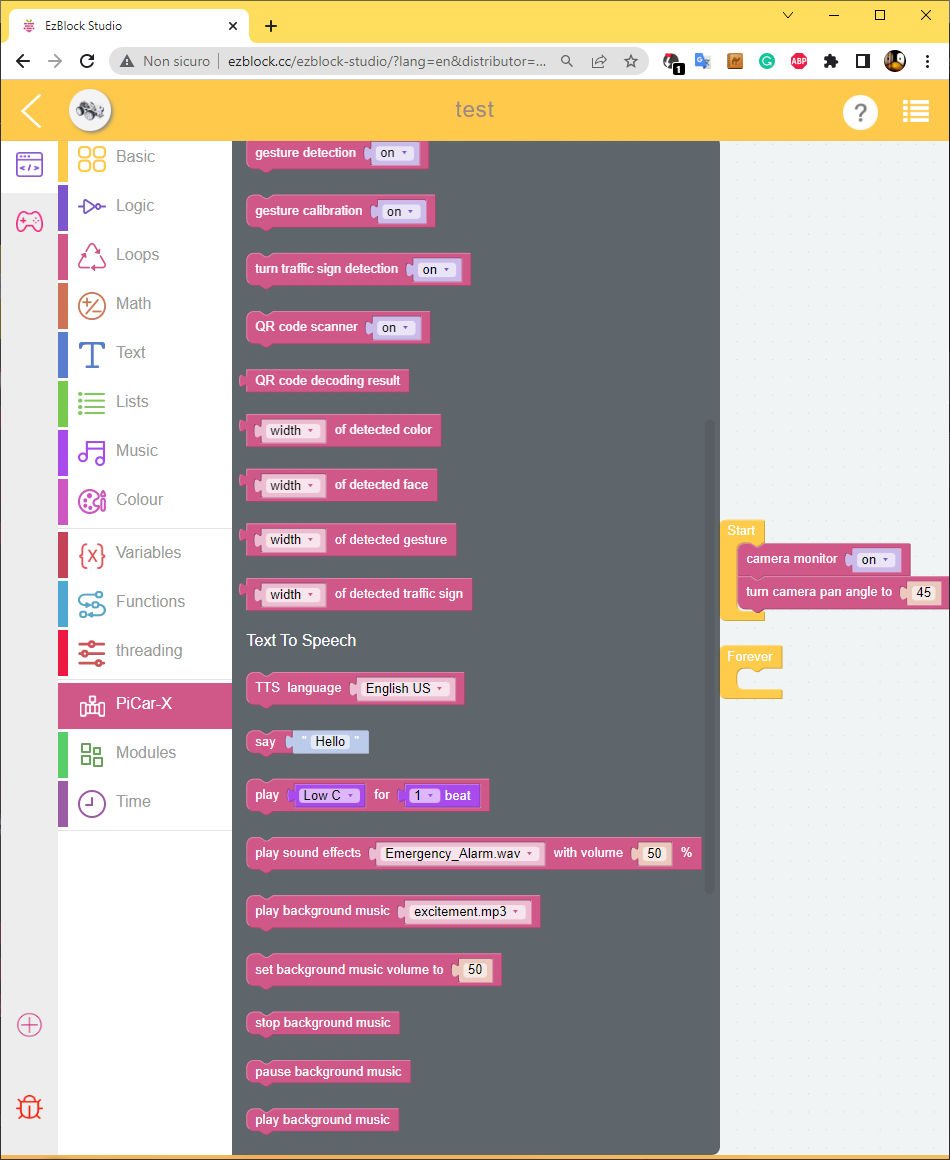
Control camera and light
Now we are going to use the virtual control tools given by the platform.
I create a simple program that allows us to turn on or off the less and view the camera on the screen.
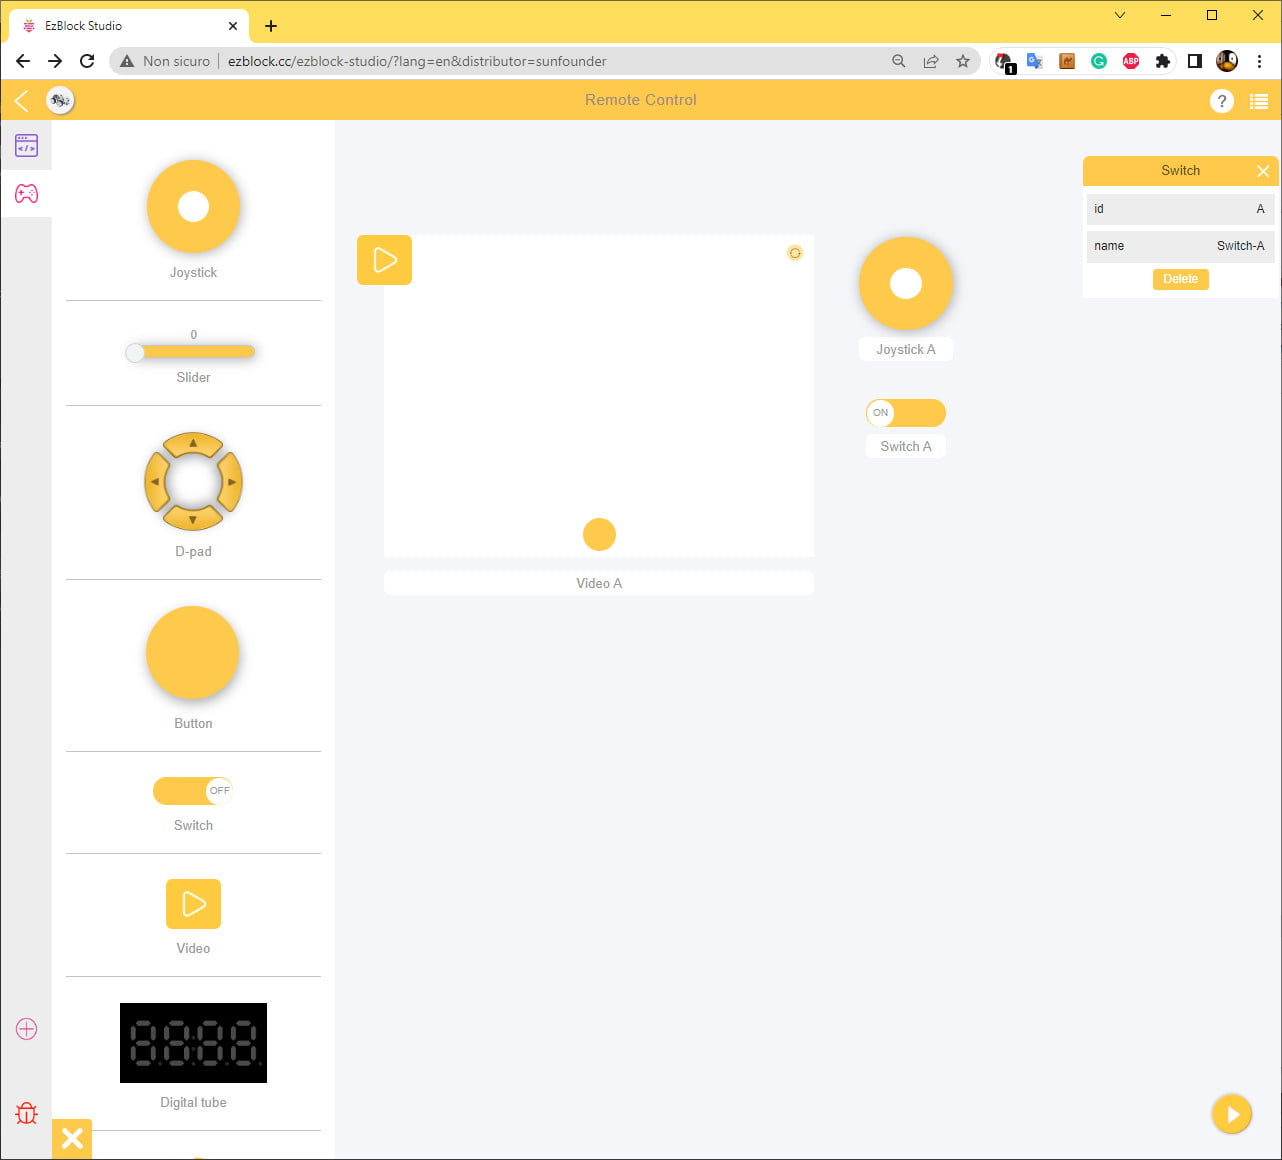
Here is the tab that allows you to add controls to create the user interface.
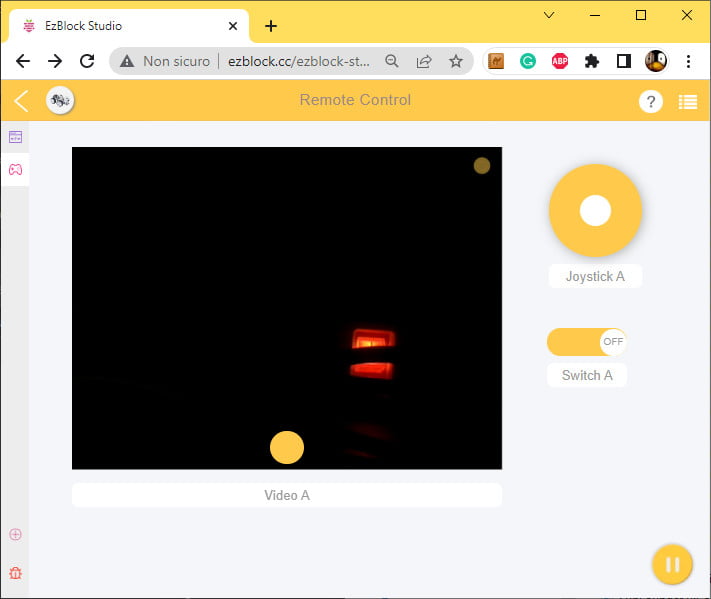
The result with LEDs off.
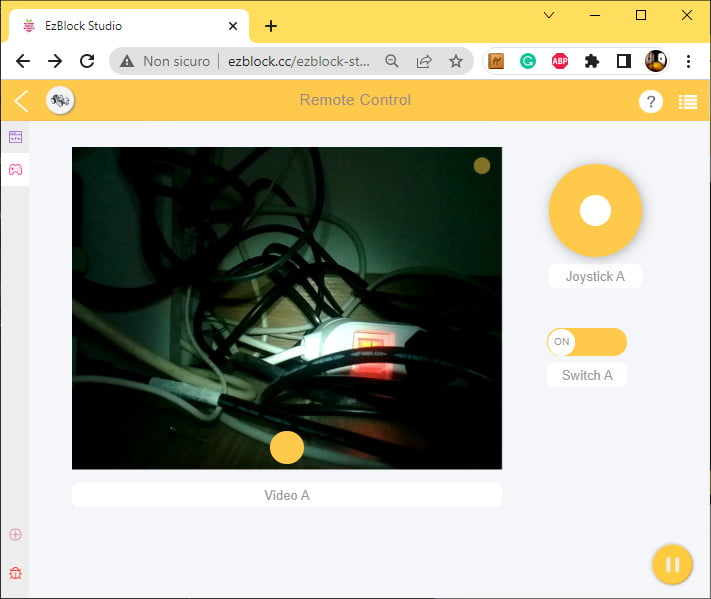
And with LEDs on.
Thanks
The PiCar-X is a highly versatile, AI-driven self-driving robot car that caters to users of all ages and programming experience levels. Its extensive documentation, support for multiple programming languages, and a wide range of features make it an excellent educational tool and an engaging way to learn about robotics, computer vision, and programming.
Whether you’re a beginner interested in exploring the world of programming and robotics or an advanced programmer looking for a platform to experiment with AI and computer vision, the PiCar-X offers something for everyone. With its diverse range of features and applications, the PiCar-X can be a valuable addition to any robotics enthusiast’s toolkit.