
Ciclop 3D scanner: component printing and assembly – 1
I built the Ciclop 3D scanner, and I encountered some problems, such as the disappearance of the documentation from the web, now it is more difficult to find materials and components and more, I hope to allow others to overcome the problems I have had in this series of articles.
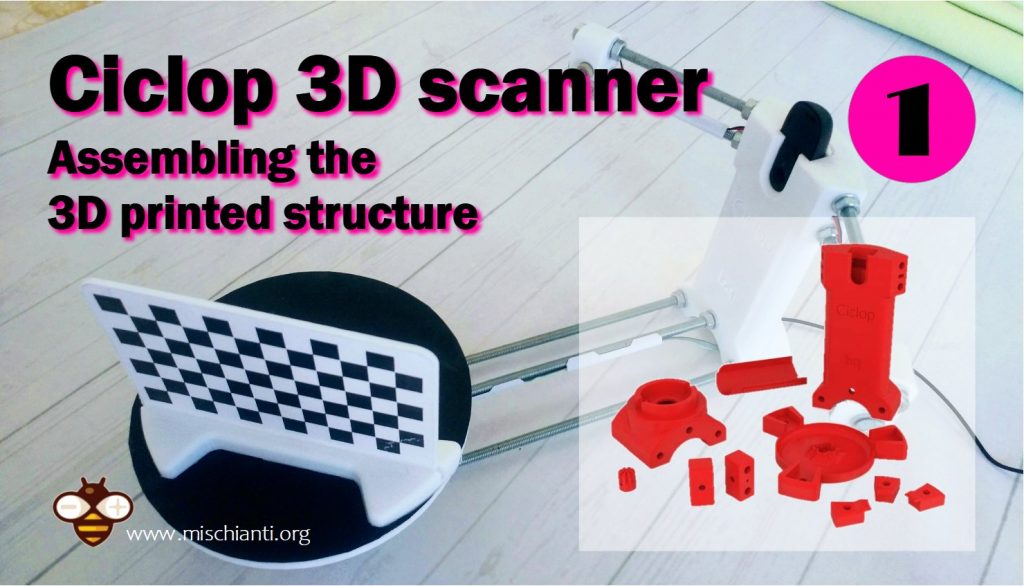
In this article I enter all the steps for 3D printing and assembling the structure, I have made some corrections to simplify the process.
Printing and Assembly Parts
The original documentation has disappeared from the internet, so I retrieve some documents in exotic languages and take the photos to write this assembly tutorial.
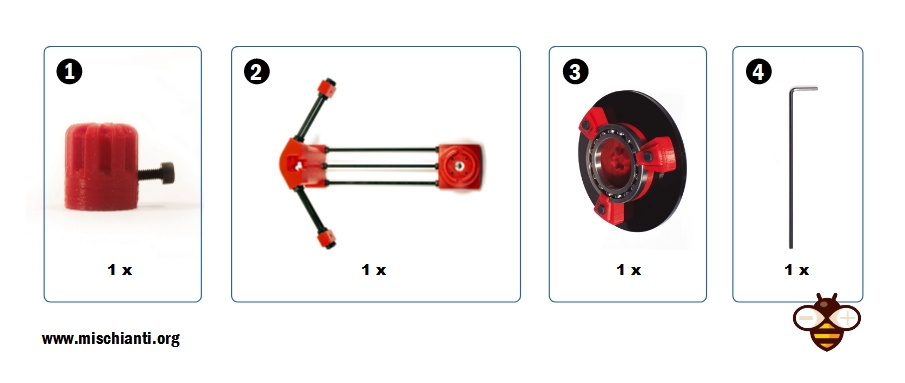
- 1 x Ball bearing 16014
- 1 x Black methacrylate disc Ø200 x 8 mm
- 3 x Bearing anchor printed part
- 1 x Non-slip surface Ø200 mm
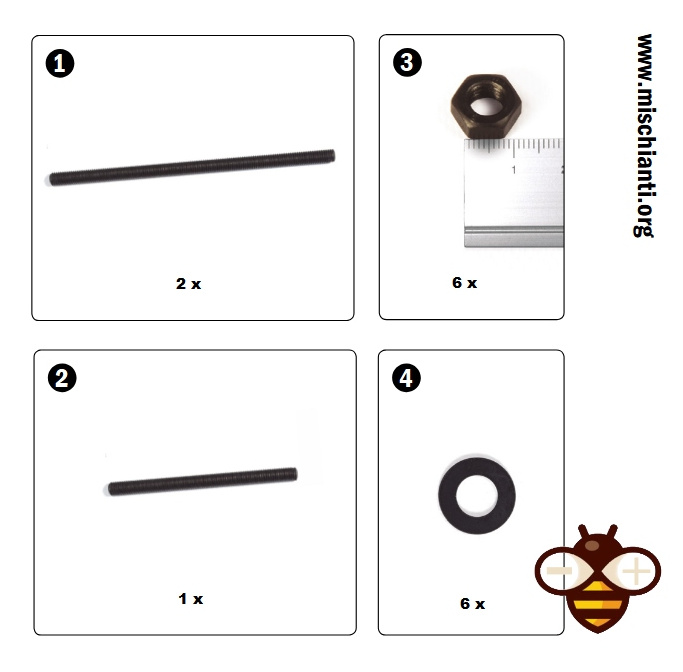
- 2 x Black threaded rod M8 x 400 mm
- 1 x M8 x 292mm Black Threaded Rod
- 4 x Black threaded rod M8 x 170 mm
- 1 x Printed part of motor bracket
- 1 x Camera Bracket Printed Part
- 2 x Printed laser holder part
- 1 x Printed part of motor-disc socket
- 1 x Nema bipolar stepper motor (1.7A 1.8 deg / step) with connector *
- 7 x Screw M3 x 10 mm – DIN-912 class 8.8 black
- 3 x Screw M8 x 30 mm – DIN 931 class 8 black
- 3 x M3 nut – DIN 934 class 8 black
- 28 x M8 nut – DIN 934 class 8 black
- 18 x Washer M8 – DIN-125 class 6 black
- 6 x Non-slip silicone drops
- 1 x Allen key
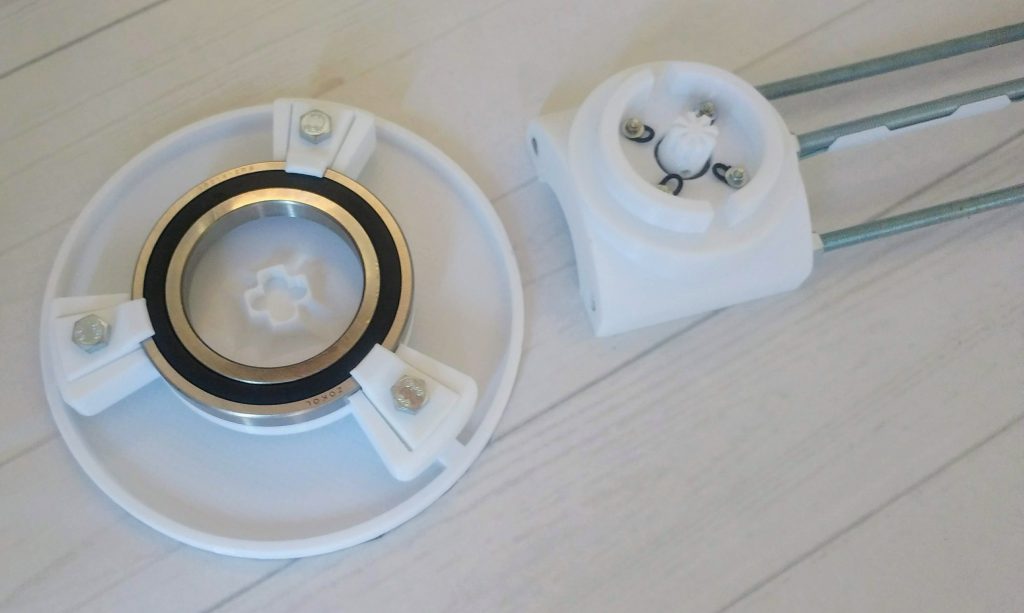
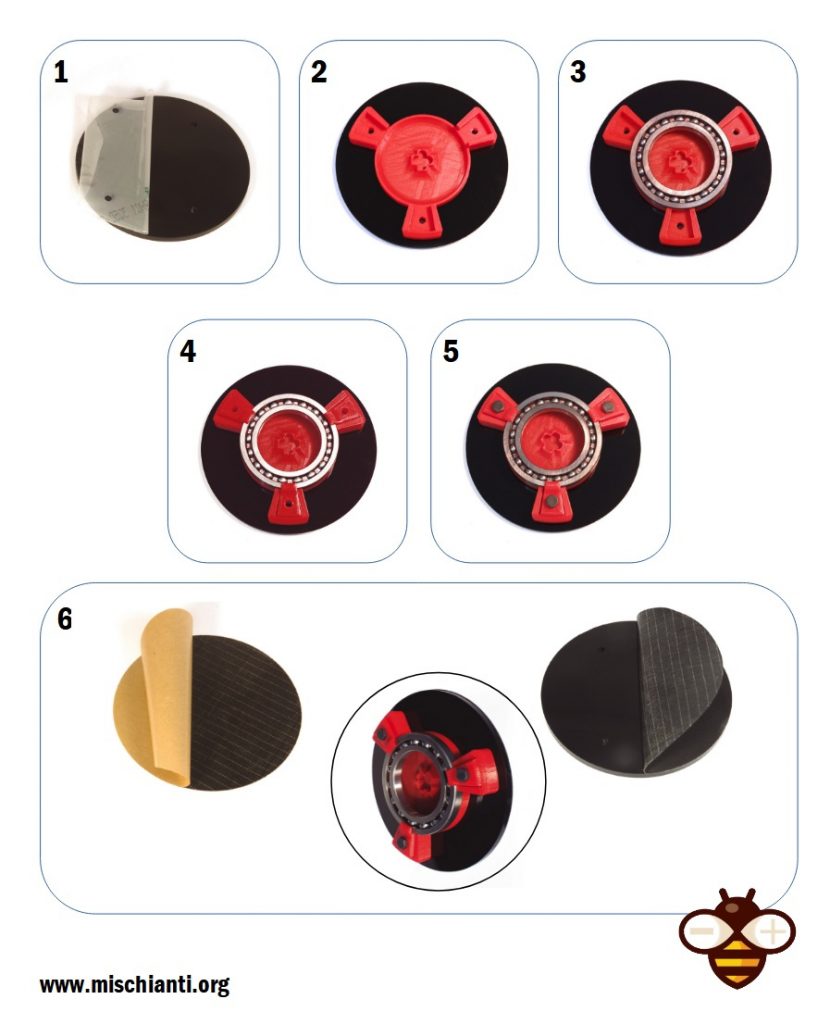
Disk mounting
I created a simple STL to allow you to print the disc with the 3D printer to replace the methacrylate one, refer to “3D Printed base for Ciclop 3D Scanner“.
Here the list of material.
You can find here Aliexpress Ball Bearing 16014
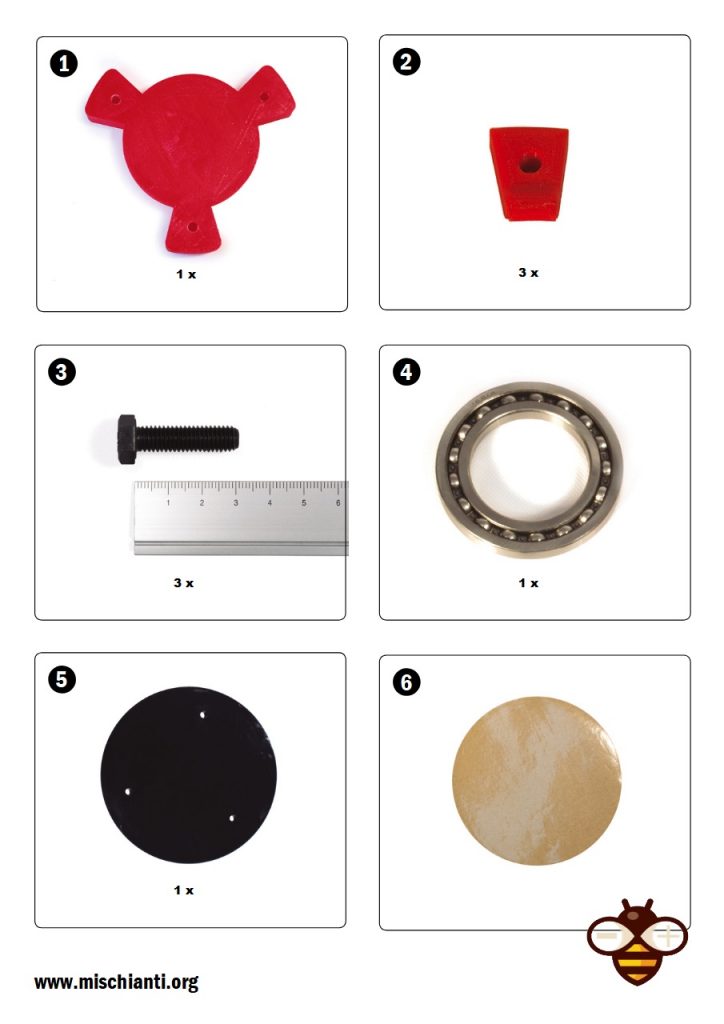
- Disc holder printed part
- Bearing anchor clip
- M8 x 30 mm screw
- Ball bearing 16014
- Methacrylate disc Ø200 mm
- Non-slip surface Ø200 mm
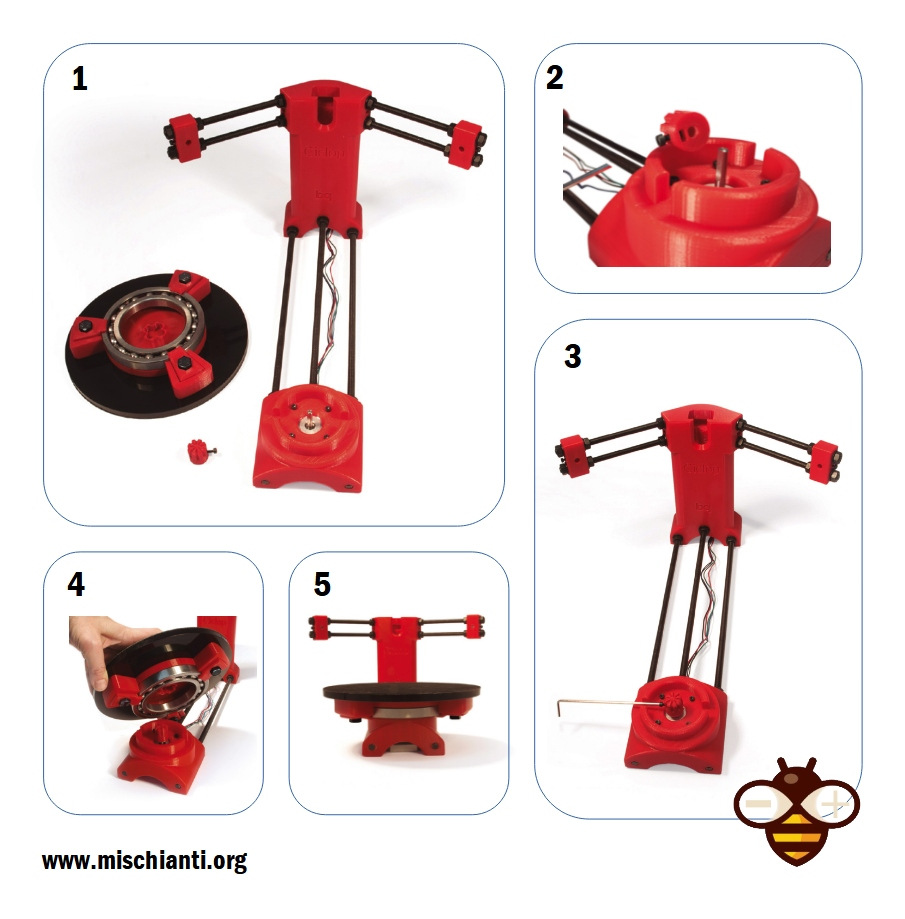
Hold the disc (5), on its bracket (1) and bearing anchor clips (2) together when tightening each screw.
To tighten the screws use a 13 mm spanner.
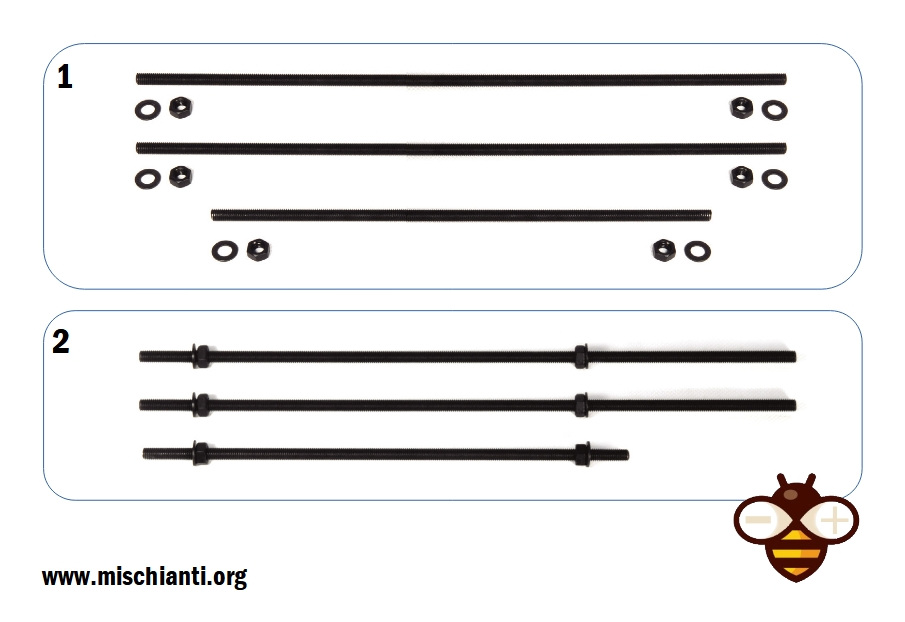
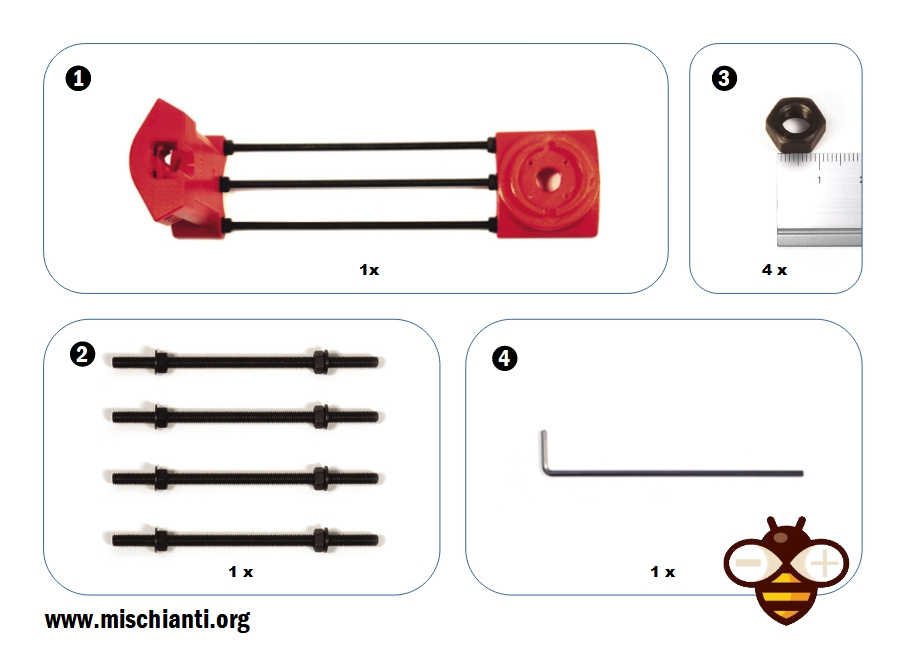
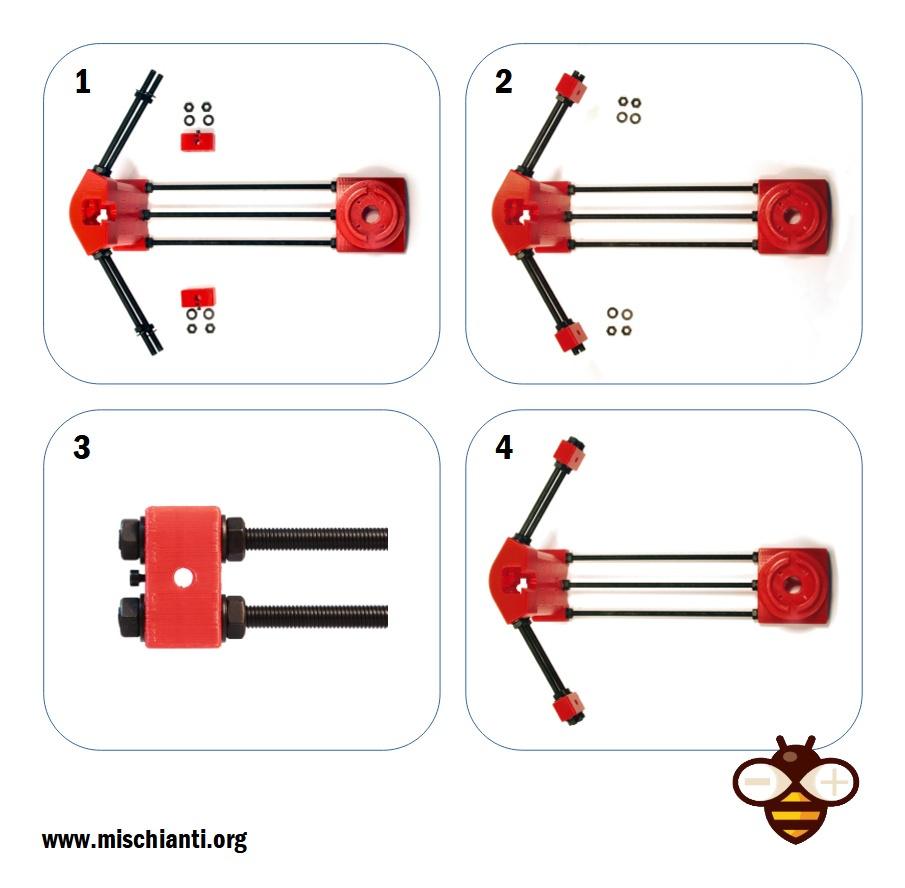
Assembly of the structure: preparation of the rods
- Newly assembled elements
- Nut M8
- Camera support printed part
- Printed motor support part
Insert the screw and nut like the image.
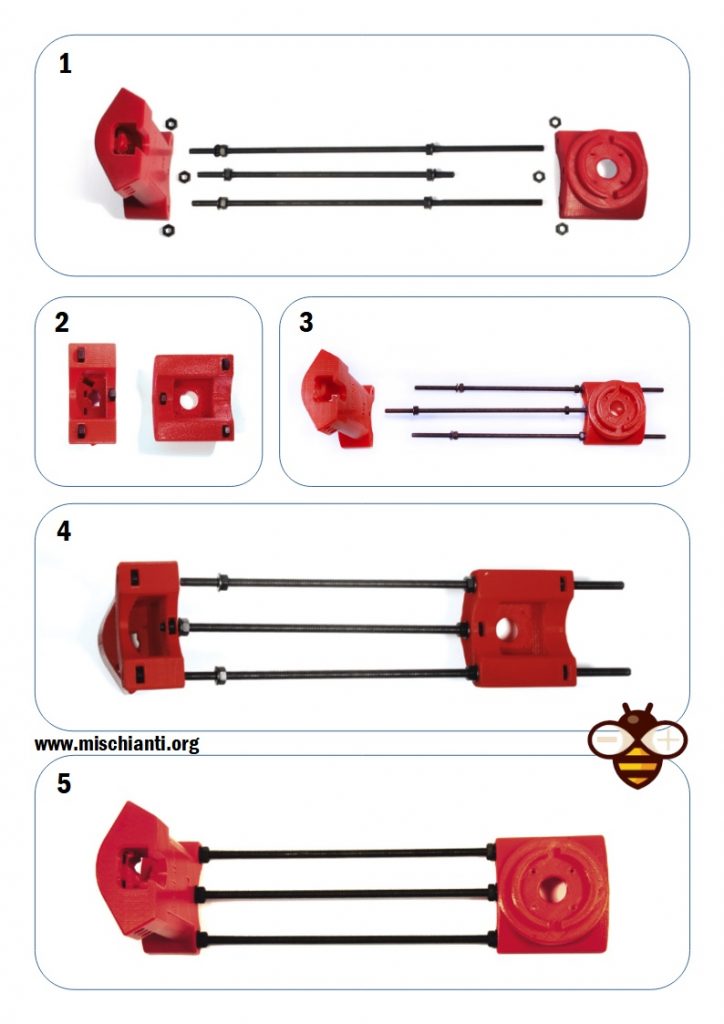
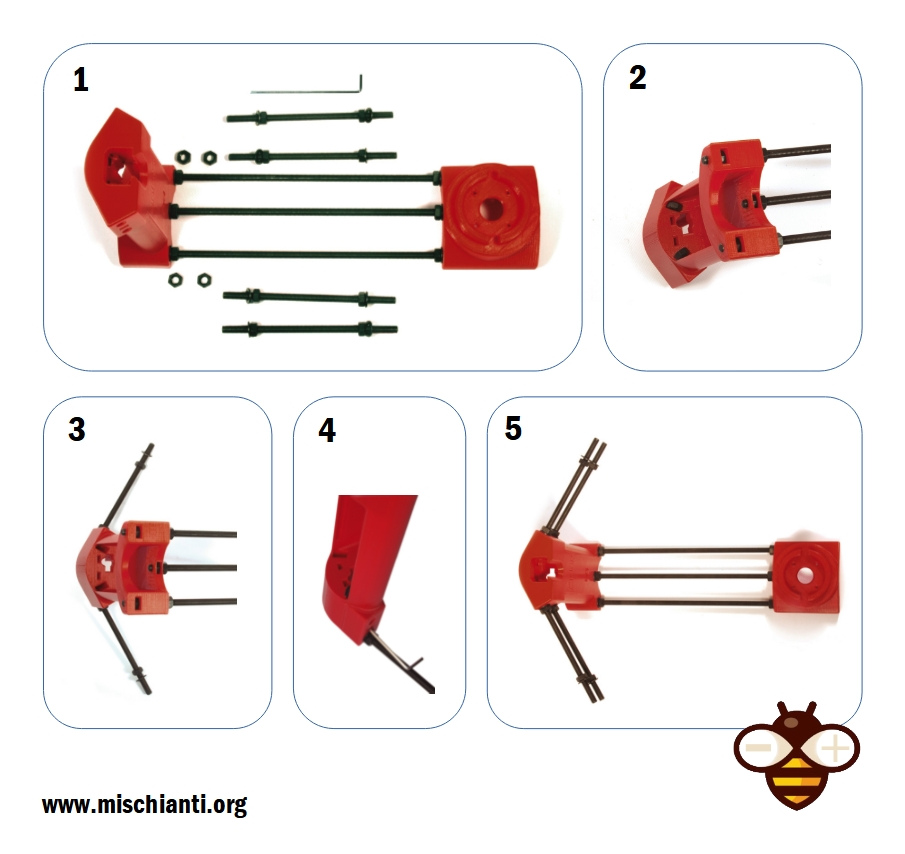
Assembly of the structure: thread central rods
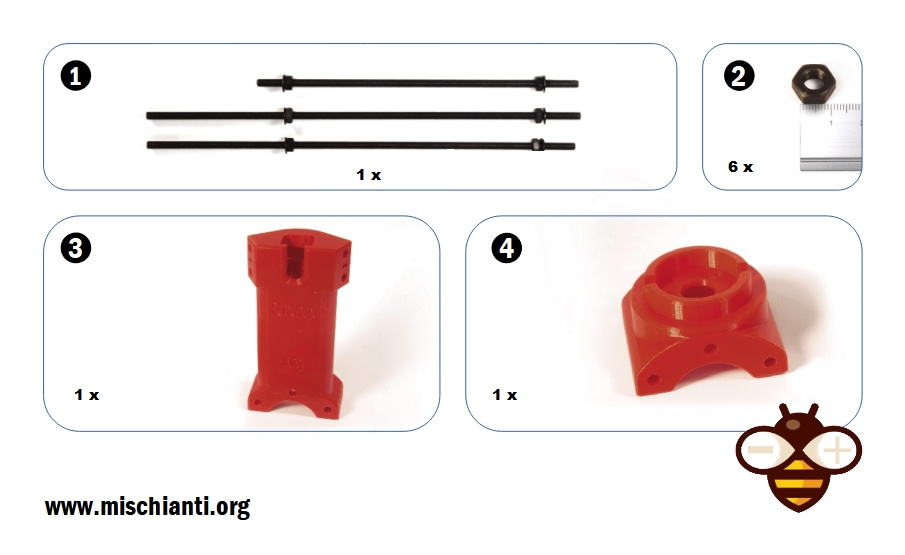
- Threaded rod just assembly
- Nut M8
- Camera bracket printed part
- Printed motor support part
First insert the central and shorter rod into the motor mount, then fit the two longer rods at each end. The nuts must snap into the holes underneath each piece. If not, file the gap a bit.
Assembly of the structure: preparation of the lasers support rods

- Black threaded rod M8 x 170 mm
- Nut M8
- Washer M8
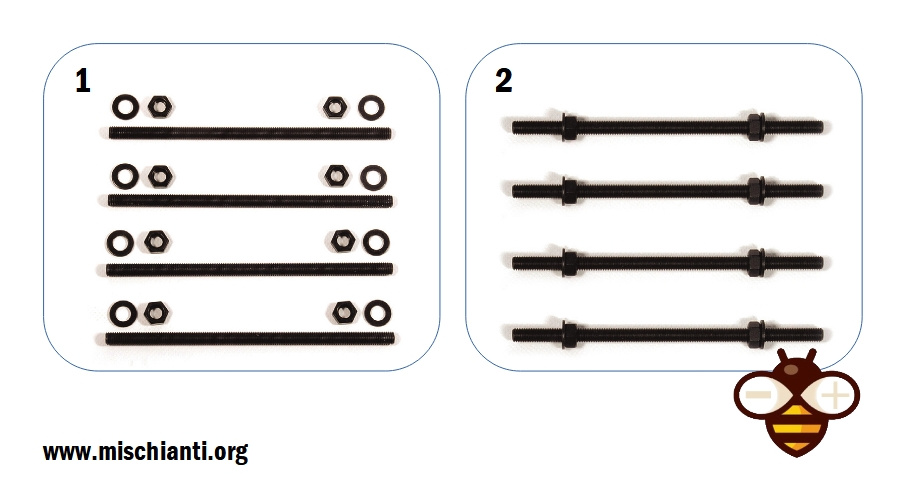
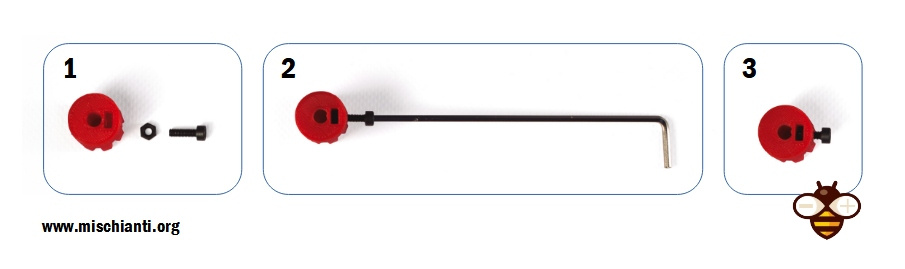
Assembly of the structure: thread lasers rods
- Assembled structure
- Threaded rods just assembled
- Nut M8
- Allen wrench
Insert the Allen key (3) to retain the nut, put it in place and screw the rod into the nut.
Assembly of the structure: prepare lasers part
Another problem is that you can probably find a low cost laser that don’t fit on orginal holder.
The common laser is 12mm laser.
You can find laser here AliExpress
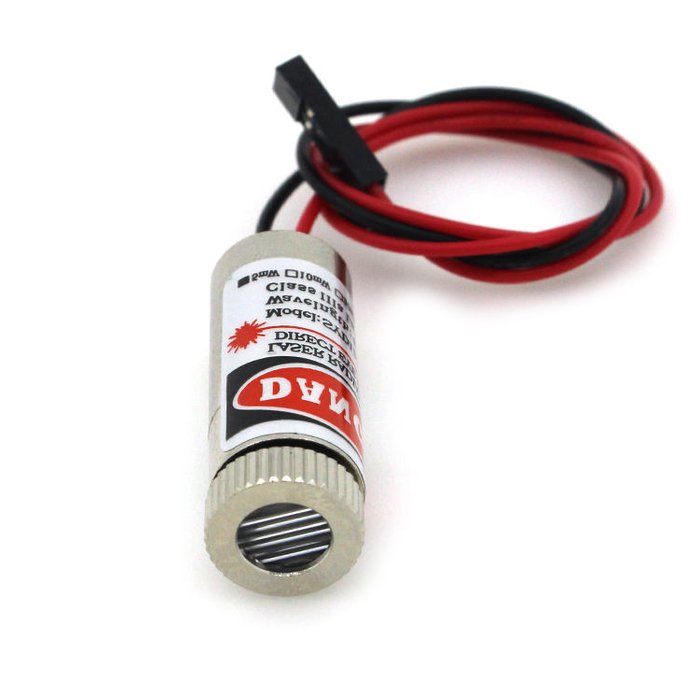
So you must use this 3D printed variant.
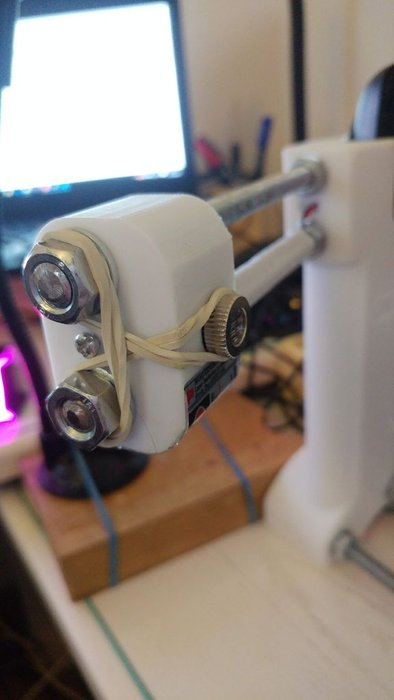
Another problem is to stop the rotating part, I think the better solution is to use a rubber band, as you can see in the pictures.
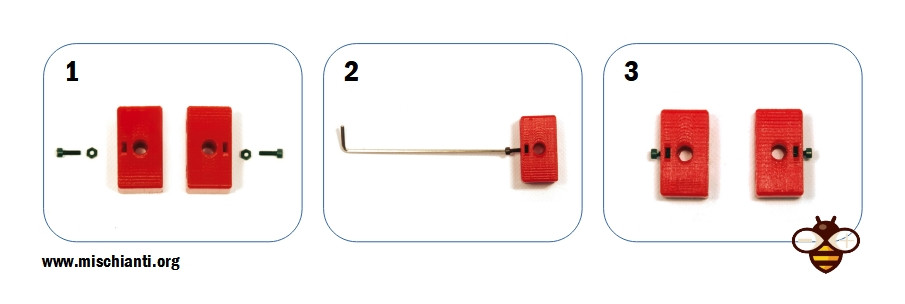
Original laser holder (For the laser I posted use previous file)
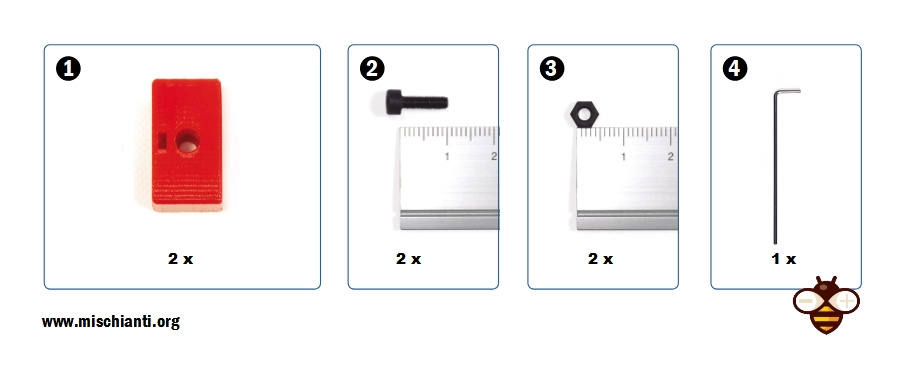
- Printed part of laser holder
- M3 x 10 mm screw
- M3 nut
- Allen wrench
Insert the nuts into the side holes. They must enter very fair. If not, file the gaps a bit.
Structure assembly: adjust lasers parts
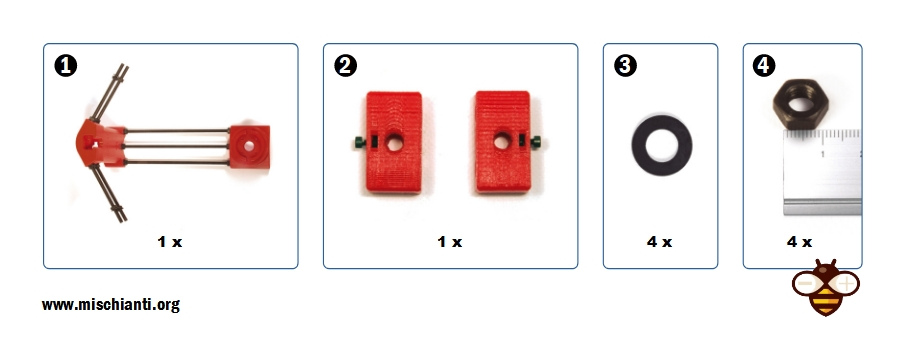
- Basic structure assembled
- Laser holder just assembled
- Washer M8
- Nut M8
Assembly of the structure: prepare socket piece

- Printed part of motor-disc socket
- M3 X 10 mm screw
- M3 nut
- Allen wrench
Frame assembly: prepare Nema motor

- Nema motor (1.7A 1.8 deg / step)
- Structure already assembled
- M3 x 10 mm screw
- Allen wrench
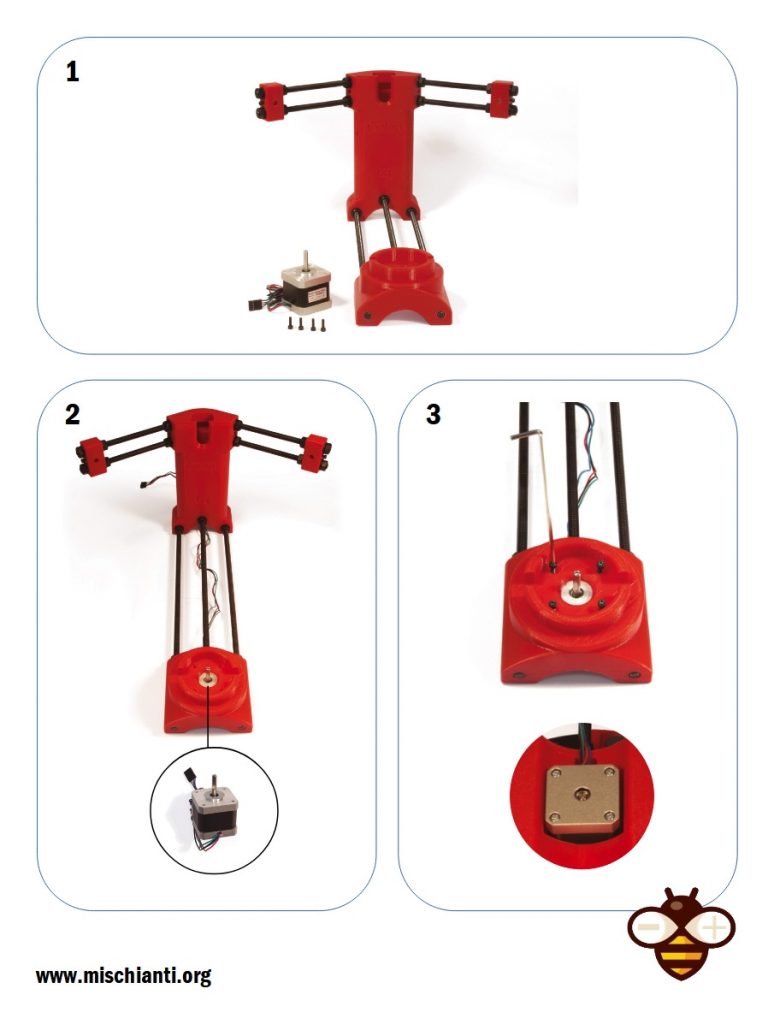
Assembly of the structure: join the socket and the disc
- Socket assembled
- Main structure
- Disk structure
- Allen key
Assembly video
There are a lot of video also, the official one is this.
Documentation
Thanks
- Ciclop 3D scanner: component printing and assembly
- Ciclop 3D scanner: production and assembly of the control PCB
- Ciclop 3D scanner: assembling electronic and wiring
- Ciclop 3D scanner: componens testing and calibration


Dear reader I’m missing the non slip methacrylatic disk 20 mm and the three clips for fasering yhe wines on the rods. Also files the part toclose the Electronic! How can I beslcome such parts or parts in general?
Hi Pieter,
the clip is in the “disk mount” section.
For the methacrylatic you can cut a foam or black paper.
Bye Renzo