
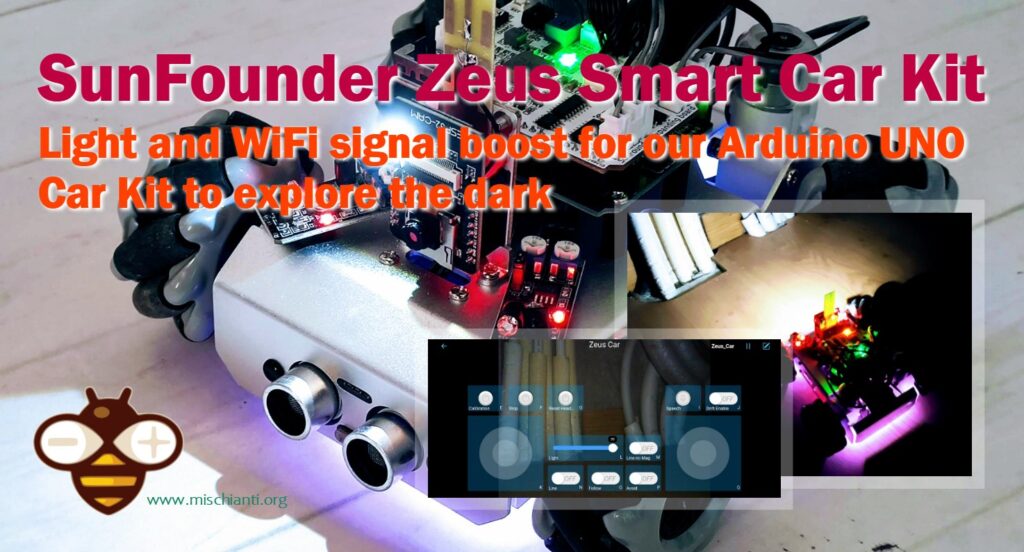
Zeus Smart Car Kit: light and WiFi signal boost to explore the dark
The SunFounder Zeus Car Smart Car Kit for Arduino UNO is an educational kit designed for beginners and children to gain hands-on experience in electronics, robotics, and programming.
The kit comes with a shield SunFounder for Arduino Uno R3 board and is equipped with various modules like ESP32 CAM, ultrasonic module, and obstacle avoidance modules. The kit offers two modes: Play Mode and Programming Mode, allowing users to either directly control the car or dive into the code to understand its functionalities.
You can find It on Aliexpress, Amazon DE, and SunFounder
Features
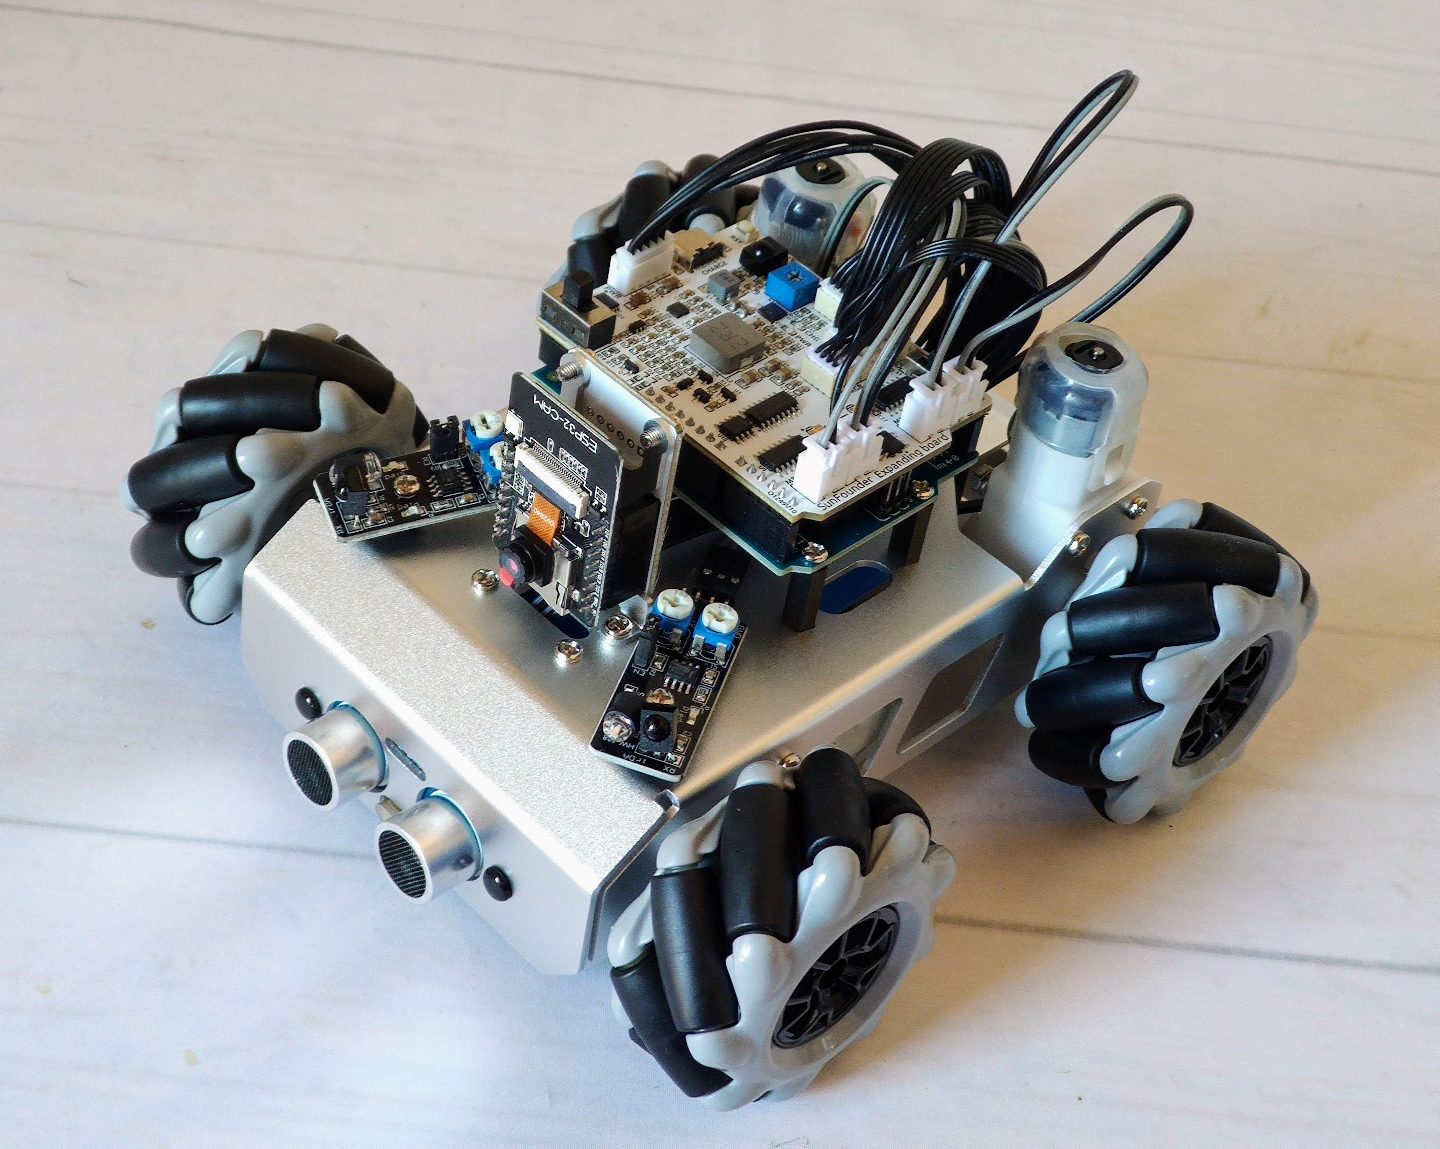
- Mecanum Wheels: the Zeus Car is equipped with 6cm Mecanum wheels, which allow for 360° omnidirectional movement. This means the car can move forward, backward, sideways, and even drift. The Mecanum wheels are designed to provide greater maneuverability, making it easier to navigate through complex terrains or tight spaces.
- ESP32 CAM: the car comes with an ESP32 CAM module, which enables a first-person driving experience. You can view real-time video streaming on your mobile device through the SunFounder Controller app. This feature enhances the interactive experience, allowing you to see what the car “sees.”
- Obstacle Avoidance Modules: the Zeus Car has two obstacle avoidance modules along with an ultrasonic module and two IR sensors. These modules help the car detect and avoid obstacles in its path. This is particularly useful for autonomous navigation and can be a great way to learn about sensors and automation in robotics.
- Grayscale Module: the car has an 8-channel circularly placed grayscale module at its bottom. This module enables the car to follow a line on the ground in any direction. This is often used in robotics competitions and can be a fun way to learn about computer vision and path-following algorithms.
- IR Remote Control: in addition to app-based controls, the Zeus Car can also be controlled using an infrared (IR) remote. This provides a more traditional way of controlling the car and can be a good starting point for those new to robotics.
Assembly and start immediately with Play Mode
The Zeus Car comes with pre-uploaded code on the Arduino board, allowing you to start using the car right after assembly. This is particularly useful for beginners or those who want to quickly test the car’s functionalities.
Two Control Options
- Controlled by APP:
- Joystick Widget: The SunFounder Controller app features a joystick widget that allows you to control the car’s movement in all directions.
- Real-Time Video Streaming: One of the standout features is the ability to view real-time video captured by the Zeus Car’s ESP32 CAM. This offers a first-person driving experience, making the interaction more immersive.
- Control by Remote:
- The kit includes a simple IR remote control.
- This is a straightforward way to control the car and is ideal for users who want to start using the car without any setup.
The Play Mode comes with a variety of pre-defined functions that you can access either through the app or the remote control. These may include basic movements, obstacle avoidance, and even more complex actions like drifting.
Play Mode is designed to be user-friendly. You don’t need to worry about coding or setting up the software; you can start playing with the car as soon as it’s assembled.
If you decide you want to explore how the car’s functions are implemented in code, you can easily switch to Programming Mode. This flexibility makes the Zeus Car adaptable to different learning curves and interests.
The next step is to use the programming mode
Programming Mode is designed for those who want to understand the underlying code that controls the Zeus Car. It allows you to modify the pre-existing projects or even create new functionalities from scratch. This mode is particularly useful for educational purposes, offering a hands-on experience in coding, robotics, and electronics.
The Programming Mode comes with 17 separate projects, each focusing on a different aspect or functionality of the Zeus Car. These projects come with corresponding code and explanations, providing a comprehensive learning experience.
Project Examples
Here are some of the projects you might encounter:
- Basic Movements: Learn how to program the car for basic forward, backward, and sideways movements.
- Omni Move: Understand how to leverage the Mecanum wheels for omnidirectional movement.
- Remote Control: Dive into the code that allows remote control functionalities.
- Obstacle Avoidance: Understand the sensors and algorithms behind the car’s ability to avoid obstacles.
- Line Tracking: Learn about computer vision algorithms that allow the car to follow a line.
The Zeus Car uses the Arduino programming language, which is a subset of C/C++. You’ll need to install the Arduino IDE (Integrated Development Environment) and related libraries to start coding.
Each project comes with detailed documentation that includes both the code and explanations. This makes it easier to understand how each function is implemented and offers insights into robotics programming.
One of the best aspects of Programming Mode is the flexibility it offers. You can modify existing code to suit your needs or even integrate additional hardware modules to extend the car’s capabilities.
Programming Mode is not just about coding; it’s also about problem-solving, logical thinking, and understanding the intricacies of robotics and automation. It offers a comprehensive learning experience that goes beyond the classroom.
Programming Mode is for those who wish to go beyond just using the Zeus Car and want to understand its inner workings. It offers a rich, educational experience, providing the tools and knowledge needed to explore the world of robotics programming.
Assembly
Here, the box arrived at me, and It was unexpectedly small.

The items are very compressed but perfectly packet.
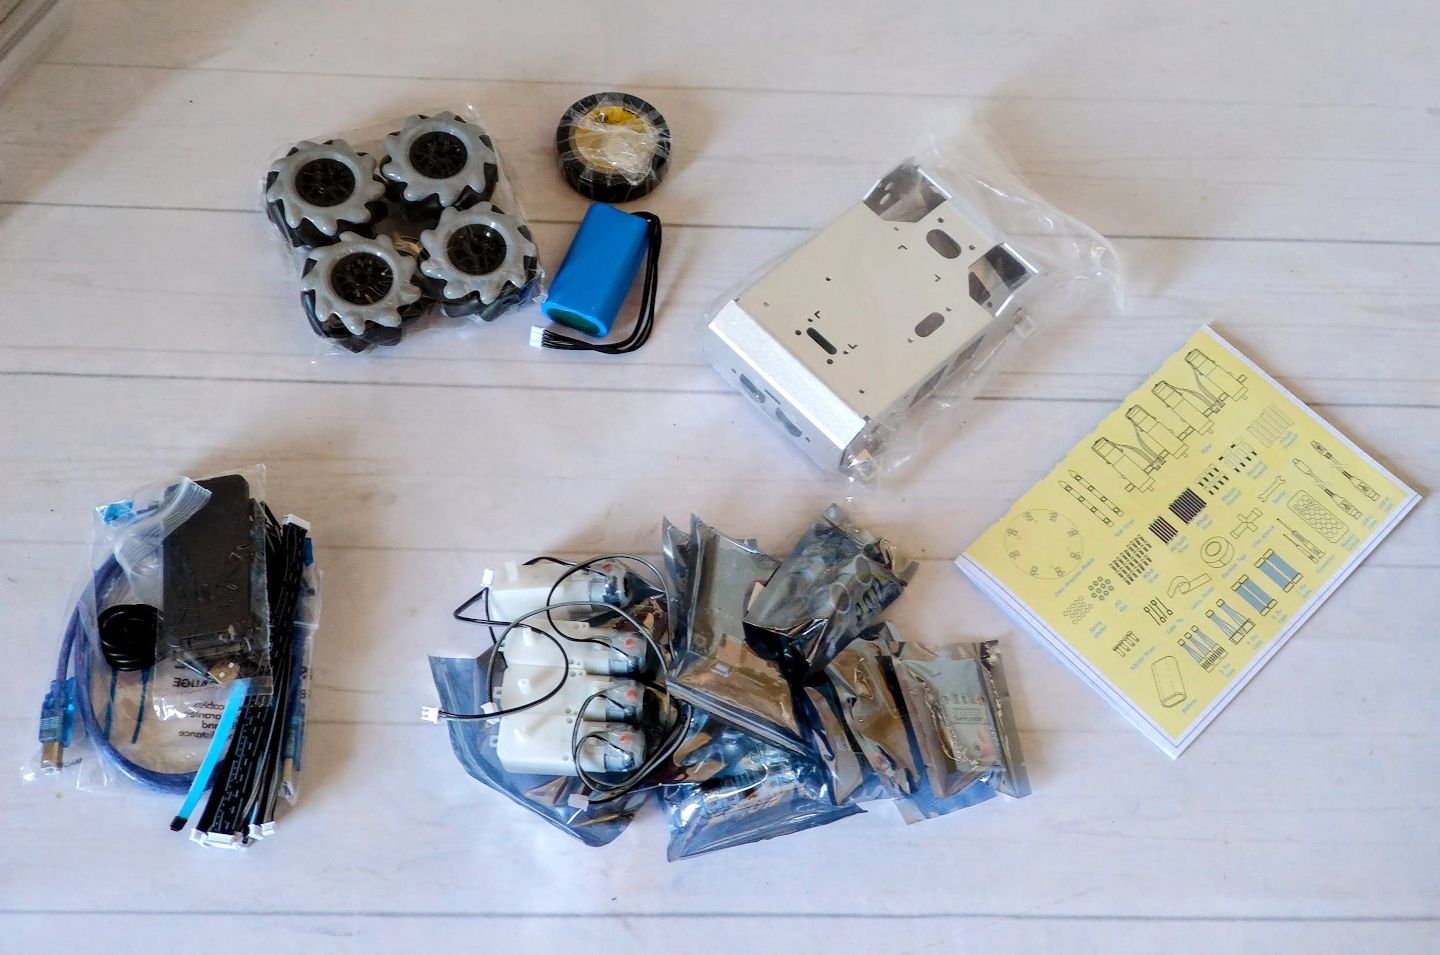
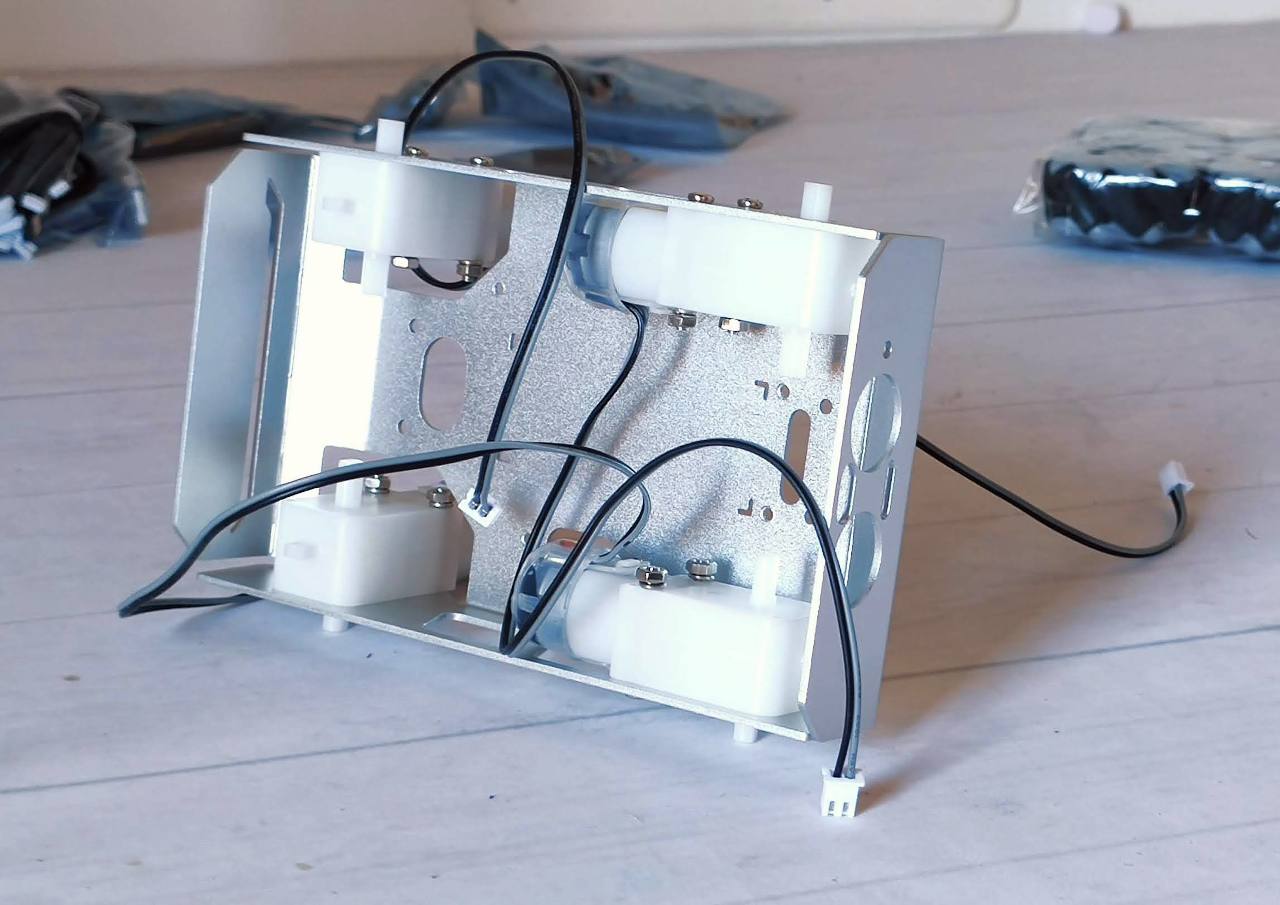
We start immediately by assembling the motors.
It’s a classical structure with a motor for every wheel.
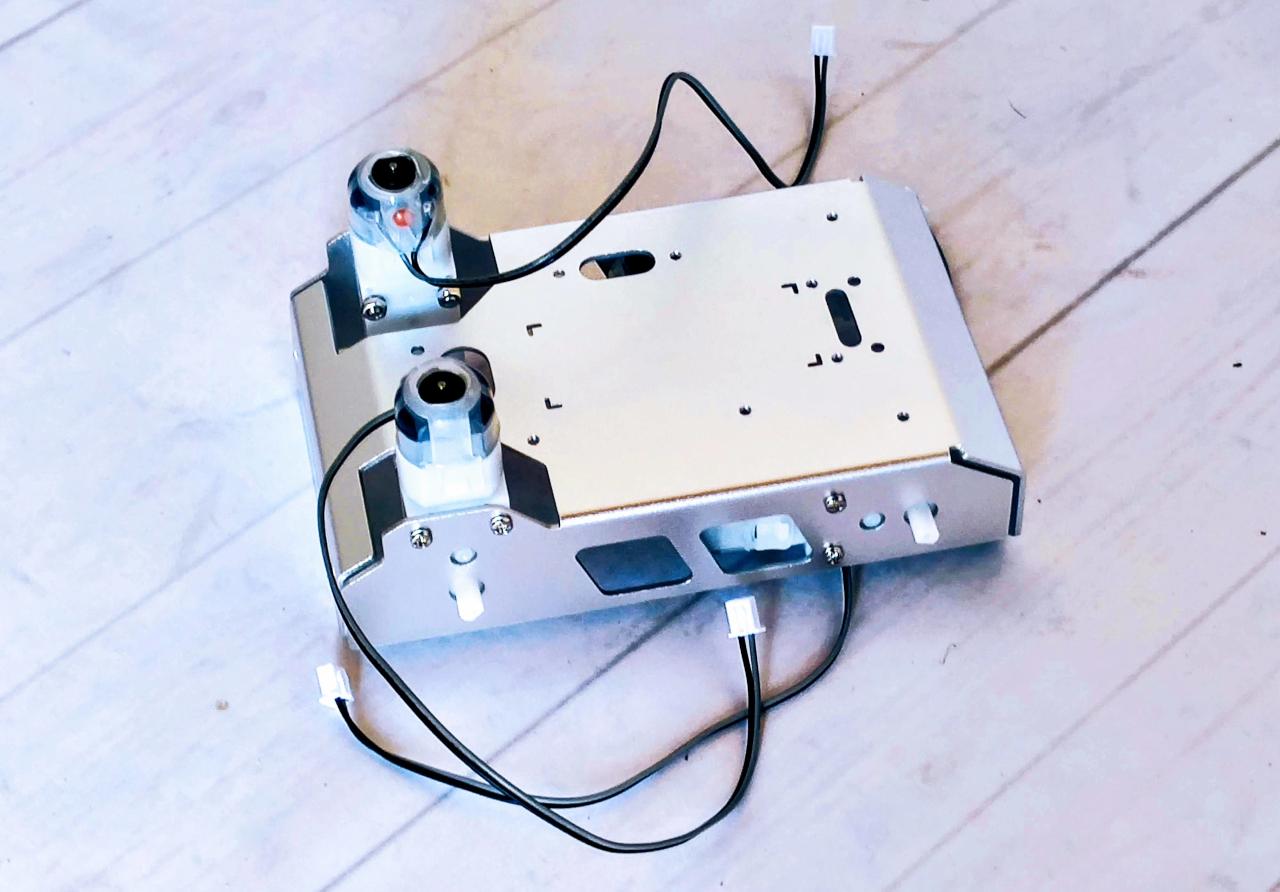
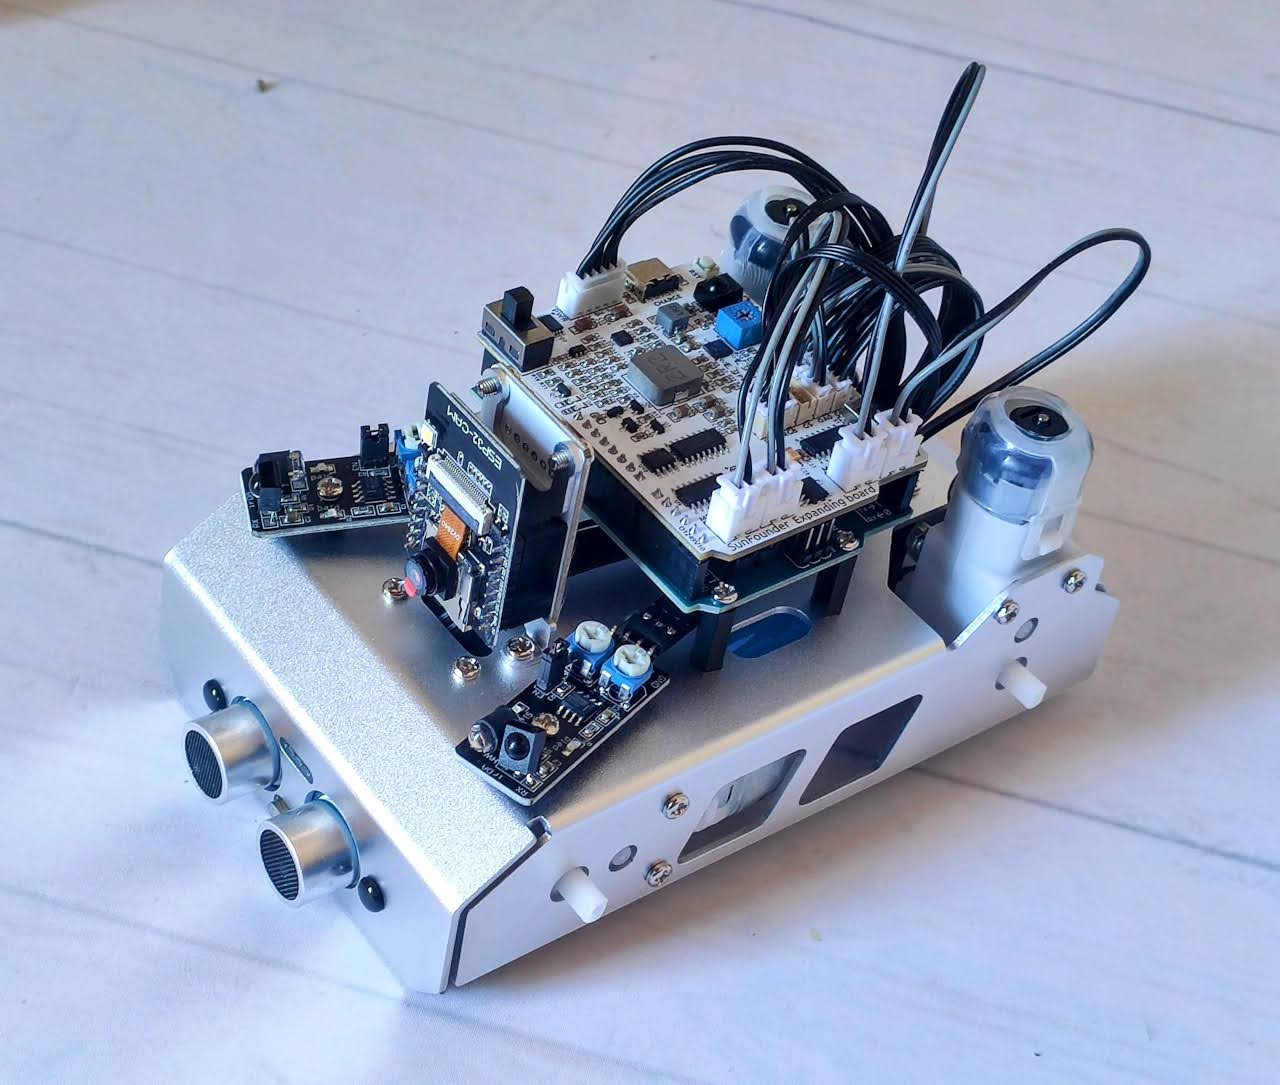
Here you can see the ESP32-CAM used for streaming the video of the front of the car.
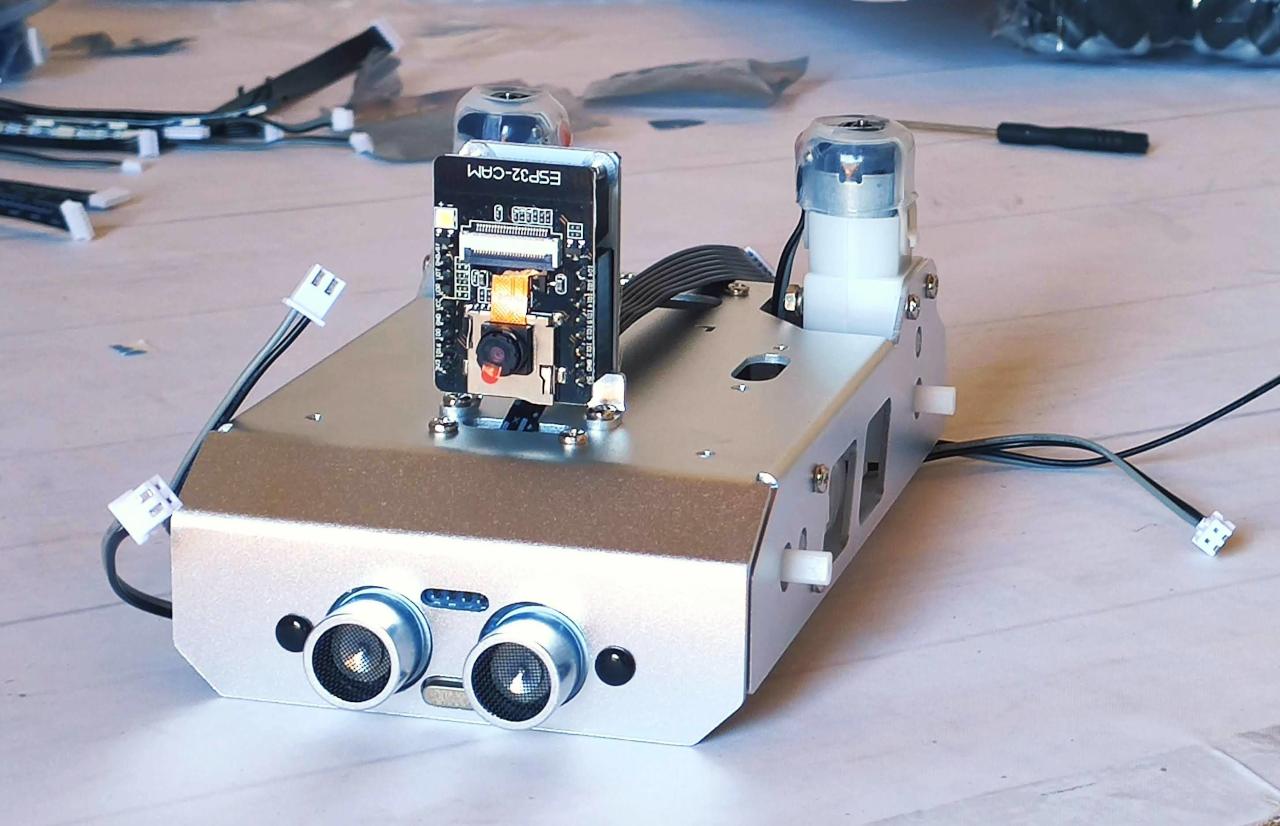
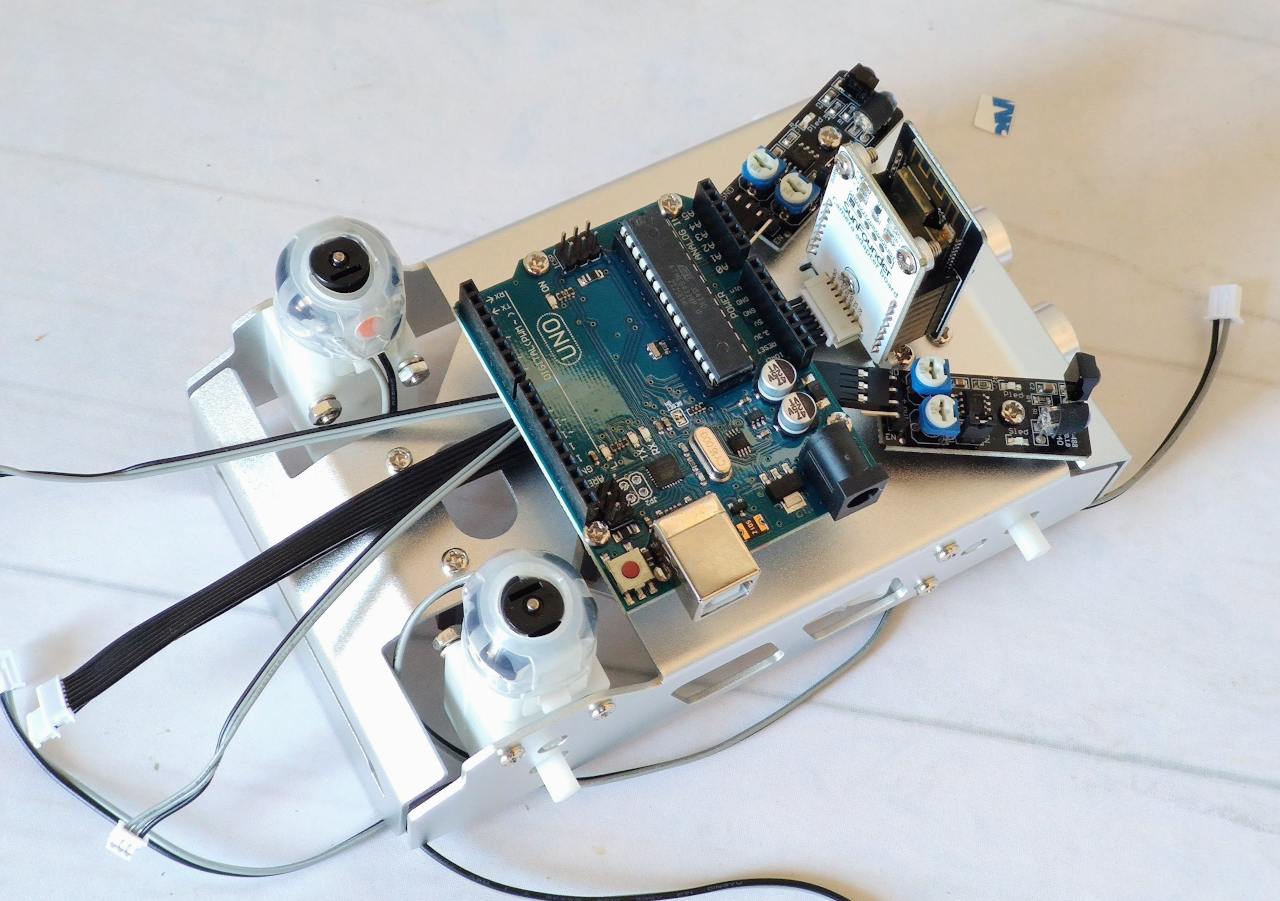
The IR is used for obstacle avoidance, and all sensors are managed by the Arduino UNO mounted on the top.
In the bottom, we are going to put the battery pack created with two rechargeable lithium 18650.

The sensor and the motor drivers are assembled and wired by the use of a shield.
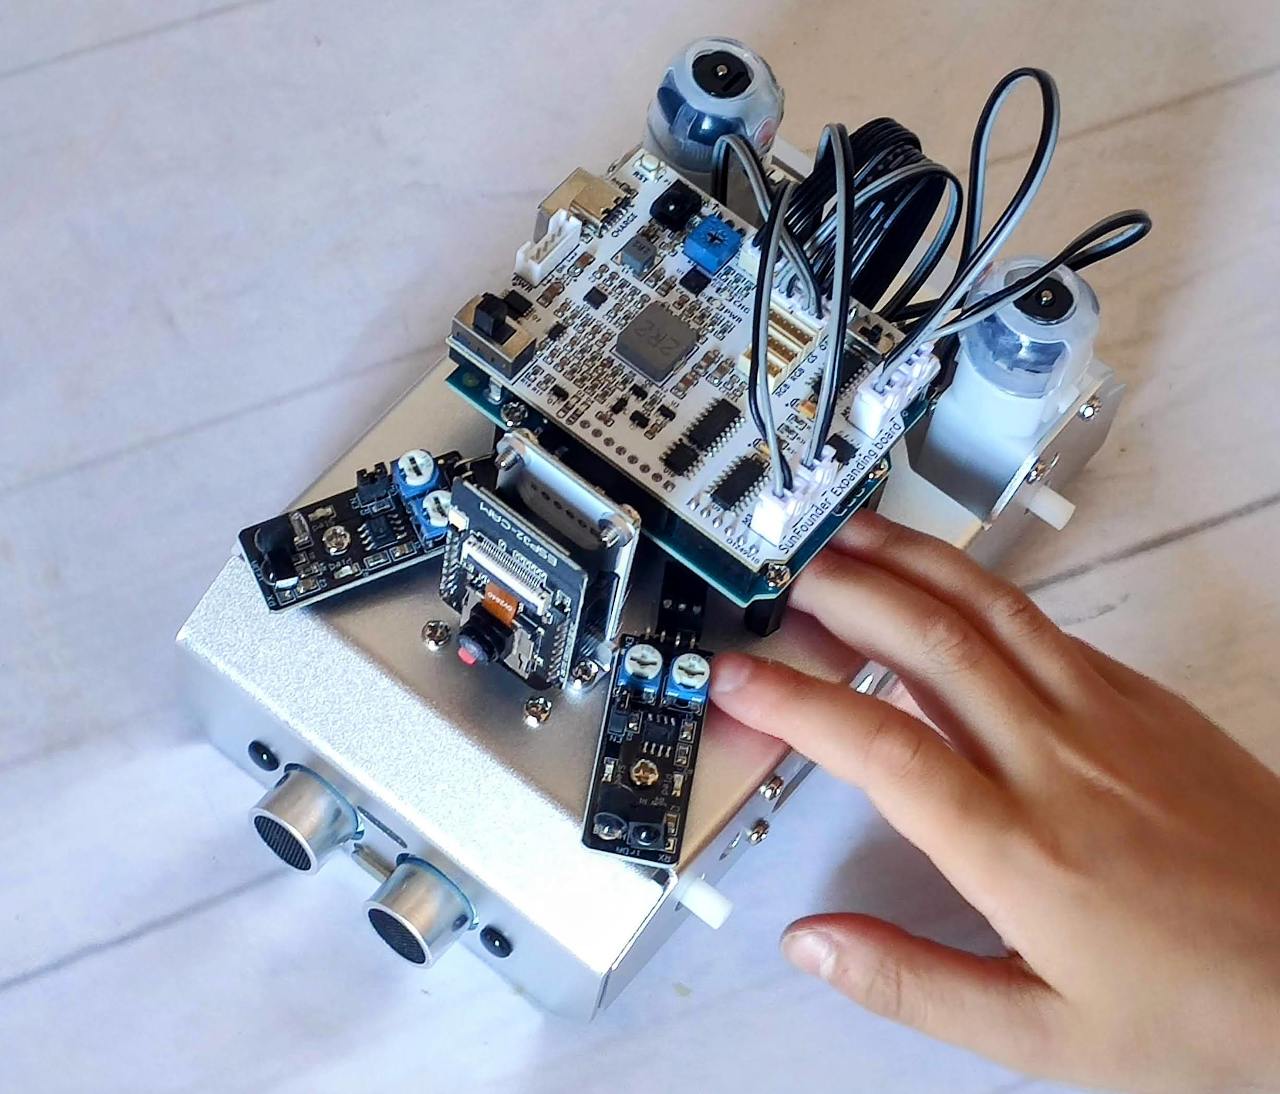
Without the wheels, the Car is very compact and well structured.
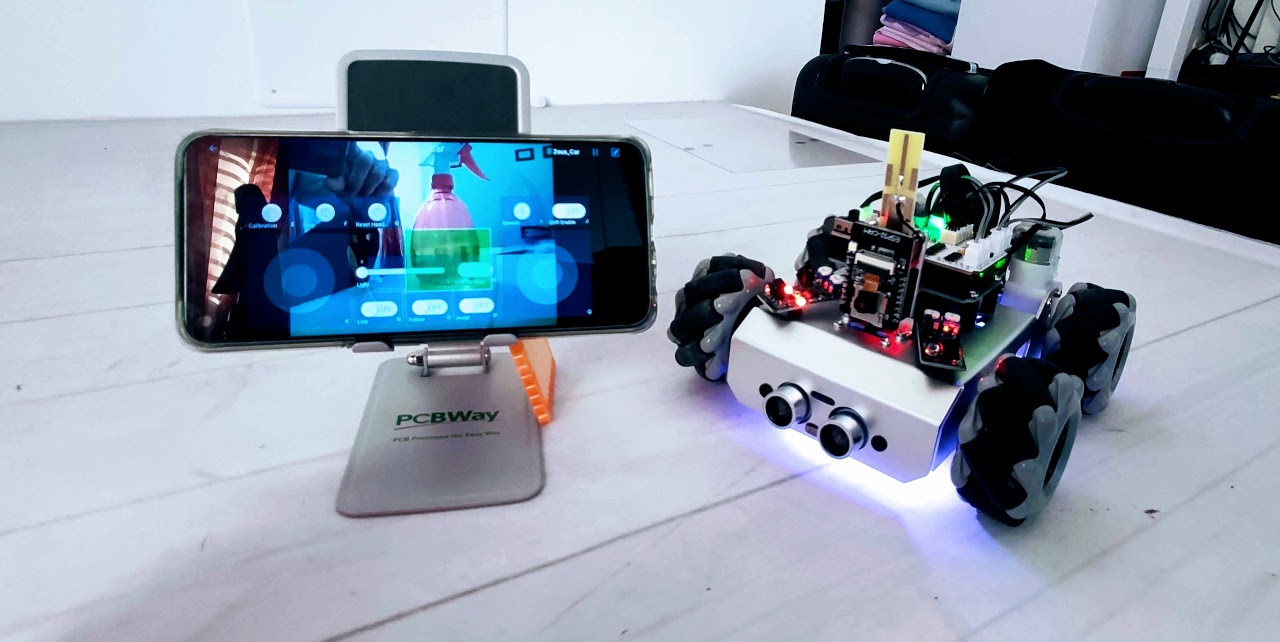
In the end, the car’s result was very satisfactory.
Usability
Remote

The remote offers a very good experience, a funny solution for kids, and a fast test of the basic implementation of the features.
SunFounder Controller
The Android and IOS apps offer a beautiful and complete solution. Here is a brief installation guide.
- Starting the Zeus Car:
- Initially, the Zeus Car Shield might activate its over-discharge protection circuitry. To deactivate it, plug in the Type-C cable for about 5 seconds.
- If the power indicator lights up, it means the protection status has been released. If both battery indicators are off, continue to plug in the Type-C cable to charge the battery.
- Flick the smaller switch to the right to establish communication between the car and the ESP32 CAM. Press the Reset button to reboot the code. The undercarriage lights should transition from orange to light blue.
- Installing the App:
- Download the SunFounder Controller from the App Store (iOS) or Google Play (Android).
- Connecting to Zeus Car WLAN:
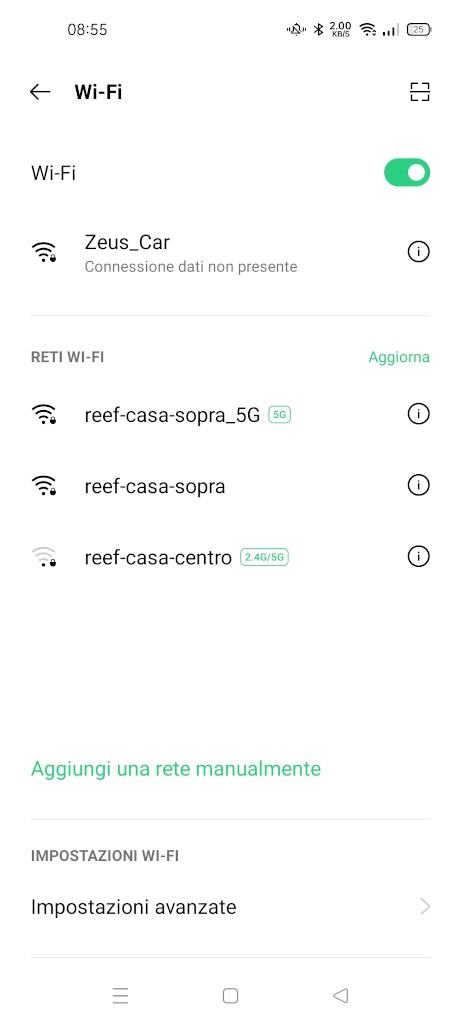
- Connect your mobile device to the local area network (LAN) broadcast by the Zeus Car.
- Find “Zeus_Car” on the WLAN of your mobile device, enter the password “12345678” and connect. There might be a prompt about no Internet access on this WLAN network; choose to continue connecting.
- Creating a Controller:
- In the SunFounder Controller app, click the “+” icon.
- Preset controllers are available. Choose “Zeus Car”, give it a name, or tap Confirm.
- The app will search for the Zeus Car. Once connected, you can view the live video feed and control the car using the provided widgets.
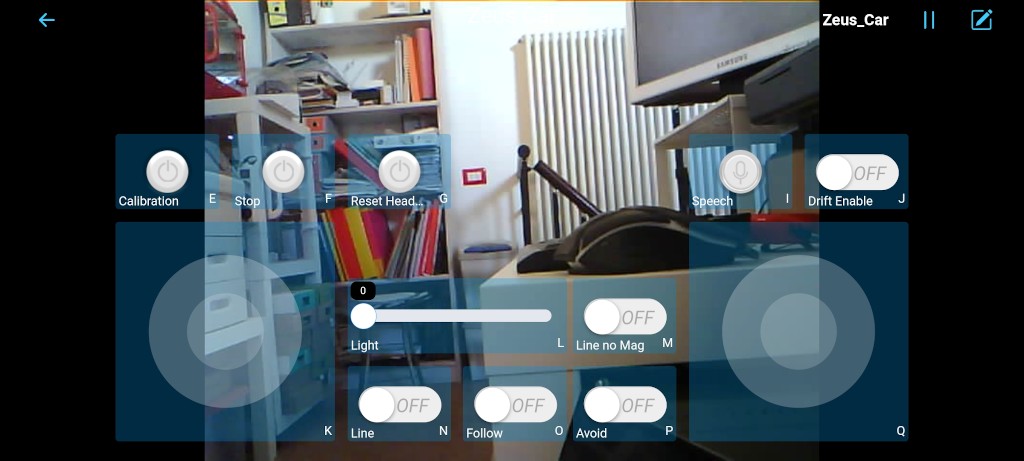
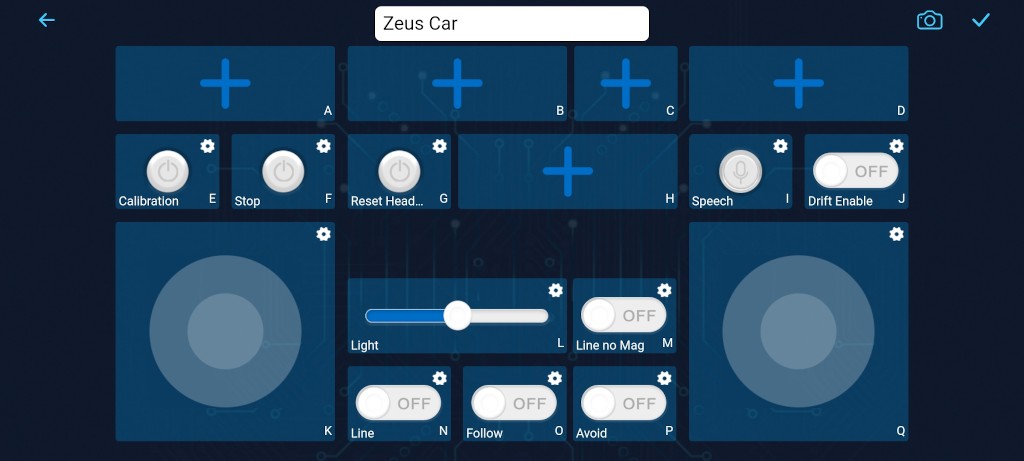
- Widget Functions:
- Calibration(E): Turn on compass calibration.
- Stop(F): Stop all car movements.
- Reset Heading(G): Set a specific direction as the front of the car movement.
- Speech(I): Switch to speech control mode.
- Drift Enable(J): Activate the drift function.
- Move in All Directions(K): Control the car’s movement in all directions.
- Line Track: Switch to line track mode.
- Follow(O): Switch to follow mode.
- Avoid(P): Switch to obstacle avoidance mode.
- Control the Direction(Q): Control the car’s head direction.
- Additional Notes:
- The STT (Speech to Text) function requires an internet connection and Google services on Android devices. However, it doesn’t work with the pre-set AP (Access Point) mode on the Zeus Car. iOS devices, using an offline voice recognition engine, work fine in both AP and STA modes.
Programming Mode
The Zeus CAR, a product of SunFounder, offers a documentation section known as the “Programming Mode.” This is designed for those who have already explored the Play Mode and are eager to delve deeper into the mechanics of how each function operates. The primary objective of this mode is to provide users with a comprehensive understanding of the functionalities and empower them to modify effects based on their preferences and ideas.
Educational Aspect
- Structured Learning: The programming mode is structured meticulously, with each function being categorized into a separate project. In total, there are 17 distinct projects. This modular approach ensures that learners can focus on one aspect at a time, making the learning process more manageable and systematic.
- Detailed Explanations: Accompanying each project is a set of codes and their respective explanations. This ensures that learners not only know what a particular piece of code does but also understand the underlying logic and reasoning behind it. Such a detailed approach reinforces learning and promotes a deeper understanding of the subject.
- Hands-on Experience with Arduino: The projects within the programming mode utilize the Arduino programming language. This offers learners an opportunity to familiarize themselves with one of the most popular microcontroller platforms. Before diving into the projects, users are guided to install the Arduino IDE and the necessary libraries, ensuring they have all the tools needed to embark on their programming journey.
- Diverse Range of Projects: The 17 projects cover a wide array of functionalities, from basic movements and remote control to more advanced features like AI detection from an app and obstacle avoidance. This diversity ensures that learners are exposed to various aspects of robotics and programming, making their learning experience holistic and comprehensive.
- Journey of Discovery: The programming mode is not just about coding; it’s about embarking on a journey of discovery. As learners progress through the projects, they’ll encounter challenges, solve problems, and, most importantly, witness their ideas come to life. This experiential learning approach is invaluable in instilling confidence and fostering a love for robotics and programming.
The Programming Mode of Zeus CAR is an educational tool. It bridges the gap between theory and practice, allowing users to apply what they’ve learned in real-world scenarios. Whether you’re a novice looking to get started in the world of robotics or an experienced programmer seeking to expand your horizons, the Zeus CAR’s Programming Mode offers a rich, immersive, and, above all, educational experience.
Add light control to play mode
The Zeus CAR, a device that has garnered significant admiration from both myself and my sons, often finds its utility in navigating through more obscured environments such as beneath beds, within attic spaces, inside pipelines, and in other low-light areas. Recognizing this, a paramount technical requirement emerges: equipping the Zeus Car with a dedicated lighting system.
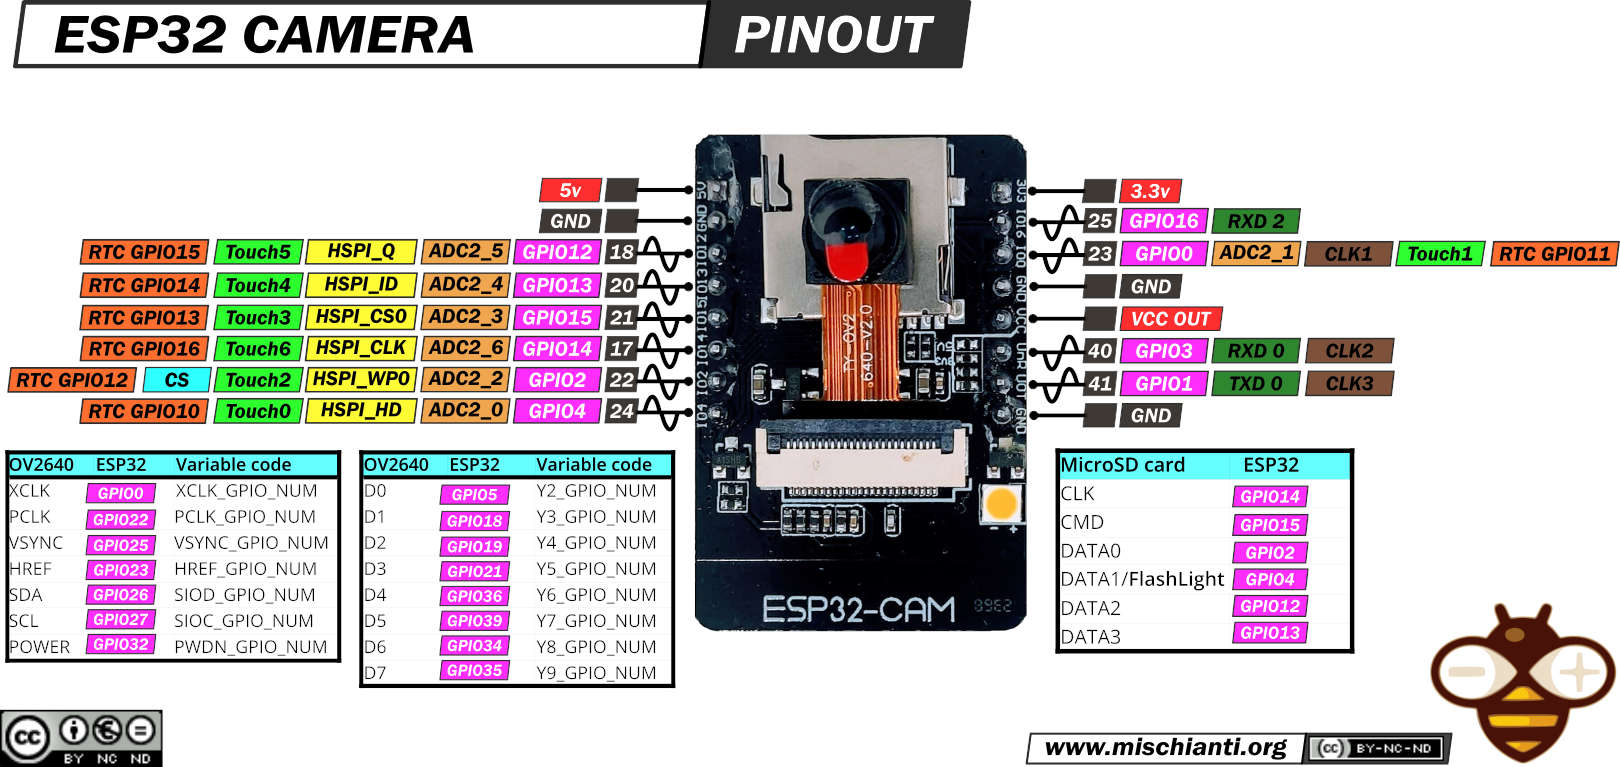
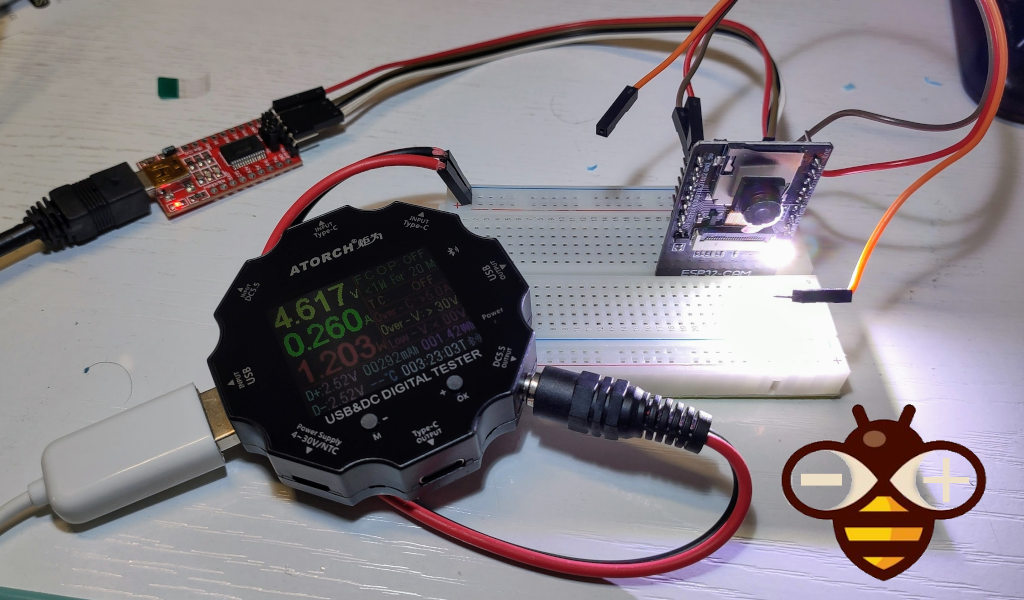
Here the ESP32-CAM and the programmer board AliExpress ESP32-CAM programmer - AliExpress ESP32-CAM bundle
From a technical standpoint, the Zeus CAR harnesses the capabilities of the ESP32-CAM module for its video streaming functions.

For those who have followed my technical writings, I’ve extensively covered the ESP32-CAM in a series of articles. One such article specifically addresses the integration of a flashlight control mechanism, titled “ESP32-CAM: Upgrade CameraWebServer with Flash Feature”. Given this prior exploration, it becomes a logical step to leverage this knowledge for the Zeus CAR’s lighting needs.
Our technical roadmap involves a two-pronged approach:
- Firmware Modification: We aim to modify the ai-camera-firmware, enhancing its capabilities to support the new lighting feature.
- Interface Enhancement: A new widget will be introduced to the Zeus Car Control dashboard. This widget is designed to activate the flashlight and provide granular control over its intensity, ensuring adaptability to diverse lighting conditions.
For a deeper dive into the technical intricacies of the ESP32-CAM and its various applications, I invite you to explore the comprehensive list of articles available here.
Communication between Arduino and ESP32-CAM
The interaction between the ESP32-CAM and the Zeus Car Arduino Firmware is orchestrated through two primary communication channels: Serial and WebSocket.
The Serial interface serves as the primary communication channel. Through this interface, the Zeus Car Arduino Firmware uses specific commands to initialize and configure the ESP32-CAM.
Arduino Car version 1.4.5
Initialzing...
SET+RESET
...[OK]
ESP32 firmware version 1.3.1
SET+NAMEZeus_Car
...[OK]
SET+TYPEZeus_Car
...[OK]
SET+SSIDZeus_Car
...[OK]
SET+PSK12345678
...[OK]
SET+MODE2
...[OK]
SET+PORT8765
...[OK]
SET+START
...[OK]
WebServer started on ws://192.168.4.1:8765
Okie!
[CAM_I] camera stream start on: http://192.168.4.1:9000/mjpg
During the initialization phase, a series of Serial commands are sent to set up the ESP32-CAM to operate in AP (Access Point) mode. The handshake begins with the Zeus Car announcing its version as “Arduino Car version 1.4.5” and initializing. Following this, a series of commands are sent:
- SET+RESET to reset settings, receiving an acknowledgment with “…[OK]”.
- The ESP32-CAM then announces its firmware version as “ESP32 firmware version 1.3.1”.
- SET+NAMEZeus_Car to set the device name.
- SET+TYPEZeus_Car to define the device type.
- SET+SSIDZeus_Car and SET+PSK12345678 to set up the network credentials.
- SET+MODE2 to configure the device in AP mode.
- SET+PORT8765 to specify the WebSocket server port.
- Finally, SET+START is sent to initiate the connection, and upon success, the ESP32-CAM confirms with “WebServer started on ws://192.168.4.1:8765” and “Okie!”. Additionally, the camera stream starts and is accessible at “http://192.168.4.1:9000/mjpg“.
On the other hand, the WebSocket, implemented in the ai-camera-firmware, acts as the secondary communication medium. This channel is primarily used by the SunFounder Control app to relay commands to the ESP32-CAM. Messages sent via WebSocket are structured in a positional format.
The code that manages this is in ai-camera-firmware/ws_server.cpp
[...]
    // receive text
    case WStype_TEXT:{
      ws_connected = true;

      out = intToString(payload, length);

      // reset ping_pong time
      lastPingPong = millis();
      if (strcmp(out.c_str(), "ping") == 0) {
        Serial.println("[APPSTOP]");
        return;
      }

      // ------------- send simplified text -------------
      DynamicJsonDocument recvBuffer(WS_BUFFER_SIZE);
      deserializeJson(recvBuffer, out);
      String result = "WS+";

      // REGIONS
      for (int i=0; i<REGIONS_LENGTH; i++){
        String region = String(REGIONS[i]);
        String value;
        if (recvBuffer[region].is<JsonArray>()) {
          for (int j=0; j<recvBuffer[region].size(); j++) {
            value += recvBuffer[region][j].as<String>();
            if (j != recvBuffer[region].size()-1) value += ',';
          }
        } else {
          value = recvBuffer[region].as<String>();
        }

        if (value == "true") value = "1";
        else if (value == "false") value = "0";
        if (value != "null") result += value;
        if (i != REGIONS_LENGTH - 1) result += ';';
      }

      // send
      if (millis() - last_send_time > SEND_INTERVAL ) {
        Serial.println(result);
        last_send_time = millis();
      }
      break;
    }
    // For everything else: do nothing
[...]
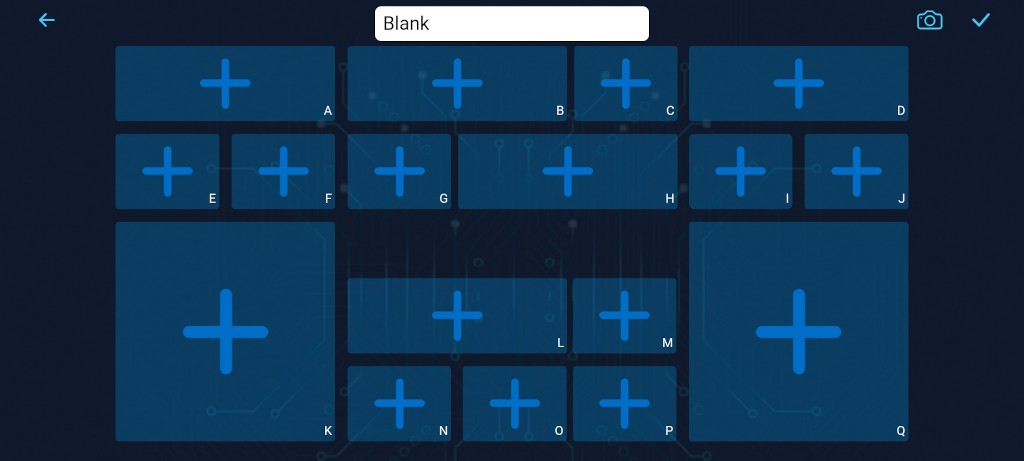
Each message arrives in JSON format, and each position in the message corresponds to a specific value. In the SunFounder Control app, every widget or control element is represented by a unique letter. Each of these letters corresponds to a specific position in the message array. For instance, the letter “L” represents the eleventh value in the message.
Upon receiving a WebSocket message, the ESP32-CAM firmware translates it into a Serial message, such as WS+;;;;;;;;;;;100;;;;;;;;;;;;;;. This format indicates that the position represented by “L” has a value of 100. The ESP32-CAM then sends this Serial message to the Zeus Car Arduino Firmware. Upon receipt, the Arduino firmware processes the message and triggers the corresponding function or action. In essence, the SunFounder Control app communicates user commands via WebSocket to the ESP32-CAM, which then translates these commands into Serial messages. These messages are subsequently processed by the Zeus Car Arduino Firmware to execute specific functions or actions.
Mod the ai-camera-firmware to manage light
Now, first, you must download the ai-camera-firmware from Git Hub. You can use the git client or download directly from here.
Now open the ino file from your preferred IDE (Arduino IDE works well and to configure ESP32 boards, refer to “ESP32-CAM: pinout, specs and Arduino IDE configuration“).
Dependencies
- WebSockets by Markus Sattler
- ArduinoJson
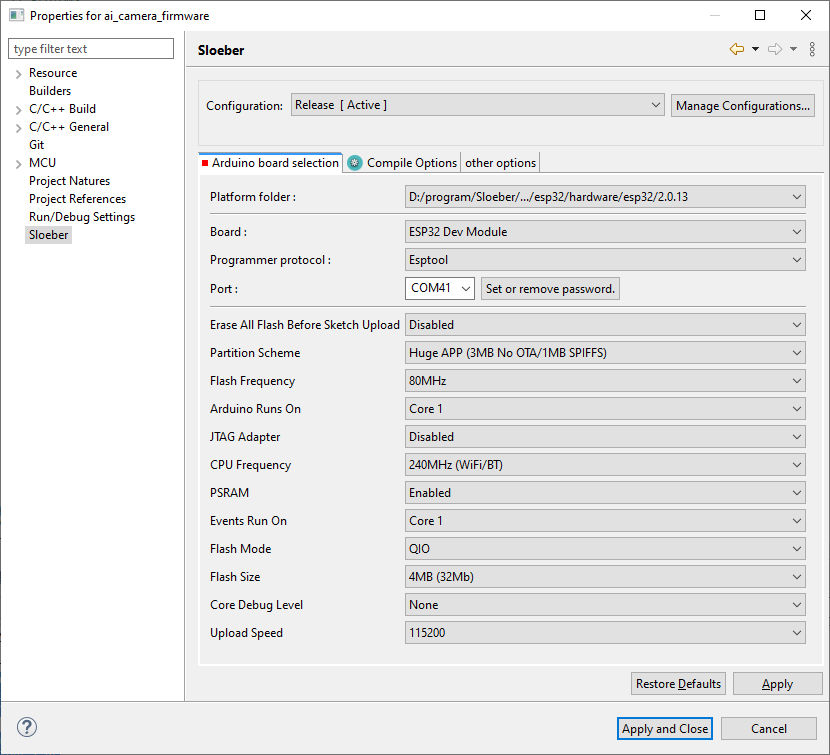
Flash settings
Board: "ESP32 Dev Module"
Upload Speed: "115200" ## You can try more but some device don't work
CPU Frequency: "240MHz (WiFi/BT)"
Flash Frequency: "80MHz"
Flash Mode: "QIO"
Flash Size: "4MB (32Mb)"
Partition Scheme: "Huge APP (3MB No OTA/1MB SPIFFS)"
Core Debug Level: "None"
PSRAM: "Enabled"
Arduino Runs On: "Core 1"
Events Run On: "Core 1"
Now proceed to the change of ws_server.cpp file. First, add 2 define to centralize the configuration:
#include "pins.h"

#define BRIGHTNESS_MULTIPLIER 0.5
#define CAMERA_PIN_FLASH 4
Than, modify the code to parse the eleventh value and set it to LED.
    // receive text
    case WStype_TEXT:{
      ws_connected = true;

      out = intToString(payload, length);

      // reset ping_pong time
      lastPingPong = millis();
      if (strcmp(out.c_str(), "ping") == 0) {
        Serial.println("[APPSTOP]");
        return;
      }

      // ------------- send simplified text -------------
      DynamicJsonDocument recvBuffer(WS_BUFFER_SIZE);
      deserializeJson(recvBuffer, out);
      String result = "WS+";

      // REGIONS
      for (int i=0; i<REGIONS_LENGTH; i++){
        String region = String(REGIONS[i]);
        String value;
        if (recvBuffer[region].is<JsonArray>()) {
          for (int j=0; j<recvBuffer[region].size(); j++) {
            value += recvBuffer[region][j].as<String>();
            if (j != recvBuffer[region].size()-1) value += ',';
          }
        } else {
          value = recvBuffer[region].as<String>();
        }

        if (value == "true") value = "1";
        else if (value == "false") value = "0";
        if (value != "null") result += value;
        if (i != REGIONS_LENGTH - 1) result += ';';

        if (i==11 && value != "null" && value != "" && ledPrecValue != value.toInt()) {
//        	Serial.print(i);Serial.print(" - ");
//			Serial.println(value);

        	ledPrecValue = value.toInt();
        	analogWrite(CAMERA_PIN_FLASH, (int)ledPrecValue*BRIGHTNESS_MULTIPLIER);
		}

      }

      // send
      if (millis() - last_send_time > SEND_INTERVAL ) {
        Serial.println(result);
        last_send_time = millis();
      }
      break;
    }
    // For everything else: do nothing
The code is very simple. I check the eleventh element value and get It, and I apply a multiplier that is lower than one because, with max power, the flash sometimes gets too much power and freezes the device (so you can preserve the power) and I set with PWM the value to the camera flash pin (in my case the pin 4 like described in the article linked before).
        if (i==11 && value != "null" && value != "" && ledPrecValue != value.toInt()) {
//        	Serial.print(i);Serial.print(" - ");
//			Serial.println(value);

        	ledPrecValue = value.toInt();
        	analogWrite(CAMERA_PIN_FLASH, (int)ledPrecValue*BRIGHTNESS_MULTIPLIER);
		}

      }
Now, we must set the correct widget at the correct position; position L is the eleventh element, and you must put the control widget there.
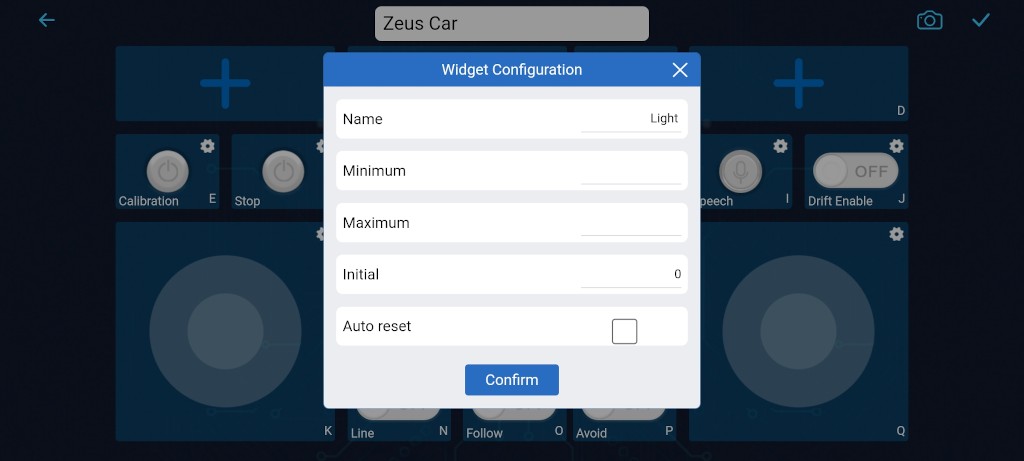
To do that, open the SunFounder controller and add Zeus Car control. After that, click on the edit button in the top right corner.
I change only the name and the initial value.
Test the change
Light
The result is exactly what I need.
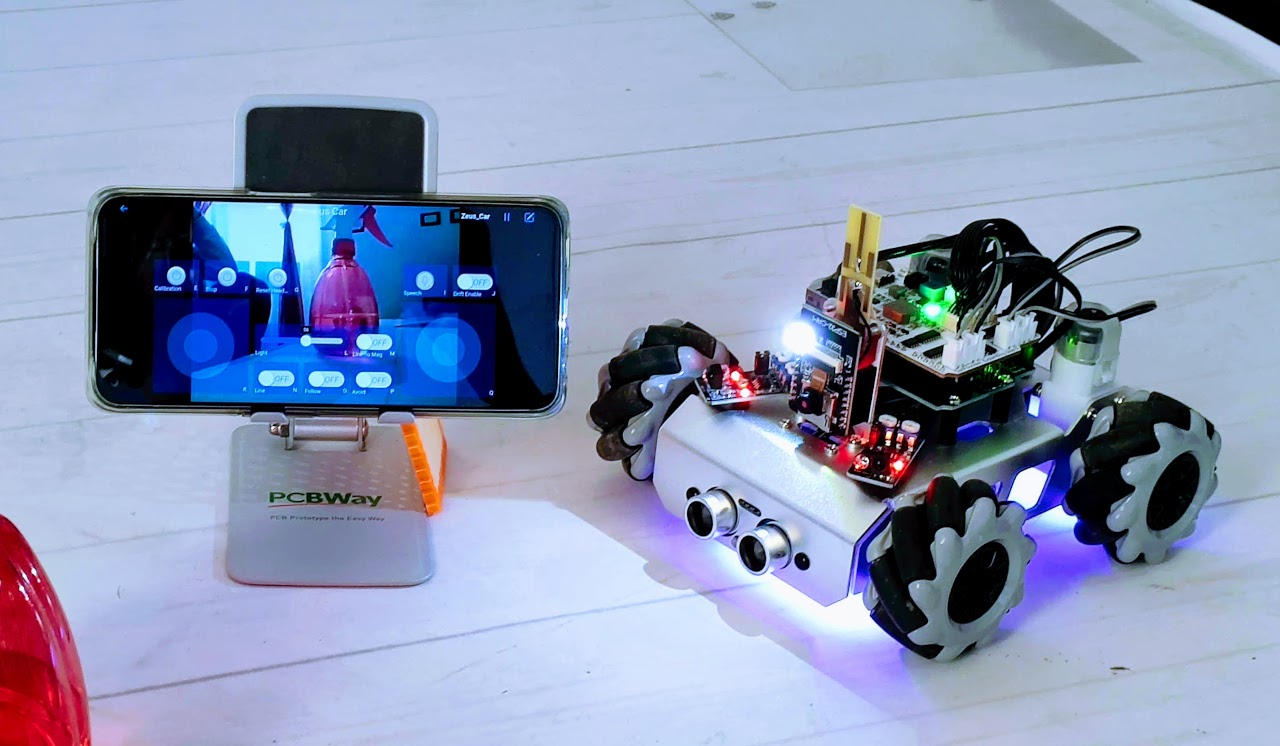
I limit the light to about 30% of the max power, but the result It’s very impressive.
Here, the car is in the dark without LED.
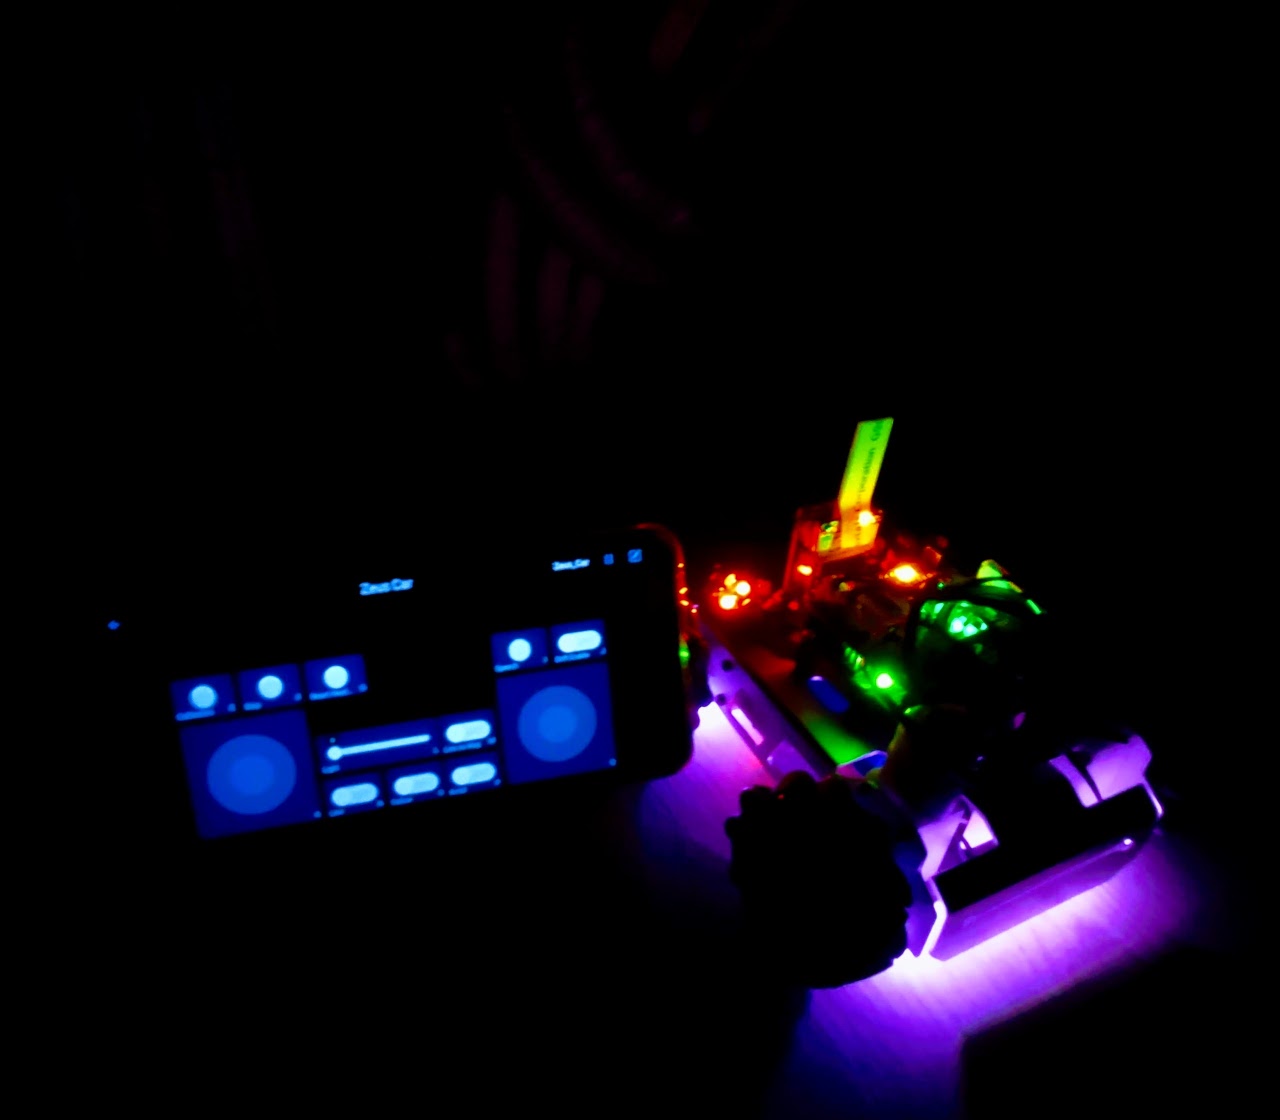
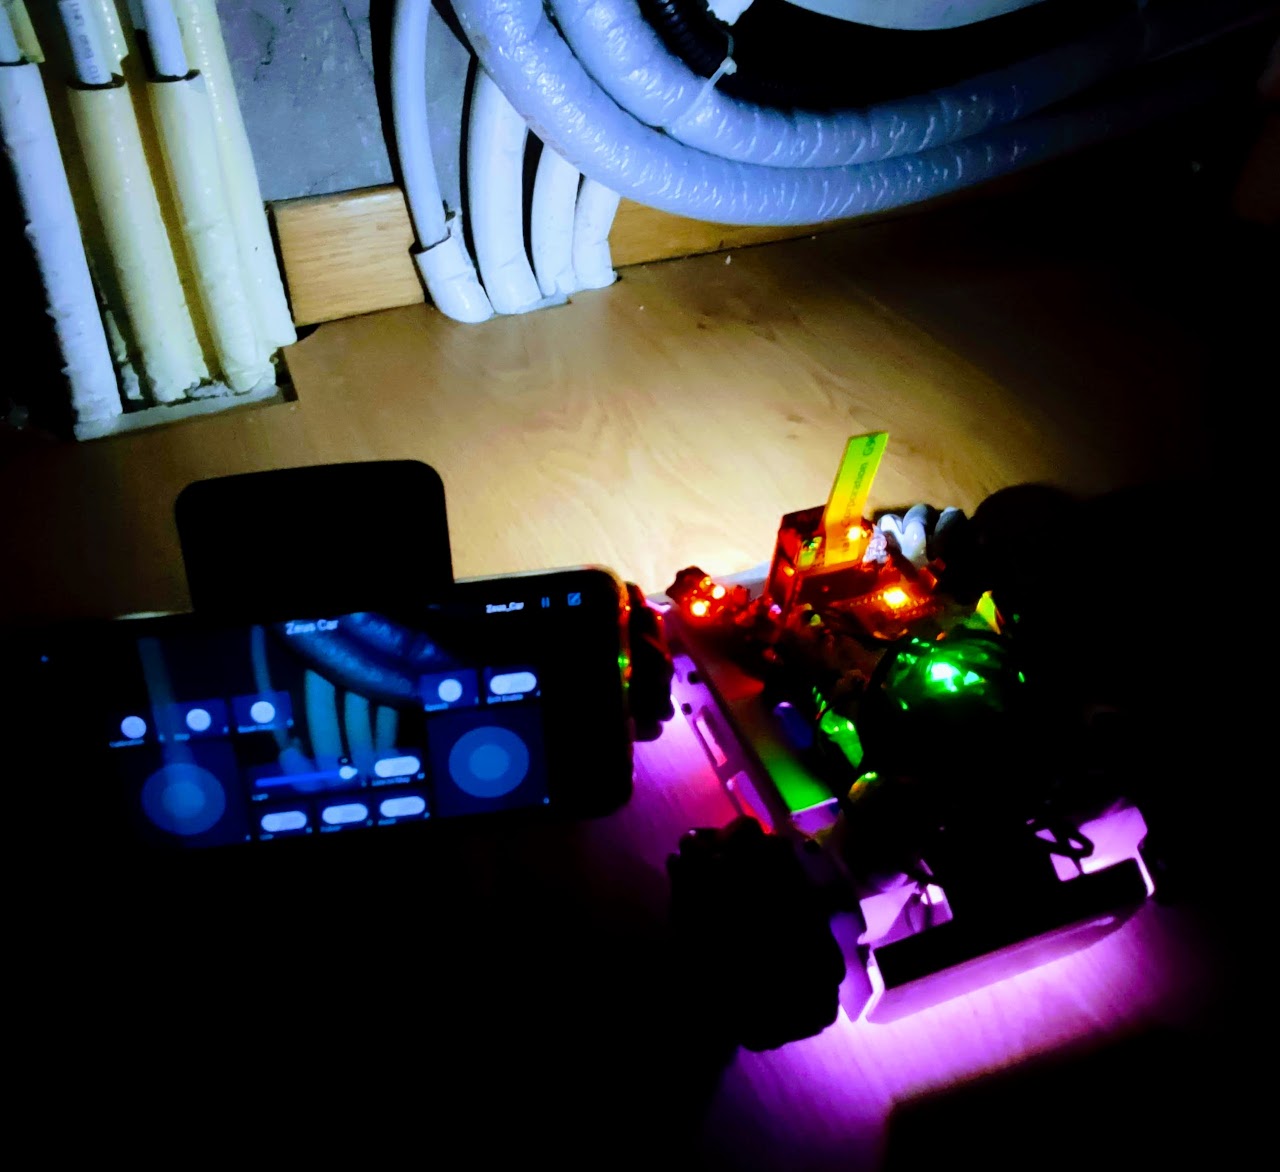
And here with LED on.
Antenna
As you can see in the photo, I also have a new antenna to extend the WiFi range at the remote angle of the house. It is quite cheap, and It has adhesive. I added the link here.
You can find here 8dbi WiFi antenna
Thanks
You can find my modded ai-camera-firmware here.


