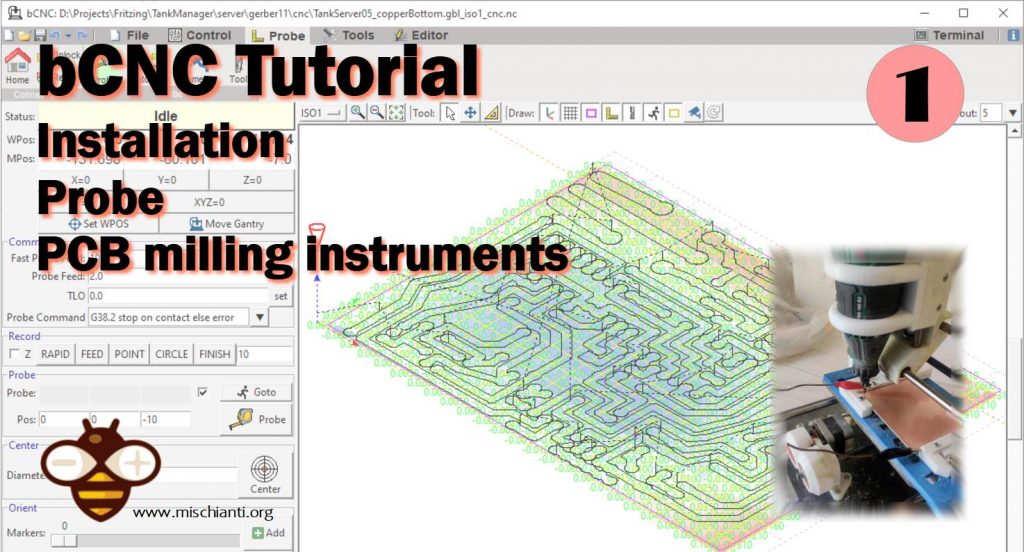
bCNC tutorial: installation, probe, PCB instruments – 1
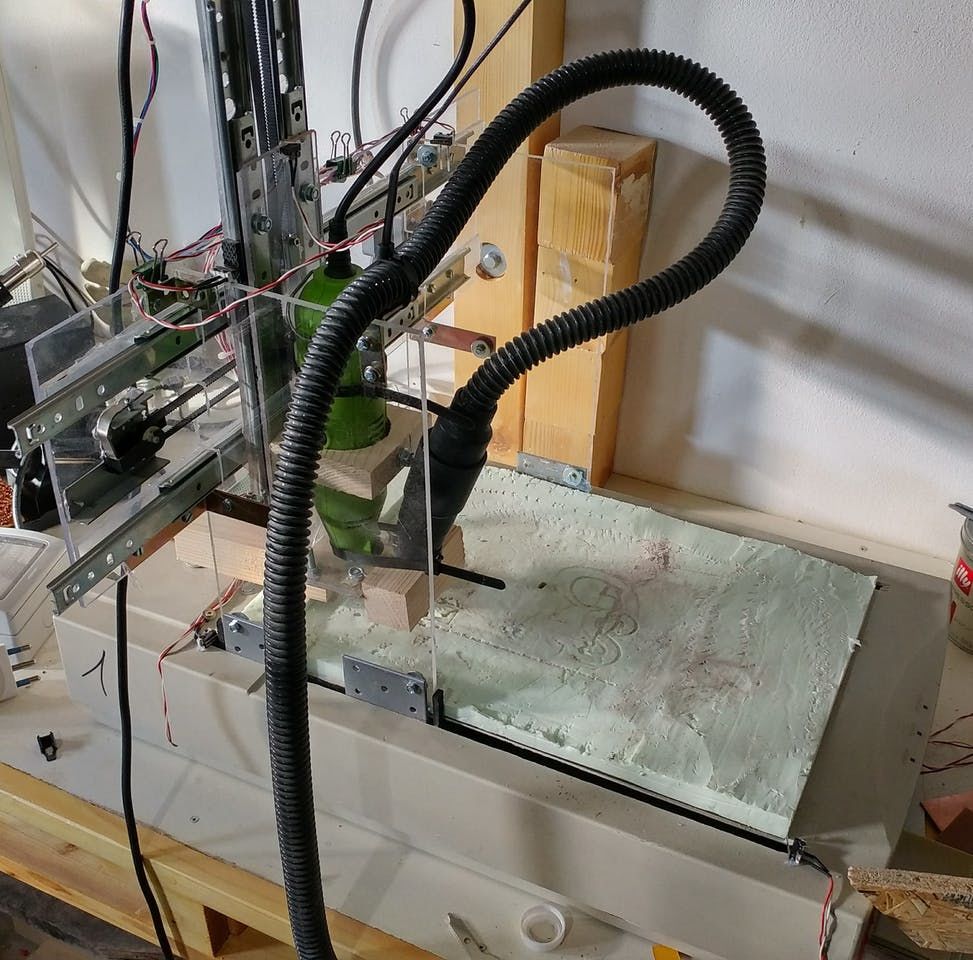
I have been prototyping PCBs with the CNC for years. I have created a CNC machine suitable for this, and today I would not know how to do it without it.
I’m going to show a short guide on bCNC, here is the description of the software from the main site:
GRBL CNC command sender, autoleveler, g-code editor, digitizer, CAM and swiss army knife for all your CNC needs.
An advanced fully featured g-code sender for GRBL. bCNC is a cross platform program (Windows, Linux, Mac) written in python. The sender is robust and fast able to work nicely with old or slow hardware like Raspberry Pi (As it was validated by the GRBL maintainer on heavy testing).
From main bCNC site
I use this software to manage my little homemade CNC
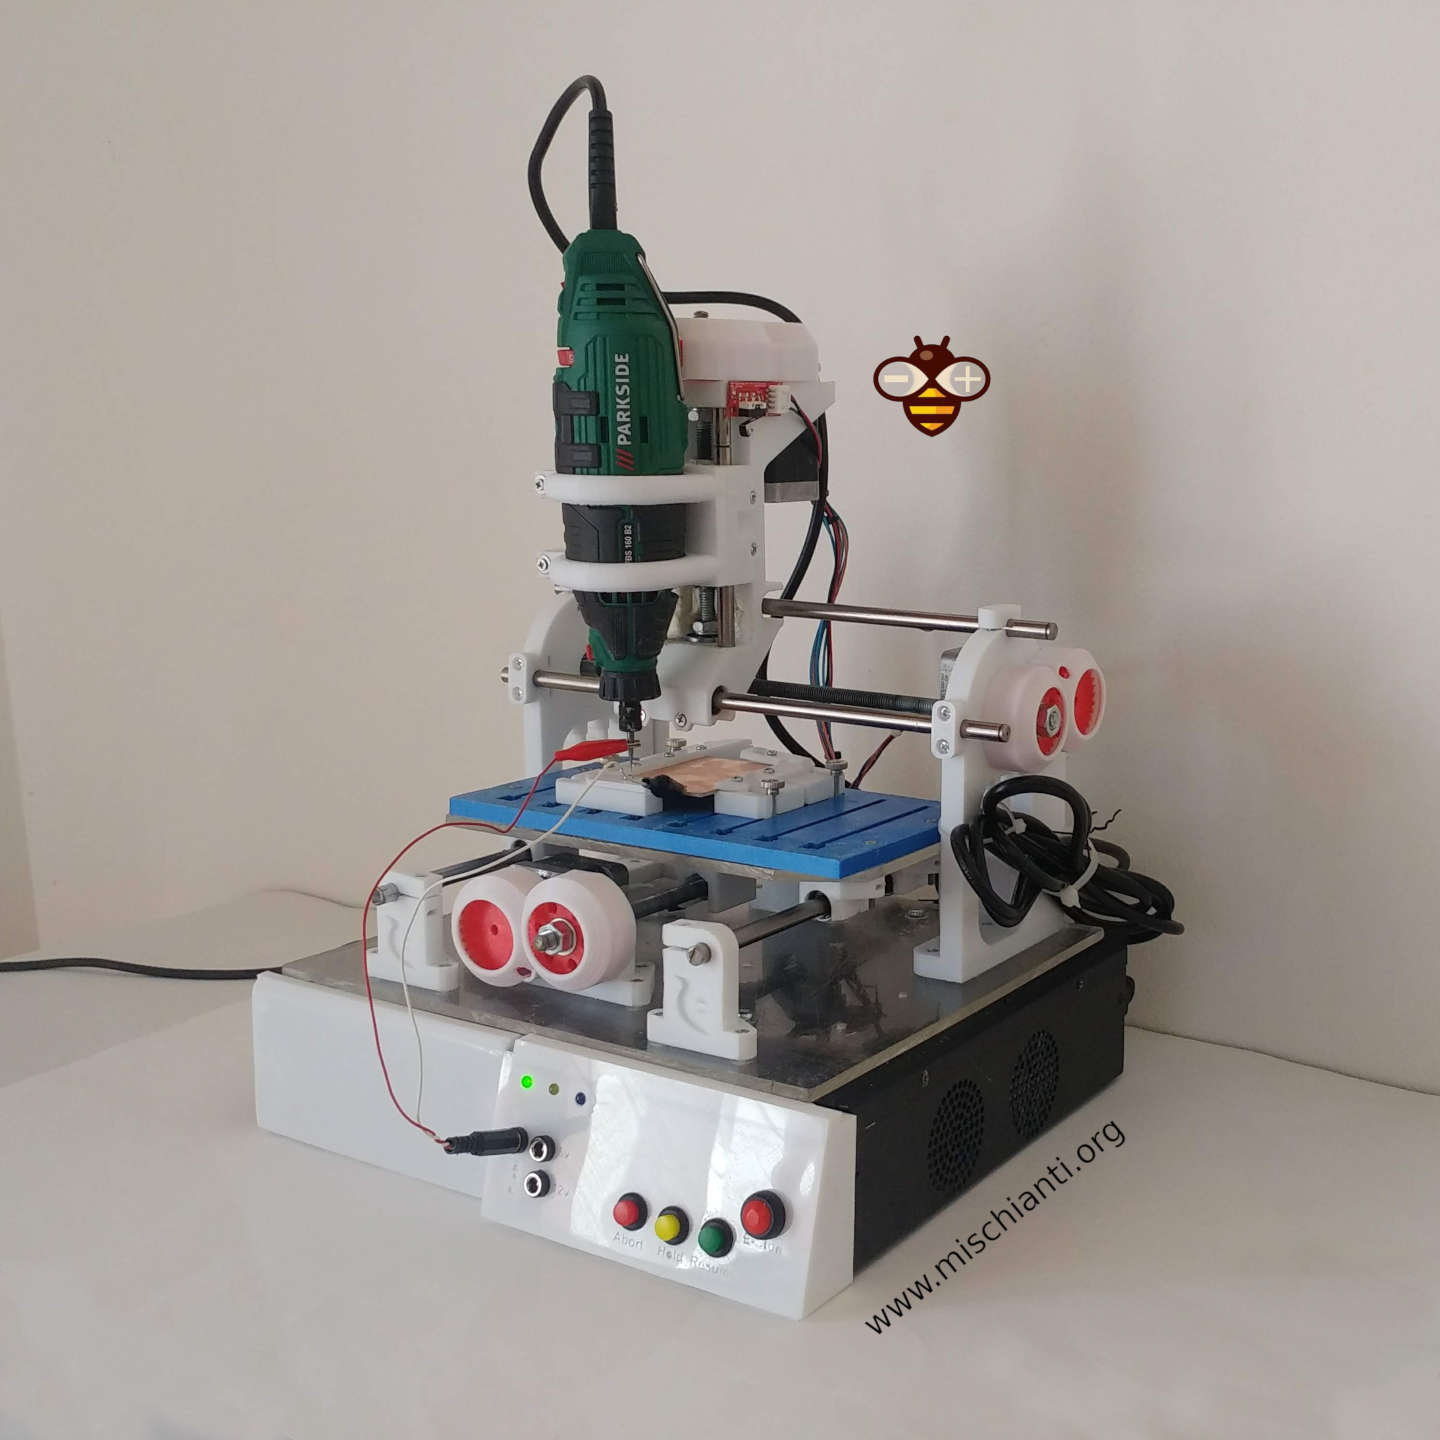
You can find all steps to build It here CNC Cyclone PCB Factory how to make It.
I’m doing a lot of prototypes with it, and It works well.
Installation
As you can read from the description, It’s cross-platform software, so there are many installation types. You can find this information on the main site also.
Windows
EXE installer
Naturally, we start with the simplest, and you can find in the release repository the installer per windows
https://github.com/vlachoudis/bCNC/releases
Naturally not significantly updated but work without any problem and with many features.
Using PIP
1.) Install python 2.7: https://www.python.org/downloads/
Do not forget to install Tcl/Tk and PIP modules while doing so. Also, check that python will be added to the path:

2.) Open a command line and install bCNC using pip:
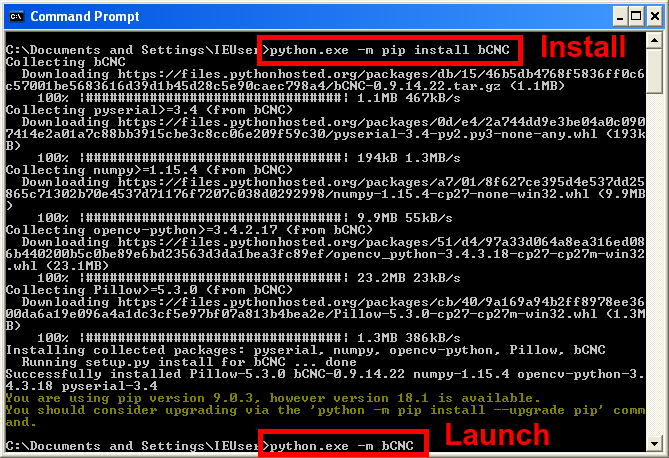
This installs bCNC to C:\Pyhton27\Lib\site-packages\bCNC\ and launches it using python -m bCNC
Mac OSX
You can get good instructions to install Python from the link on Medium
Here is the recap :
- Install pyenv and tcl-tk
  brew install pyenv
  brew install tcl-tk
- Add environment variables into ~/.zshrc or other shell rc and restart the shell/terminal
# python pyenv
export PATH="$HOME/.pyenv/bin:$PATH"
if which pyenv > /dev/null; then
  eval "$(pyenv init -)";
fi
# pyenv-virtualenv
if which pyenv-virtualenv-init > /dev/null; then
  eval "$(pyenv virtualenv-init -)";
fi
# tcl-tk
export PATH="/usr/local/opt/tcl-tk/bin:$PATH"
export LDFLAGS="-L/usr/local/opt/tcl-tk/lib"
export CPPFLAGS="-I/usr/local/opt/tcl-tk/include"
export PKG_CONFIG_PATH="/usr/local/opt/tcl-tk/lib/pkgconfig"
export PYTHON_CONFIGURE_OPTS="--with-tcltk-includes='-I/usr/local/opt/tcl-tk/include' --with-tcltk-libs='-L/usr/local/opt/tcl-tk/lib -ltcl8.6 -ltk8.6'"
- install pyenv virtual env
brew install pyenv-virtualenv

pyenv install 3.8.0

exec $SHELL
- Test tcl tk setup
  mkdir ~/foo; cd ~/foo
  pyenv local 3.8.0
  pyenv version
  python -m tkinter -c 'tkinter._test()'
- Install and launch bCNC
    pip install --upgrade bCNC
    #pip install --upgrade git+https://github.com/vlachoudis/bCNC #if you want git version
    python -m bCNC
Linux / BSD
- Update your system (Optional) and install git, python (with tkinter support) and pip:
	#This is specific for Debian/Ubuntu, other distros have other package managers than apt-get
	sudo apt-get update
	sudo apt-get upgrade
	sudo apt-get install git python python-tk python-pip
- Install bCNC using pip and launch it:
	sudo pip2 install --upgrade bCNC
	#sudo pip2 install --upgrade git+https://github.com/vlachoudis/bCNC #if you want git version
	python2 -m bCNC
Start working
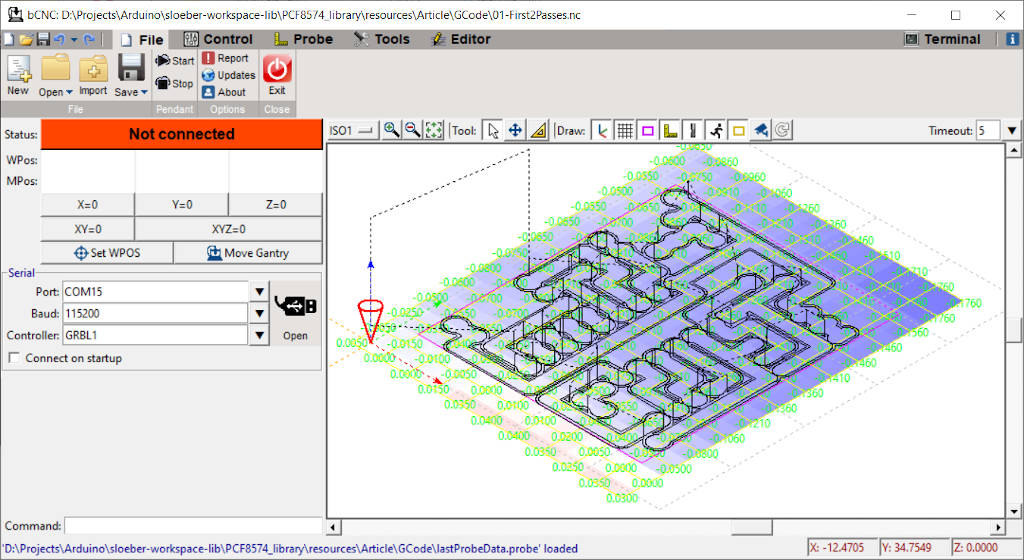
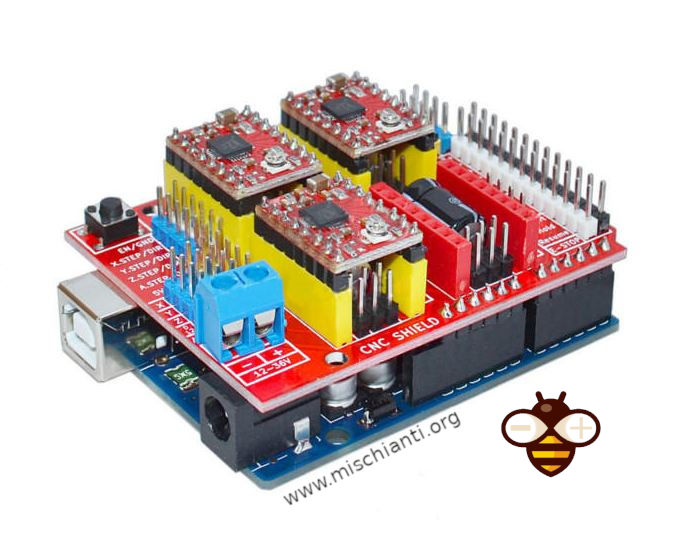
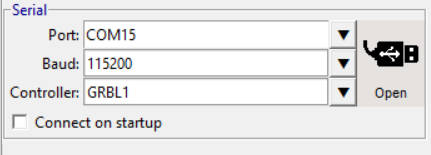
Now go to File Tab. The first operation is to connect your device to bCNC, and if you use my electronic with Arduino, you must connect the device and set the correct port, the baud rate to 115200, and the GRBL1 controller.
then click to open.
Home
My first CNC couldn’t do Home, and it was frustrating. I removed the limit switches because I didn’t know how to remove the noise (see this article for more details “CNC Cyclone PCB Factory: mechanical limit switches“), and I used tricks to avoid various tip changes, as you can see in the “Milling PCB tutorial“.
But all CNC must-do home, you can find the home command in this toolbar.

Material
To follow the guide, you need to have these boards

Here the FR4 single side copper clad Aliexpress
For all works, I use the same bits
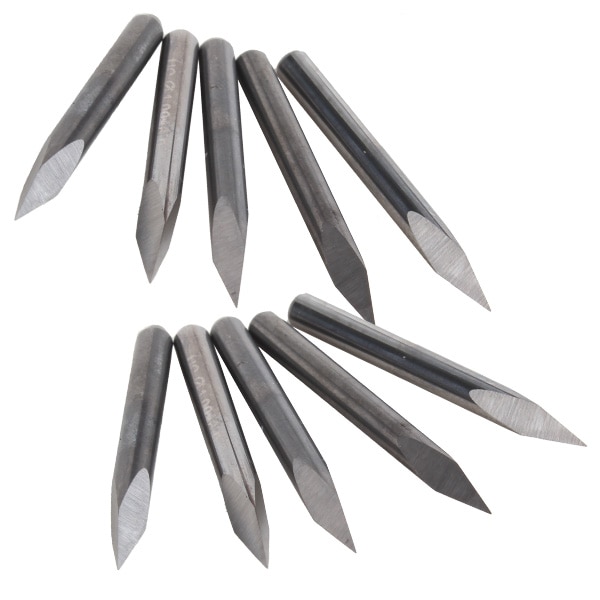
Here the pyramid bits AliExpress
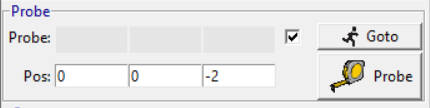
Probe
Now you must go to the bottom left angle of your board.
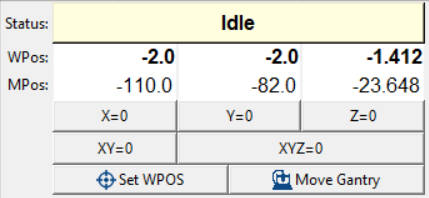
Put your bit with the alligator clip for probe about 1mm over the copper.
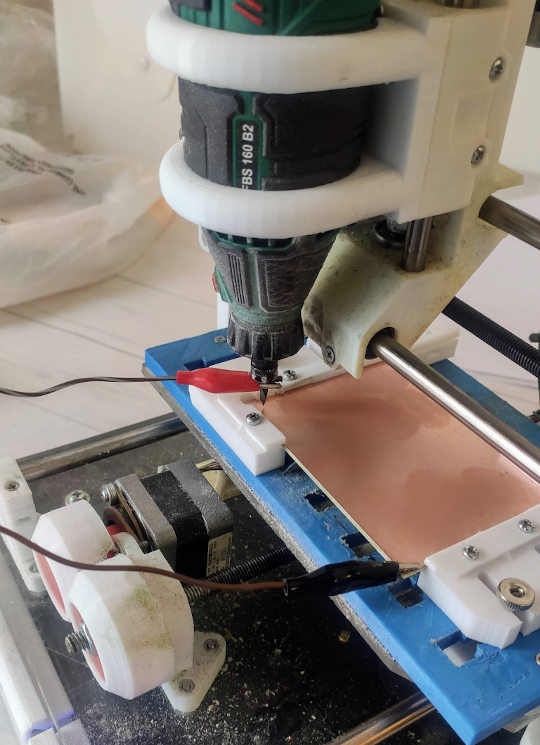
Then click the button to set all coordinates to 0 XYZ=0.
Now you must set the X and Y coordinate of your probe panel to 0 and Z to -2, and this means that X and Y remain fixed and Z try to find a contact from the actual position to 2mm depth.
Thanks
- bCNC tutorial: installation, material and probe
- bCNC tutorial: autolevel
- bCNC tutorial: restart work and milling process