Pironman Mini PC: a Raspberry Pi in a compact package with SSD, heat sync, and more.
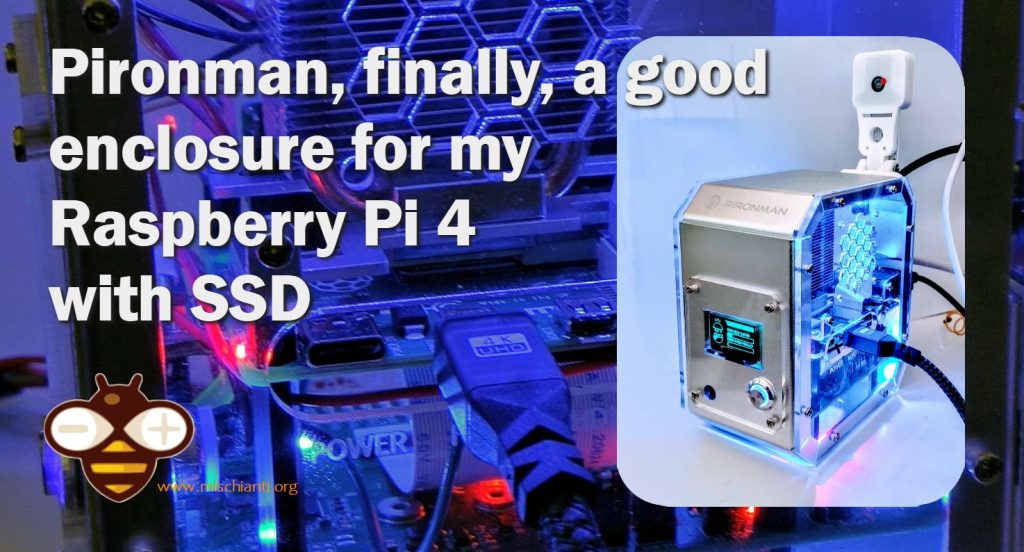
The Raspberry Pi has taken the maker and DIY community by storm, with its wide range of applications, affordable price, and ease of use. SunFounder’s Pironman Mini PC for Raspberry Pi is a testament to the platform’s versatility, incorporating an array of useful features into a compact and stylish package. In this review, we will delve into the Pironman’s design, performance, and unique features, as well as how it compares to a standard Raspberry Pi setup when it comes to storage performance.
We are going to assemble the Pironman, I advise you to get an SSD mPCIe and a micro HDMI cable like so.
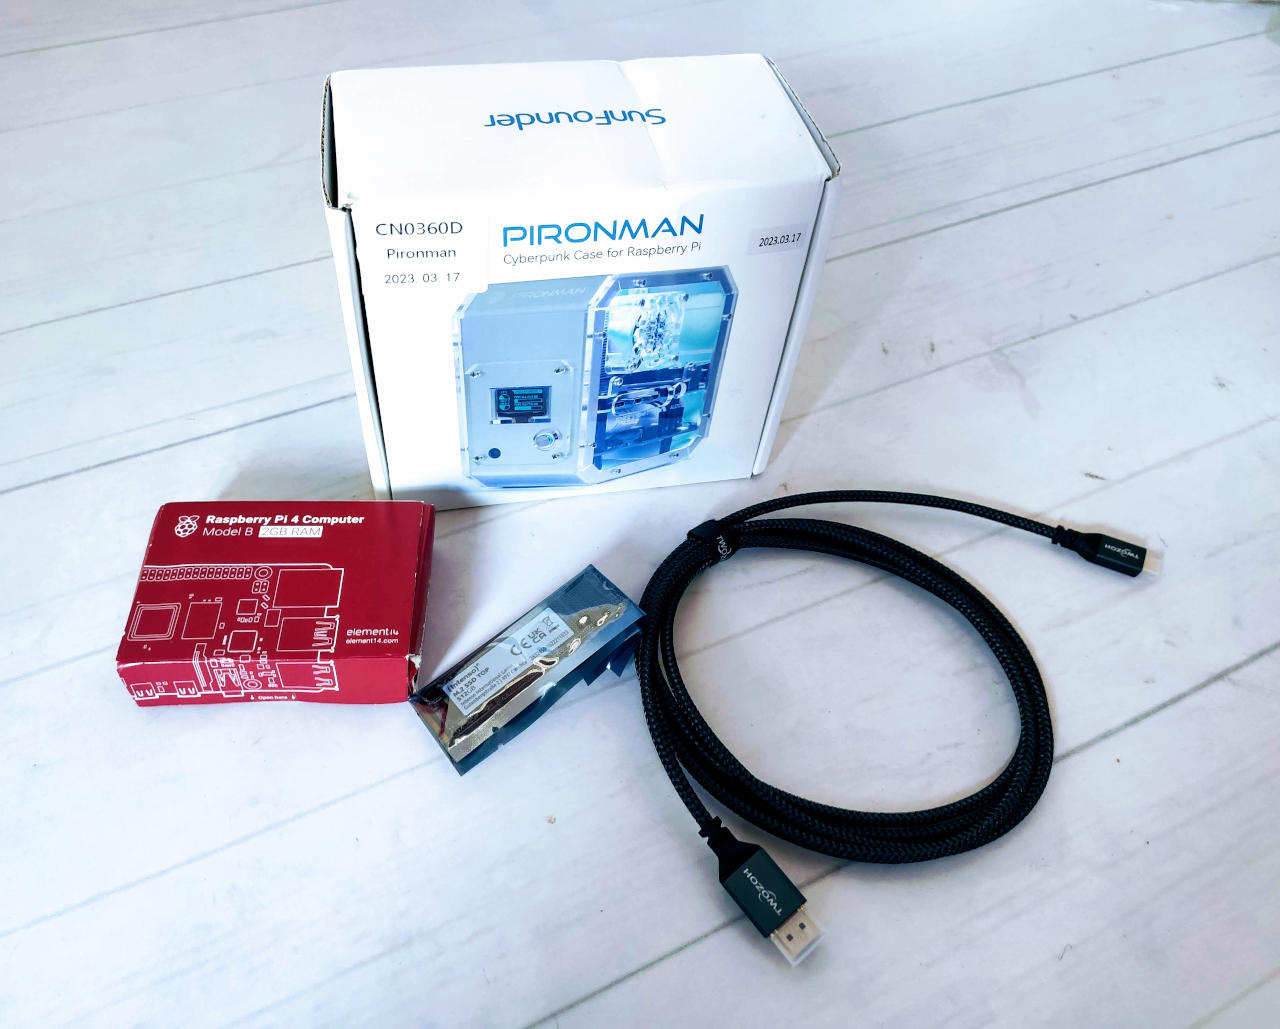
You can find Pironman from Sunfounder here, and from Aliexpress here.
I advise you to get an SSD like this one, and a good power supply like this one.
Finally, a micro HDMI cable.
Specs
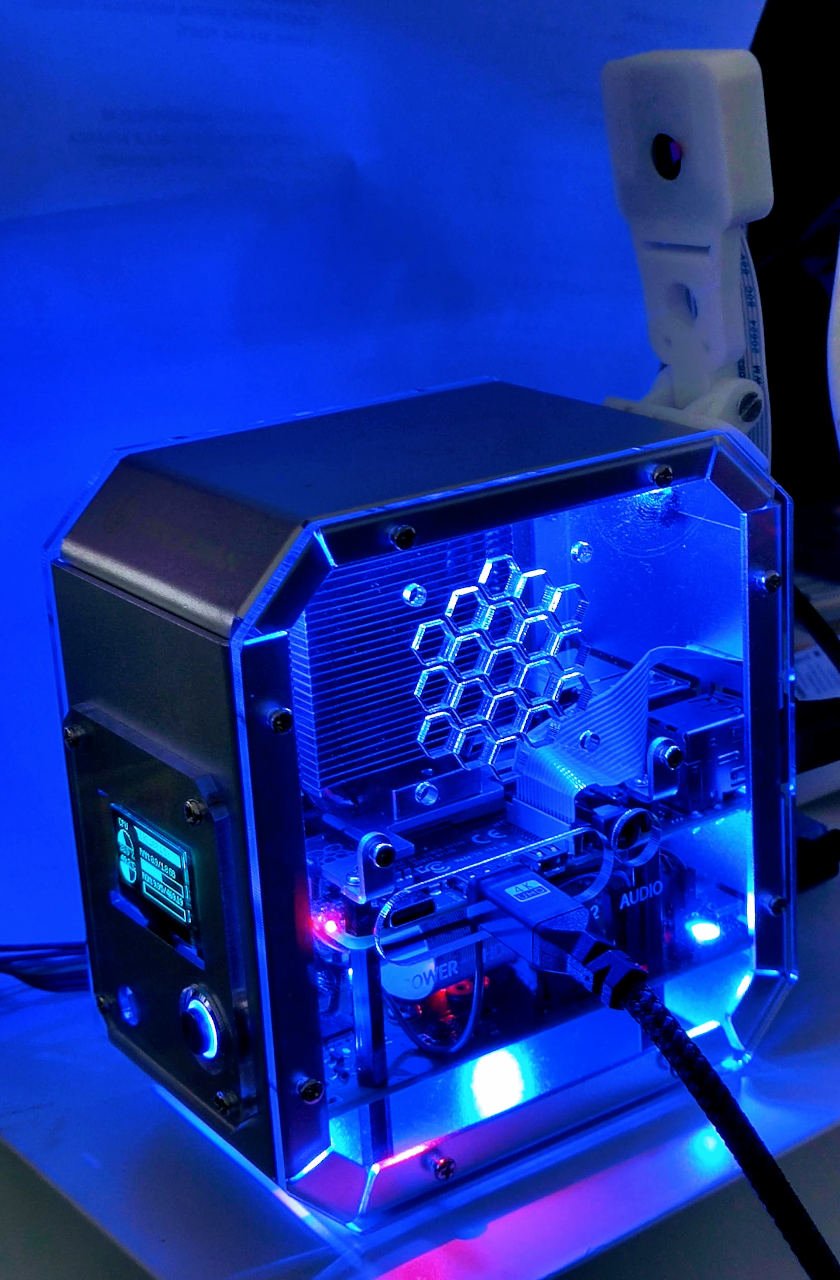
Design and Aesthetics
The Pironman is a small, aluminum-cased Raspberry Pi mini PC measuring just 11,25cm x 6,83cm x 11,89cm (4.43” x 2.69” x 4.68”).
The main body is made of aluminum, which not only provides durability but also aids in heat dissipation.
The clear acrylic side panel allows users to admire the internal components, while the external GPIO extender with pin name labels facilitates easy access to the Raspberry Pi’s GPIO pins.
The overall design is sleek, modern, and visually appealing, making it an excellent addition to any workspace or entertainment center.
Performance and Cooling
One of the standout features of the Pironman is its tower cooler, which can maintain a 100% CPU load Raspberry Pi at a cool 48°C in a 25°C room temperature.
This efficient cooling system ensures that the Raspberry Pi remains stable and can perform optimally even under heavy workloads.
Additionally, the RGB fan with GPIO control adds a touch of personalization and flair to the Pironman, while the 16 WS2812 addressable RGB LEDs further enhance its aesthetic appeal.
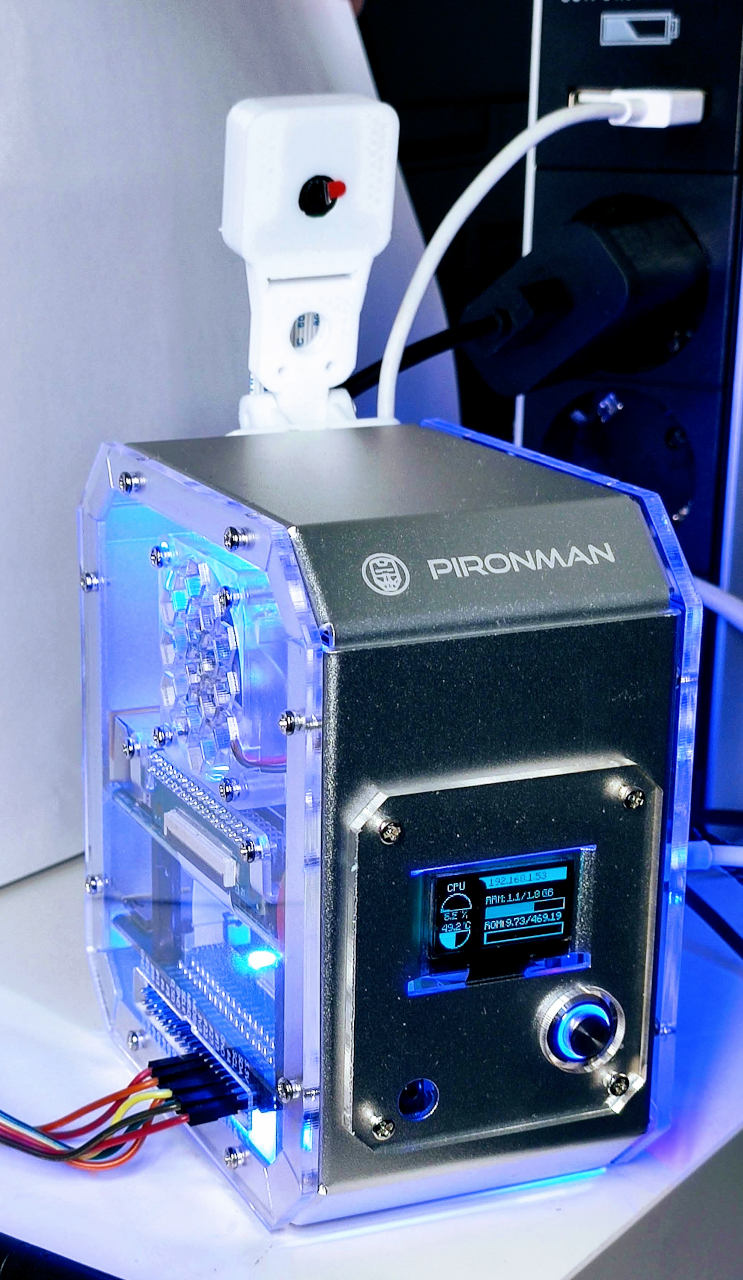
Onboard Display and Controls
The Pironman includes a 0.96″ OLED display that provides users with valuable information about the Raspberry Pi’s performance, such as CPU usage, temperature, disk usage, IP address, and RAM usage.
This real-time monitoring can be invaluable for troubleshooting and optimizing the system’s performance.
The IR receiver also allows users to control multimedia centers like Kodi or Volumio with ease, providing a seamless entertainment experience.
Storage Performance
One significant advantage of the Pironman is its onboard USB to M.2 SATA SSD adapter, which supports TRIM. Our tests show a remarkable improvement in storage performance when using the SSD adapter compared to a standard SD card setup. The results are as follows:
SD Card:
- Timing O_DIRECT cached reads: 41.40 MB/sec
- Timing O_DIRECT disk reads: 39.83 MB/sec
Pironman SSD Adapter:
- Timing O_DIRECT cached reads: 290.43 MB/sec
- Timing O_DIRECT disk reads: 307.08 MB/sec
The Pironman’s SSD adapter delivers approximately 7x faster performance in both cached and disk reads compared to a standard SD card setup, which can dramatically improve the overall responsiveness and capabilities of the Raspberry Pi.
Additional Features
The board can manage the power off and power on like a PC, so you don’t disconnect the cable or use an external switch to power off.
Assembly
The unboxed gives us an idea of the number of parts there are in the box.
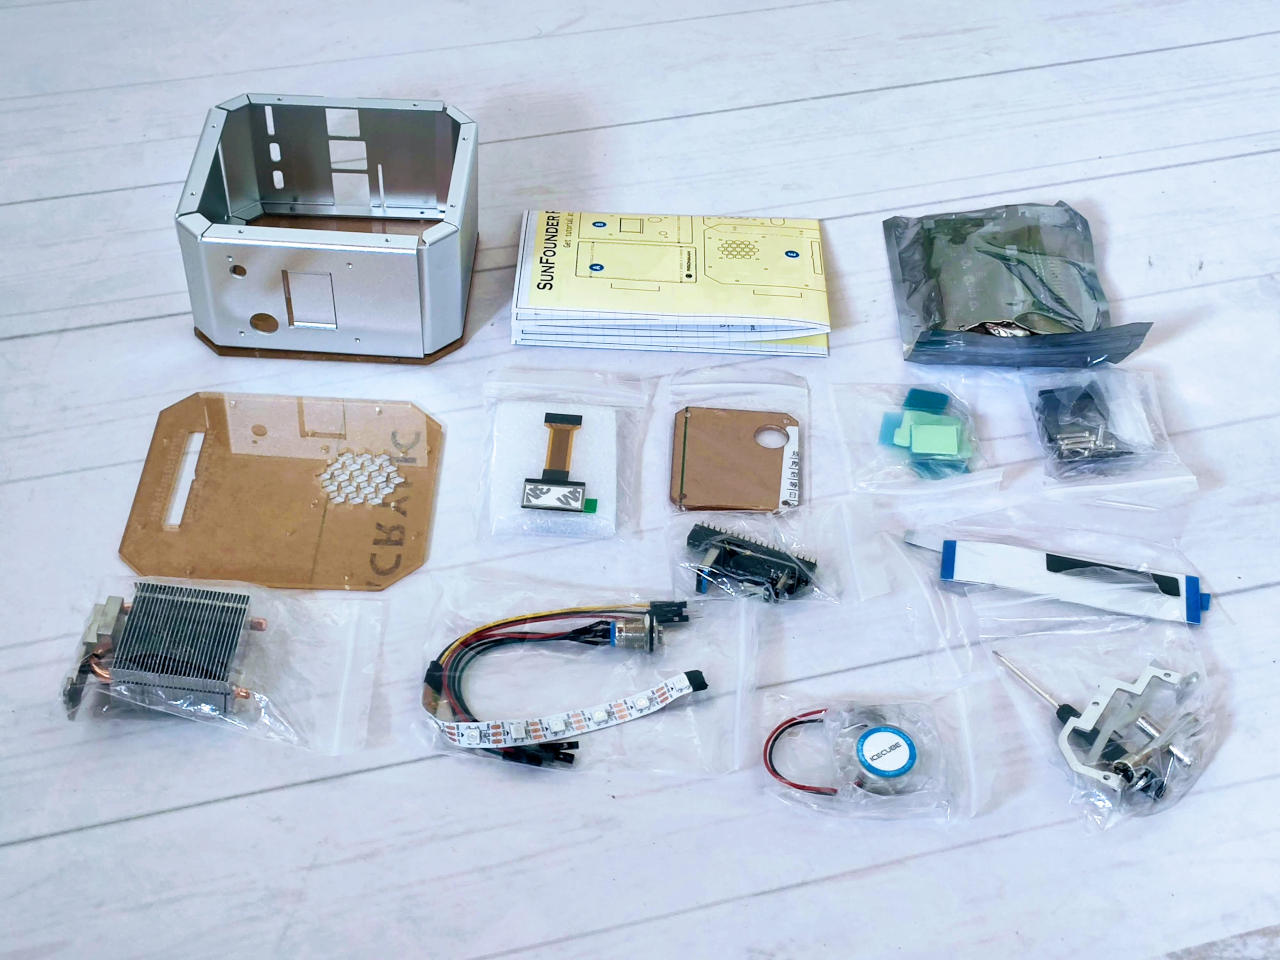
First of all, we get the extension board of Raspberry Pi. This board has some interesting features.
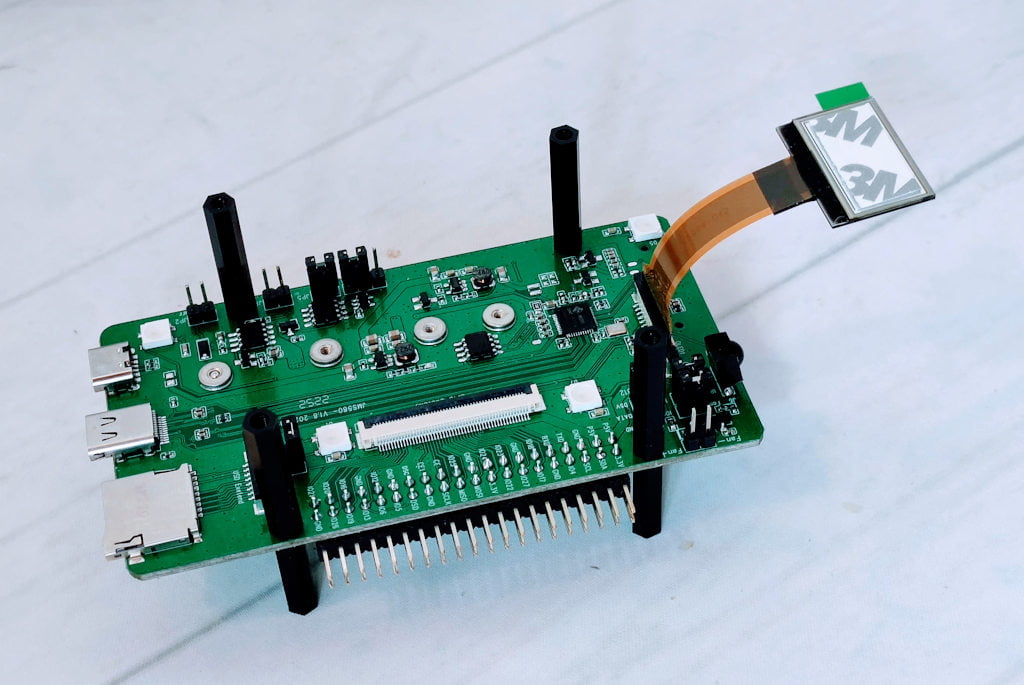
There are five jumper caps on the Main Board, and each jumper cap corresponds to a function. If you do not need the function and want to use the pin elsewhere, you can unplug the jumper cap. The following is a detailed explanation of the functions of the five jumper caps.
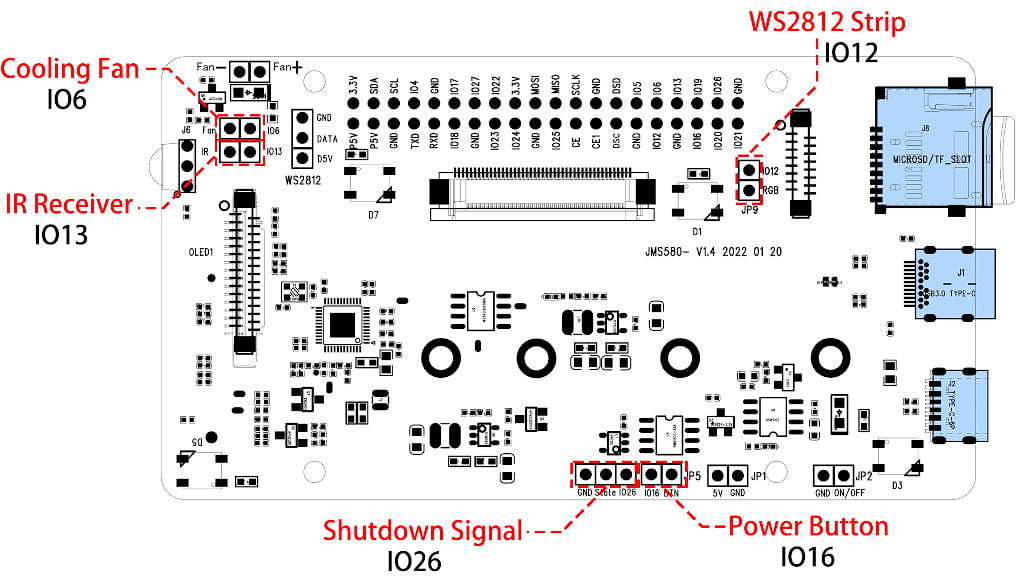
- Cooling Fan (IO6): The fan is always spinning when this jumper cap is unplugged. You can unplug the fan wires or remove the fan if you don’t need it.
- IR Receiver (IO13): If you pull out this jumper cap, the IR Receiver will not work.
- WS2812 Strip (IO12): If you pull out this jumper cap, the WS2812 Strip will not work.
- Shutdown Signal (IO26): The Mainboard powers on/off depending on the level of the
Statepin; whenStateis low, it powers on, and whenStateis high, it powers off.- You can only turn off the main board by pressing and holding the power button for 10 seconds if you connect GND and state with a jumper cap.
- If you connect
Stateand IO26 with a jumper cap. After configuration, the Raspberry Pi can control theStatepin through IO26. When Raspberry Pi is on,Statewill be set to low level, when Raspberry Pi is off,Statewill be set to high level, so the motherboard and Raspberry Pi can power on/off synchronously.
- Power Button (IO16): If you pull out this jumper cap, the power button will not work. Besides, the power button is also used to wake up the OLED screen in Sleep Mode.
Power Cut Memory
When the Pironman suddenly loses power, the chip of the Main Board will record this state and will automatically power on the next time.
The cables to connect are quite tedious, and a pair of pliers can help you.
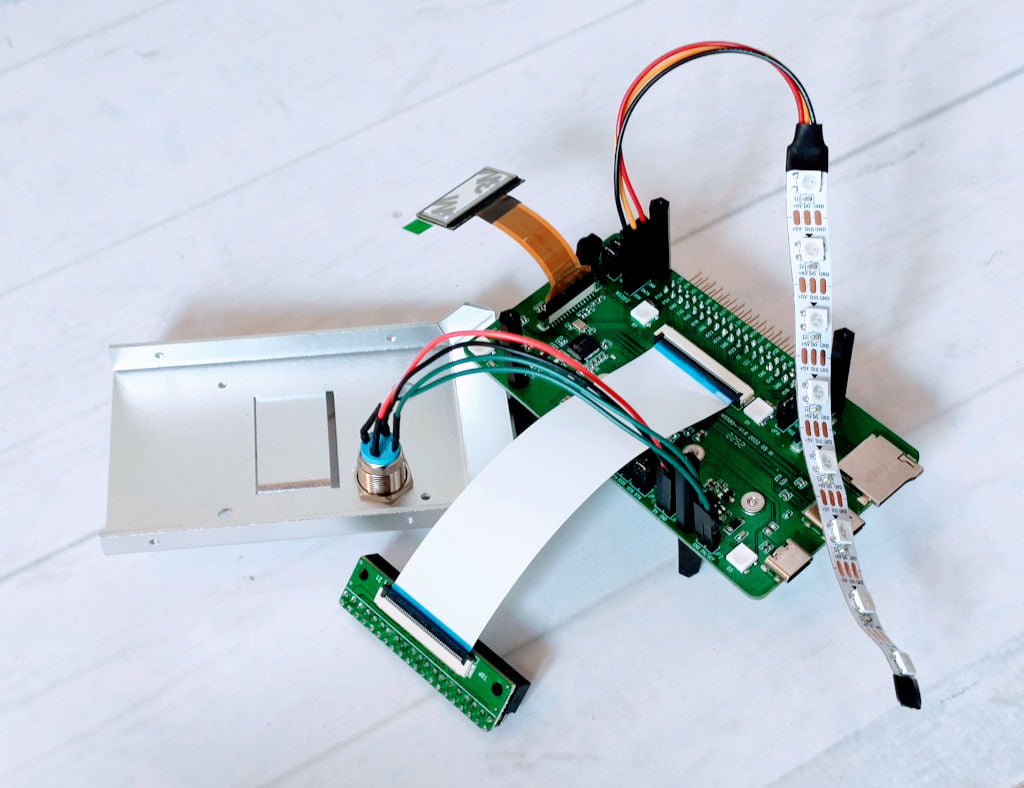
Now It’s the time to add the Raspberry Pi over all.
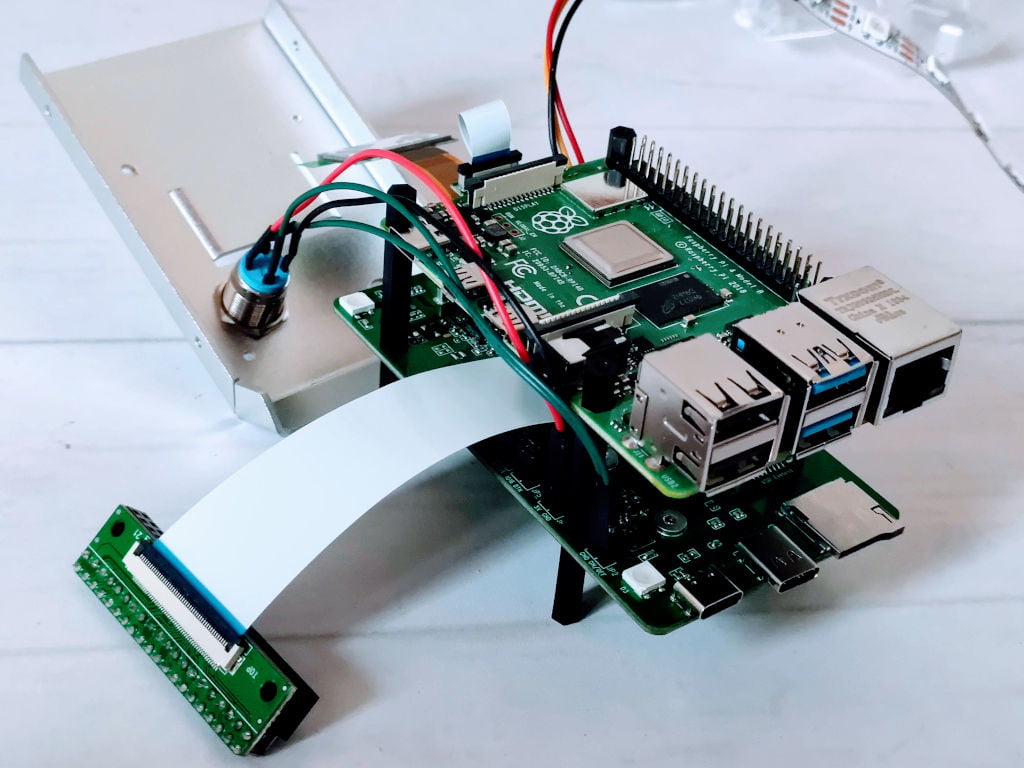
An impressive part is the heat sync, which has a big surface, and after some testing, I can declare that It works very well.
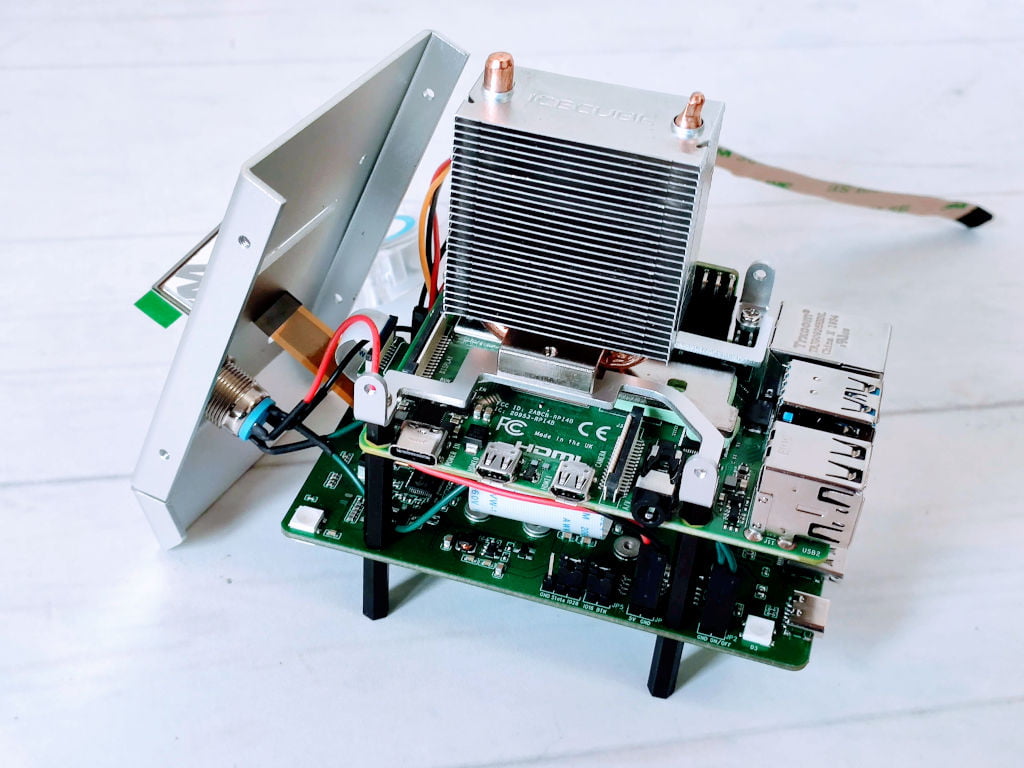
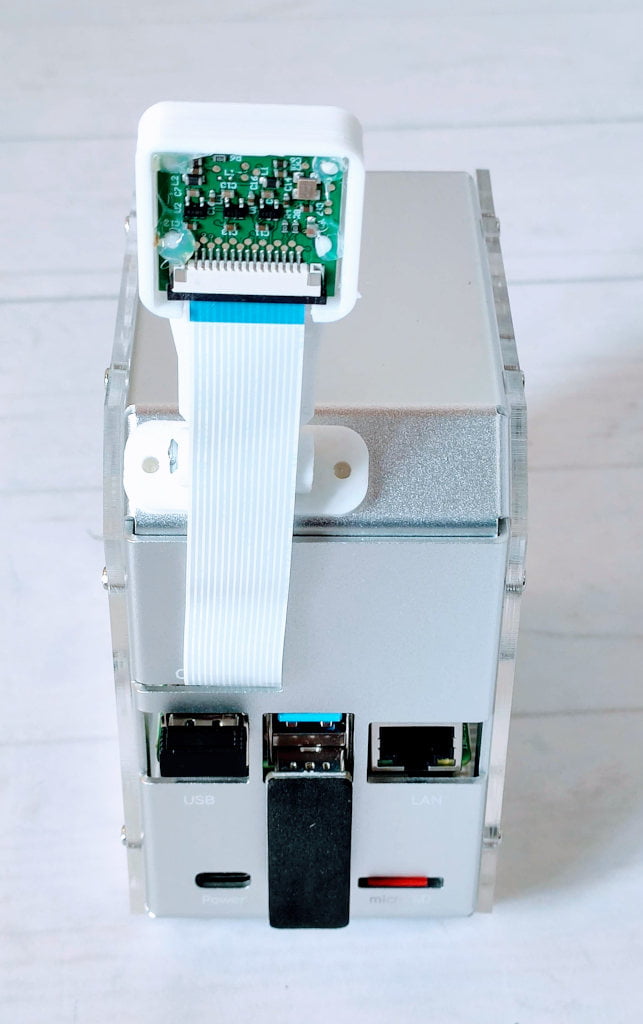
At this point, all electronic components are mounted. In my case, I add a camera to use this device for call conferences.
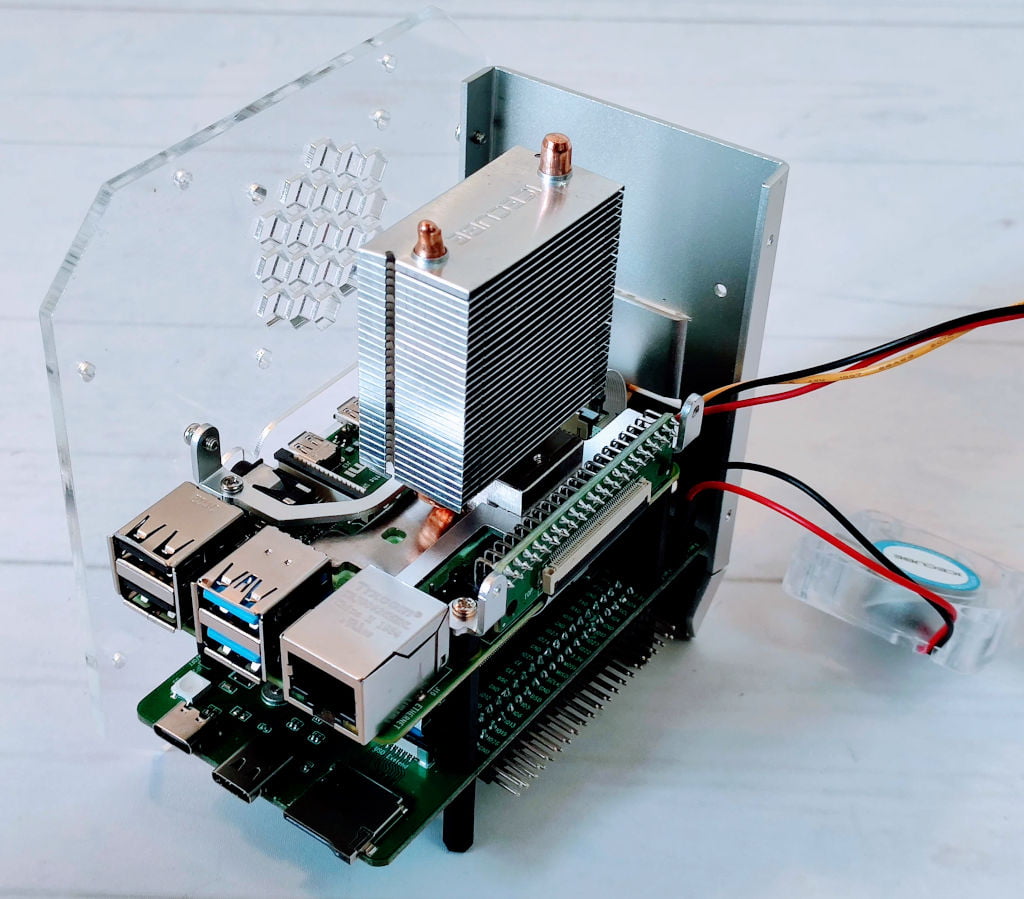
We can continue to assemble the case parts.
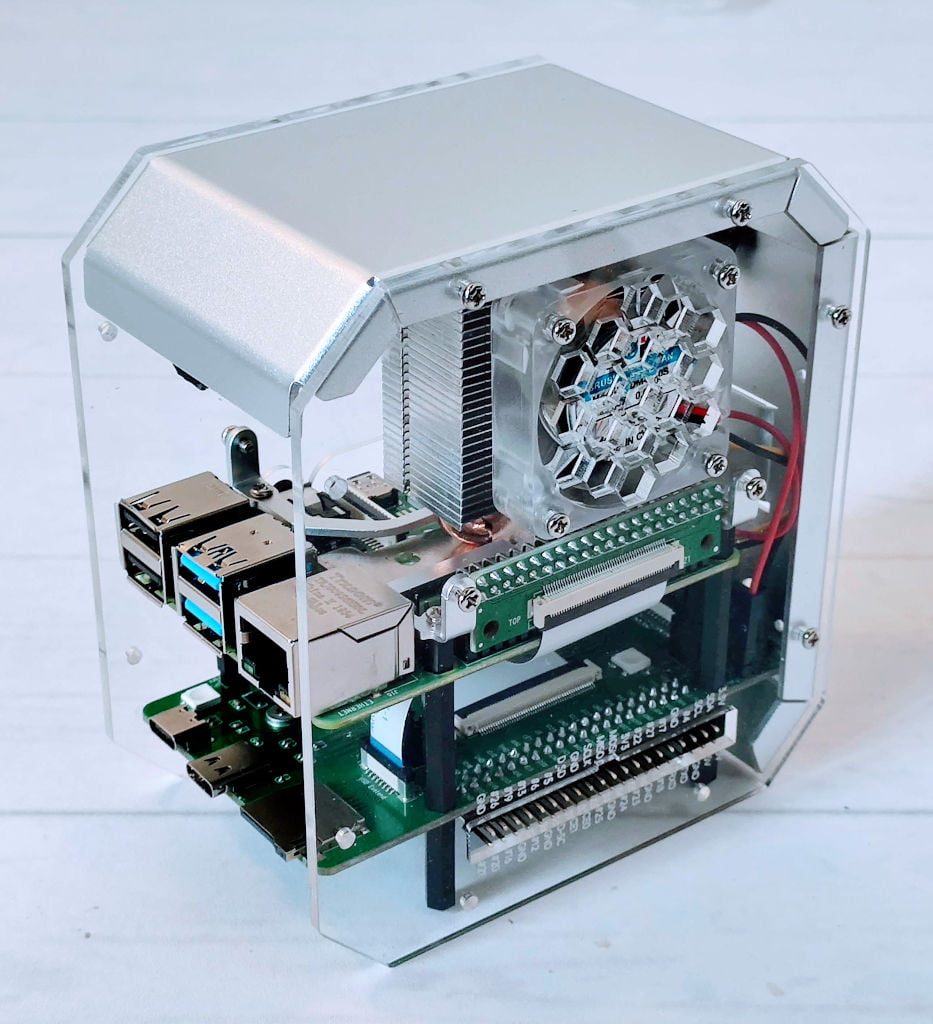
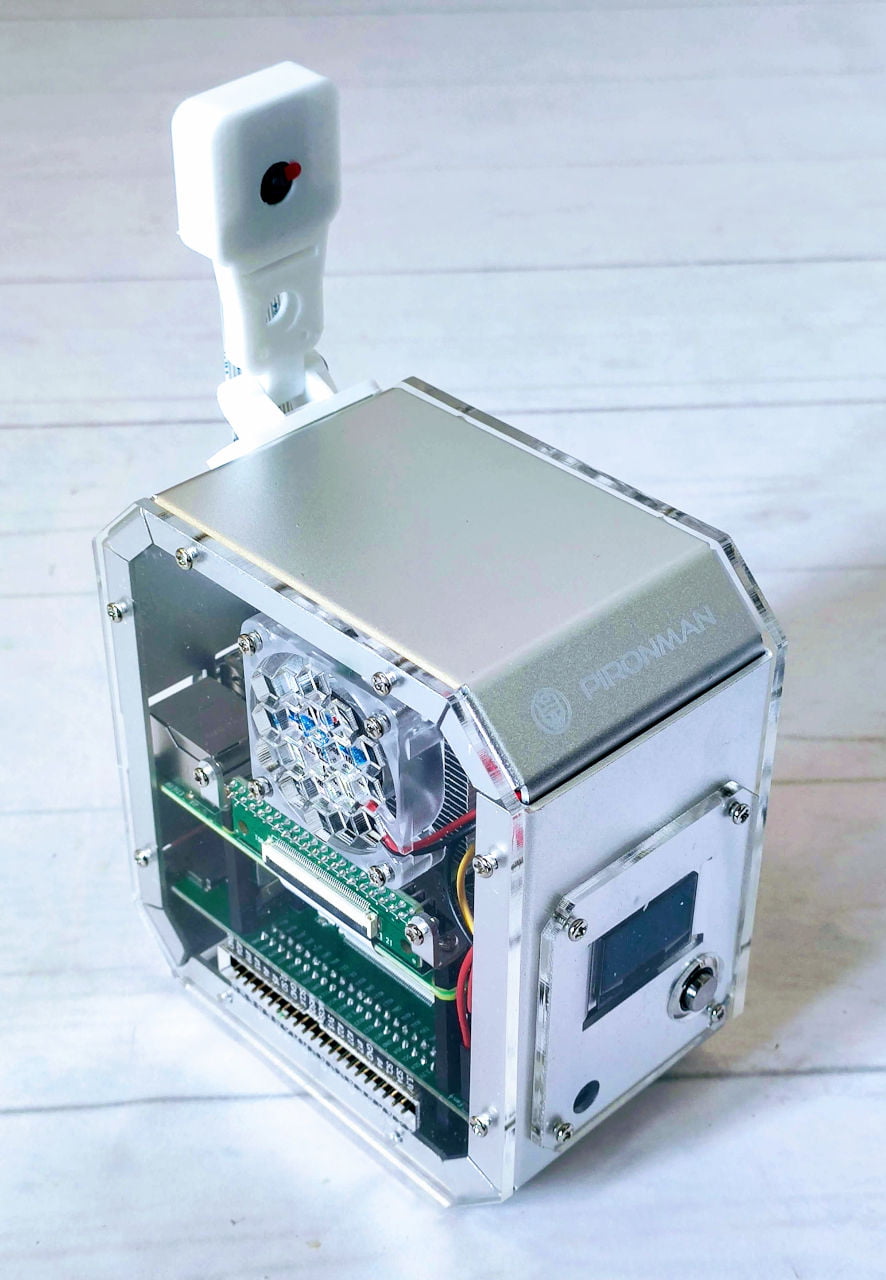
We can see that the case start to get the definitive form.

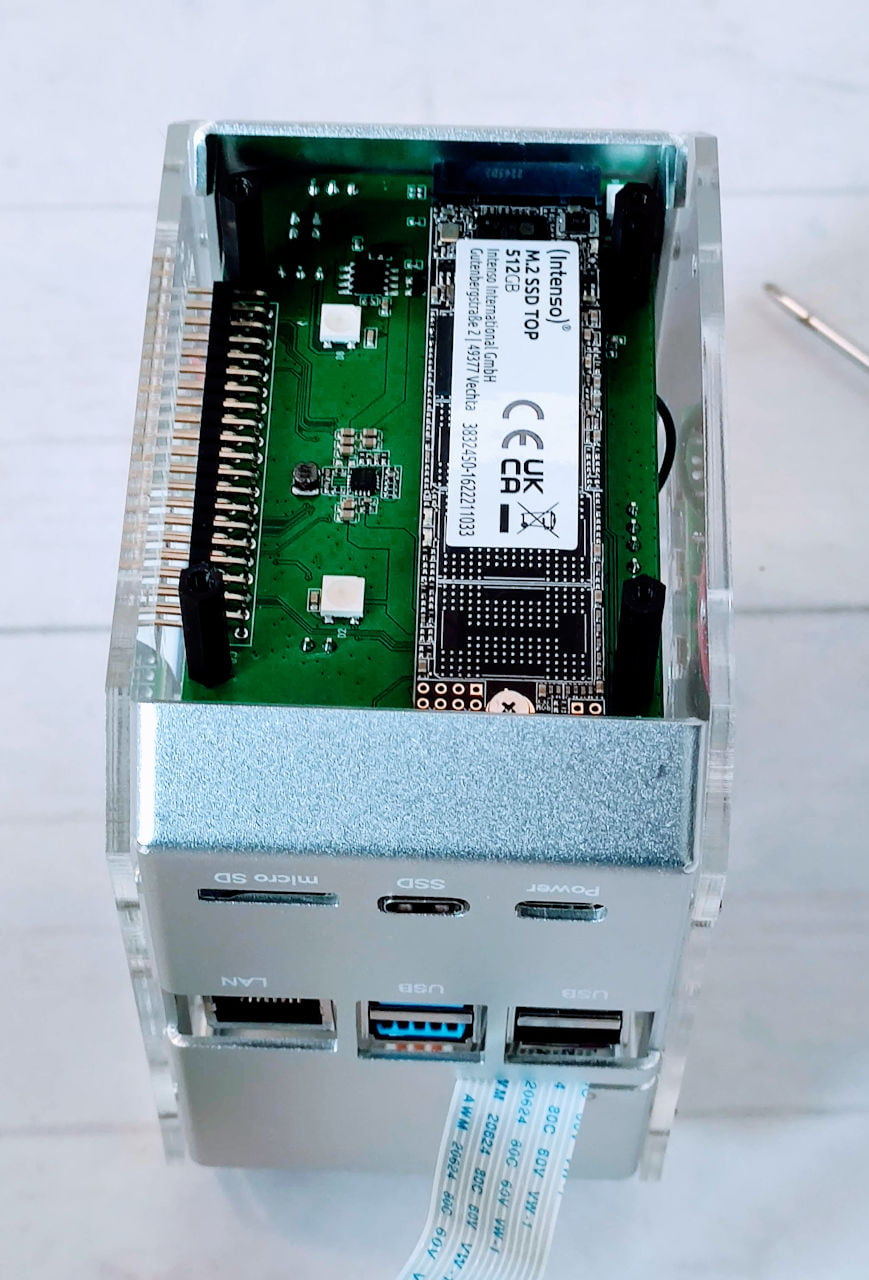
At the bottom, before adding the last case part, we can see the SSD slot.

Here the SSD is mounted.
Camera holder
To add a camera, I would get a mount like this one.
Here is a detail without the back of the camera holder.
I used hot glue to fix the holder. And finally, a complete detail.
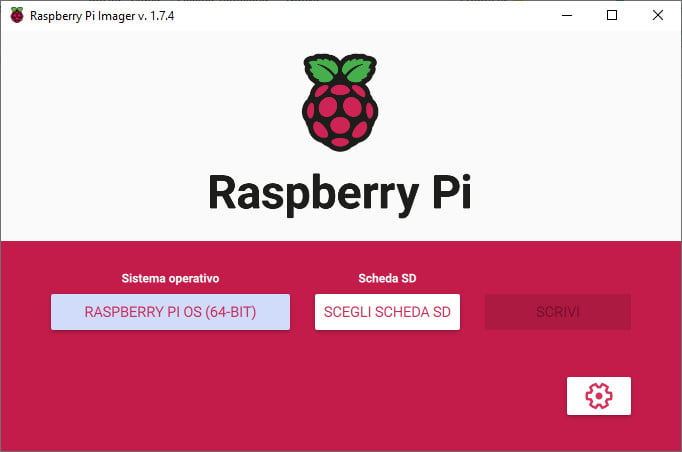
Installing software
As usual, I advise using Raspberry Pi imager for the installation, I select Raspberry Pi OS (64-bit) for me, and I put all in an SD.
Now put It on the back slot for the SD card and start the device. Add all mandatory data.
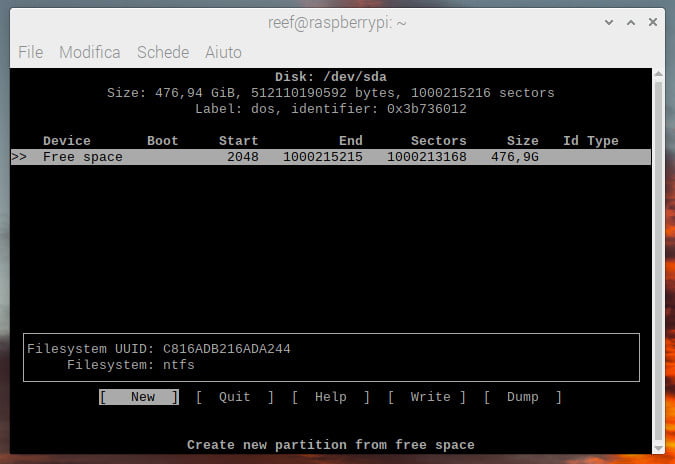
When the system is started, you can install the SO directly on SSD, or you can do a partition on It to use as an external drive. You can write:
cfdisk /dev/sda
And then create the partition.
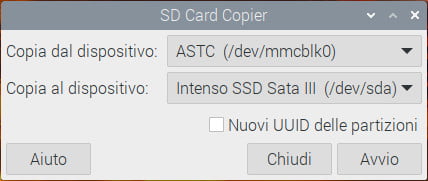
Another option is to use the utility given by the SO, the SD card copier that allows to you to copy the current SD to the SSD so that you can use the same SO on SSD.
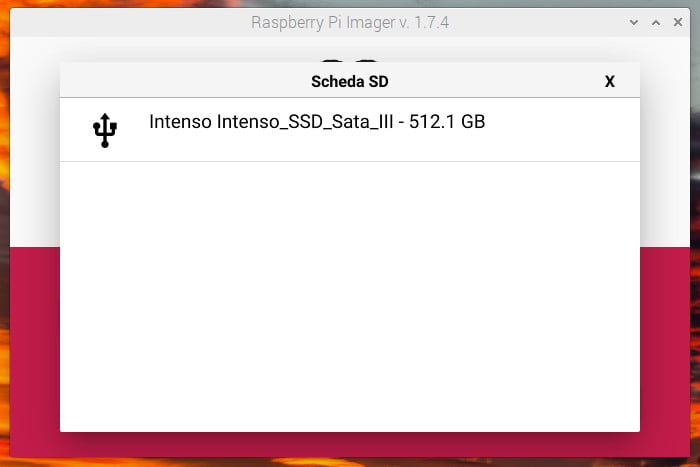
Or (my option) use the Raspberry Pi Imager, already installed on Raspberry Pi OS, to do a new installation.
Configure the Pironman environment
When you definitively select your SO, the next step is to install the Pironman utility to manage the fan, RGB led, screen, the power on/off button, and so on.
If your systems don’t have git, python3, and pip pre-installed, you need to install them first.
sudo apt-get update
sudo apt-get install git -y
sudo apt-get install python3 python3-pip python3-setuptools -y
Use the following commands to download and install the pironman module.
cd ~
git clone https://github.com/sunfounder/pironman.git
cd ~/pironman
sudo python3 install.py
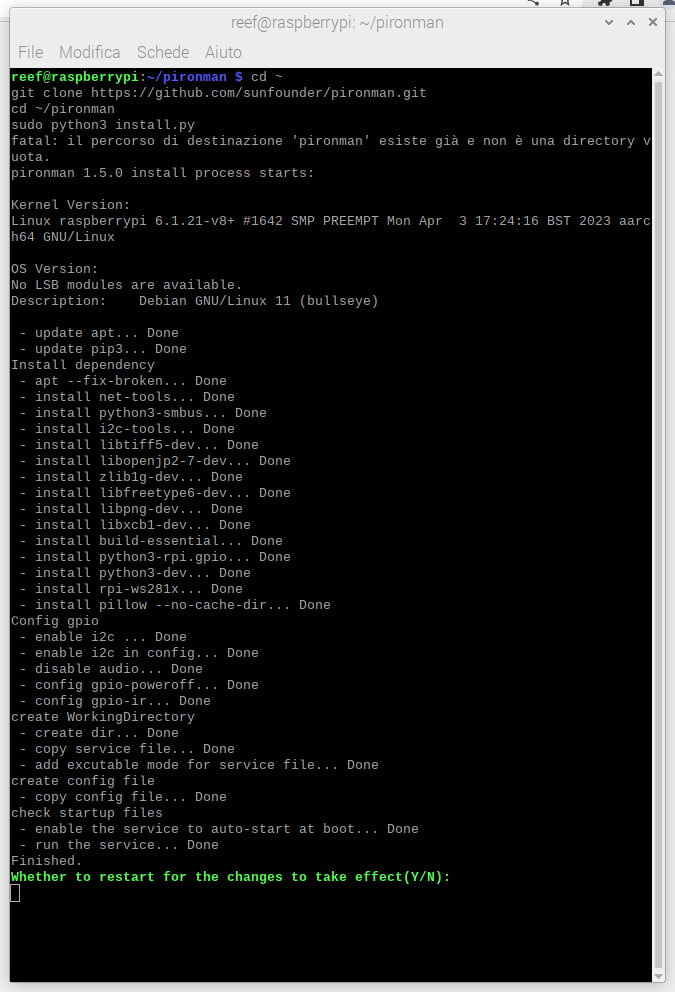
After installation, the program will start automatically. Here are the basic configurations for Pironman.
- The OLED screen will display the CPU, RAM and ROM Usage, CPU Temperature and IP Address of the Raspberry Pi.
- After 60 seconds, the OLED display goes into sleep mode, and you can wake it up by a short press on the power button.
- The fan is turned on at 50 degrees Celsius.
- Turn on the WS2812 RGB strip so that it displays in color #0a1aff(blue) and in breath mode (change rate is 50%).
- At this point, you can press and hold for 2 seconds to safely shut down or 10 seconds to forcibly shut down.
For me, the next step is to put on the OLED screen with stats for all time with this command.
pironman -al on
Minimal test for evaluation
Now I do some tests to check if the case finds my expectation. First of all, I evaluate if SSD offers better performance than SD (securely, SSD is more strong than an SD).
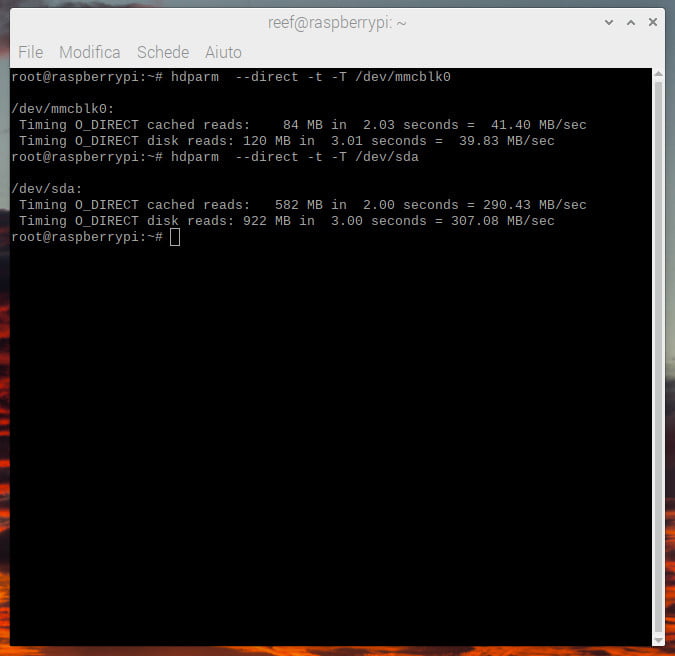
So I launch a benchmark on SSD and SD, with these commands:
hdparm  --direct -t -T /dev/mmcblk0
hdparm  --direct -t -T /dev/sda
The result, as I already say, is that my SSD is seven times faster than my SD.
Another important test for me was the stress test to check the temperature, and It was brilliant survive to that.
I put in 30 minutes of 100% CPU and never raised more than 52° of temperature.
But I discover that SSD wants more current, so I advise a minimum 4A power supply.
Thanks
SunFounder’s Pironman Mini PC for Raspberry Pi is an impressive, feature-rich, and visually appealing package that offers a significant performance boost over standard Raspberry Pi setups. With its efficient cooling, onboard display, IR receiver, and storage performance, the Pironman is an excellent choice for anyone looking to maximize the potential of their Raspberry Pi, whether for projects, entertainment, or office use.
Thanks
Raspberry Pi case
- Pironman Mini PC: a Raspberry Pi in a compact package with SSD, heat sync, and more.
- Night Vision on Raspberry Pi: TS7-Pro Display, PiPower & DIY 3D Printed Battery in Action!
- RasPad 3: transform your Raspberry Pi into a versatile tablet with multi-OS boot