
RasPad 3: transform your Raspberry Pi into a versatile tablet with multi-OS boot
Embarking on a digital creation journey often begins with choosing the right tools, and for enthusiasts of the Raspberry Pi, the SunFounder RasPad 3 offers a compelling solution. Marketed as more than just a display, the RasPad 3 turns the popular Raspberry Pi into a versatile, portable tablet.
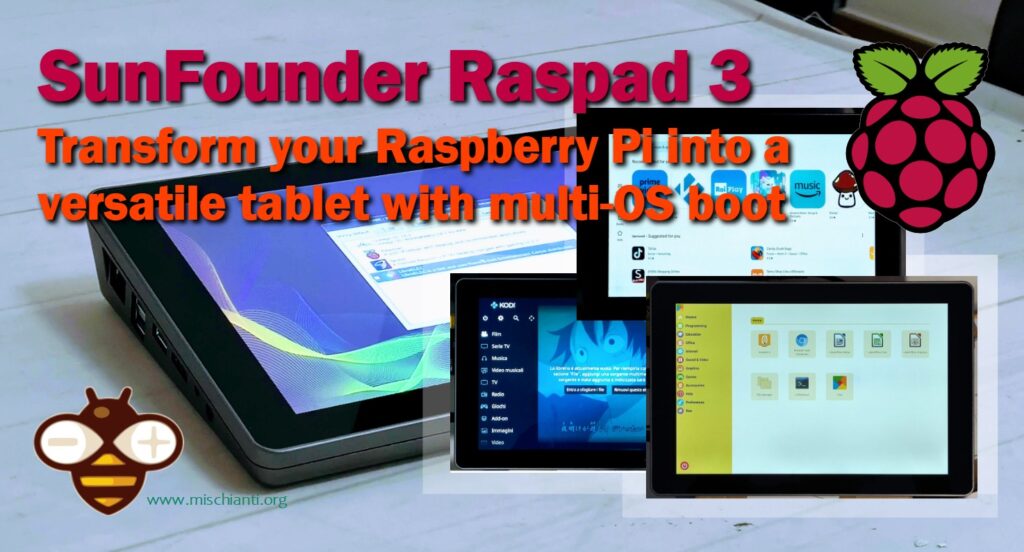
This all-in-one solution not only provides a 10.1-inch touchscreen monitor but also houses a battery and a case specifically designed for the Pi. Ideal for tinkerers and creators who revel in the ability to experiment with various projects, the RasPad promises portability and ease of use. In this article, I will take you through the nuances of assembling this device with a Raspberry Pi 4, enhancing it with an M2. SSD, and setting up a multi-operating system environment using PINN.
We’ll delve into the product’s announced features, assembly process, compatible operating systems, and I’ll share hands-on experiences and tips to help you decide if the RasPad is the right fit for your creative toolbox
SunFounder Raspad official store
Here the Raspad Raspad 3.0 - Pironman Mini PC - Wireless Keyboard and Mouse
Here the Raspberry 4 Raspberry Pi 4 B - Raspberry Pi Zero
Here the SSD M2 SATA and the adapter SSD M2 SATA - SSD M2 SATA - USB SSD M2 SATA adapter
Key features
The SunFounder RasPad 3 is a haven of features for the Raspberry Pi enthusiast, offering a 10.1-inch IPS touchscreen LCD monitor with a 10-finger touch capability and a comfortable 1280×800 resolution.
Its battery life extends to a useful 5 hours, empowering users with true portability. With an external HDMI port, the RasPad 3 can easily switch roles between a standalone device and a desktop monitor.
It includes a six-axis acceleration sensor, mirroring the intuitive screen rotation familiar to smartphone users. Connectivity is a breeze with its three USB 3.0 ports, Ethernet, audio jack, and power input, all strategically placed for easy access.
Additional thoughtful touches include an SD card slot, battery indicator, and volume controls with a built-in speaker and brightness adjustment functions. What’s more, the GPIO and camera ports remain accessible for hardware projects, ensuring that the RasPad doesn’t limit the Pi’s expandability.
When augmenting the RasPad with a Raspberry Pi 4, the enhanced processing power and improved memory management open doors to more demanding projects and applications.
The inclusion of an M2. SSD — not to be confused with the faster NVMe variant — provides ample storage space and potentially faster read/write speeds than a traditional microSD, which can be crucial when running multiple operating systems or handling large datasets.
This SSD integration, along with the potential for multiboot capabilities through PINN, transforms the RasPad into a highly versatile development platform. Users can switch between operating systems tailored for different tasks, from media centers to programming environments, making it a quintessential tool for hobbyists and professionals alike seeking flexibility without sacrificing functionality.
So at the end of this article, we have these features:
- 10.1-inch IPS Touchscreen: Offers a multi-touch experience with a clear 1280×800 resolution.
- Battery Life: Up to 5 hours, facilitating mobility and wireless use.
- Connectivity: Includes an HDMI port, three USB 3.0 ports, Ethernet, audio jack, and power input.
- Intuitive Interface: Features a six-axis acceleration sensor for automatic screen rotation.
- Comprehensive Controls: Comes with an SD card slot, battery indicator, volume control, and brightness settings.
- Expansion-Friendly Design: Maintains access to GPIO and camera ports for hardware projects.
- Raspberry Pi 4 Integration: Boosts performance with advanced processing capabilities and memory efficiency.
- M2. SSD Storage Expansion: Provides additional storage capacity and improved data transfer rates, enhancing the device’s functionality for complex tasks.
- Multiboot with PINN: Allows the installation of multiple operating systems, offering versatility for a wide range of applications and use cases.
Assembly process
To assemble the SunFounder RasPad 3 with a Raspberry Pi 4 and an M2. SSD, follow this comprehensive guide:
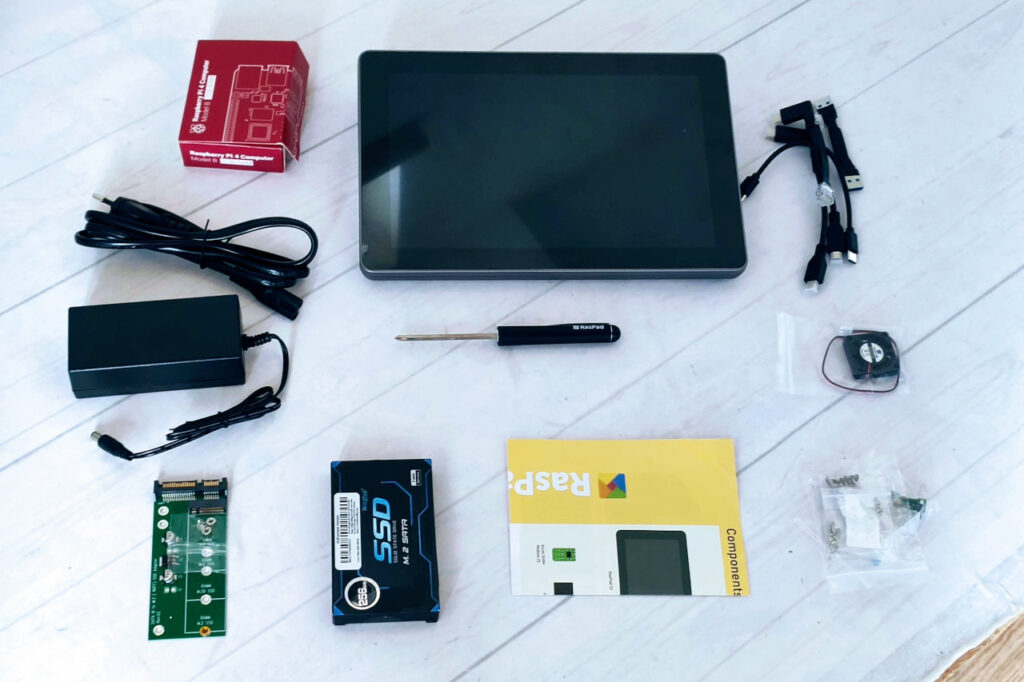
- Unboxing: Inside the RasPad box, you will find:
- Power supply (select the model compatible with your region: US, EU, or UK)
- A fan and three heat sinks to manage the Raspberry Pi’s temperature
- A user manual for assembly and system installation
- Necessary cables and screws
- A magnetic screwdriver with the RasPad logo
- An accelerometer for screen rotation
- Case Preparation: Open the case to reveal the pre-installed mainboard and the designated space for the Raspberry Pi 4.
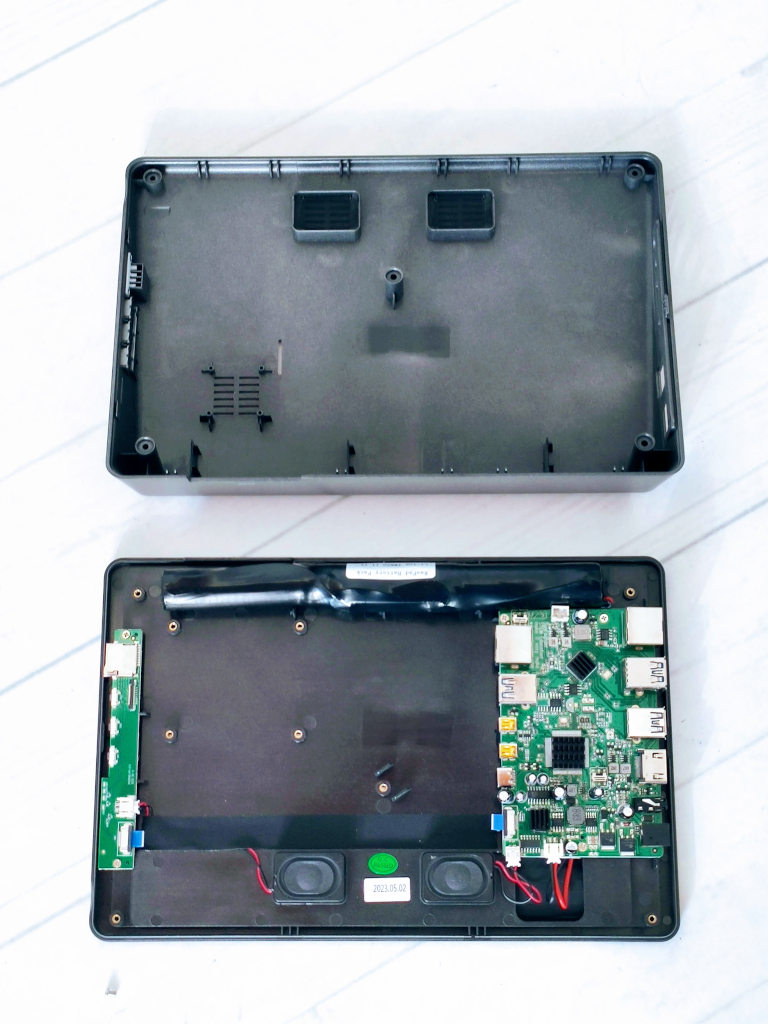
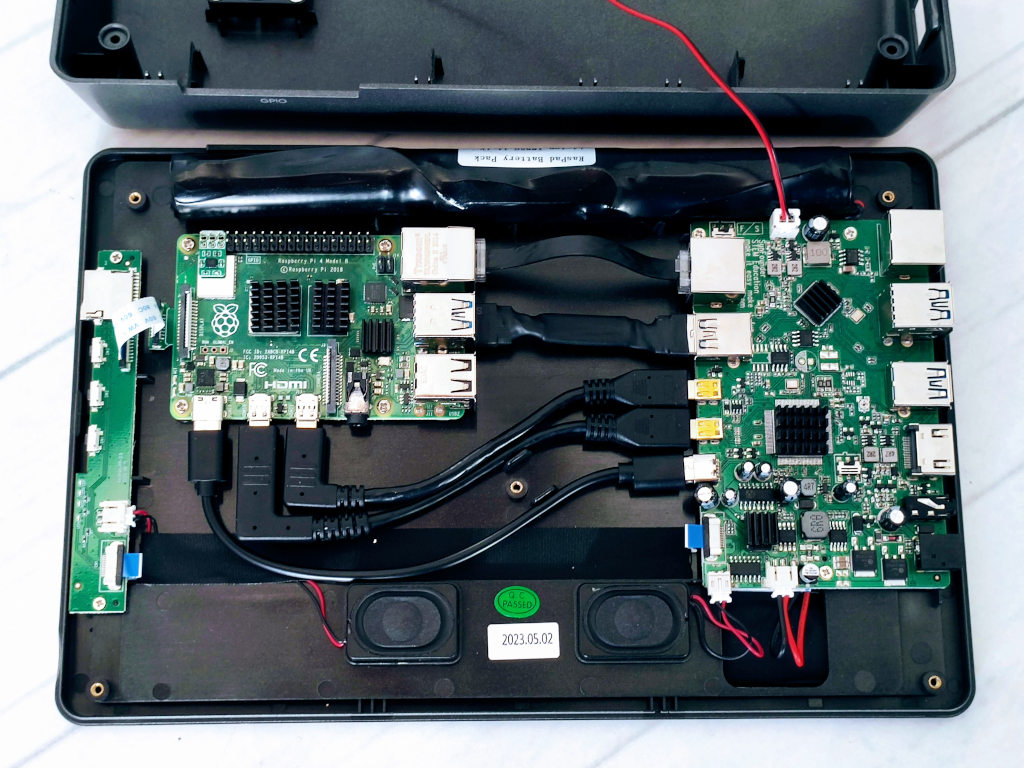
- Raspberry Pi Installation: Secure the Raspberry Pi 4 onto the provided screws on the left side and connect it to the mainboard using the included cables for USB, RJ45, Micro-HDMI, etc.
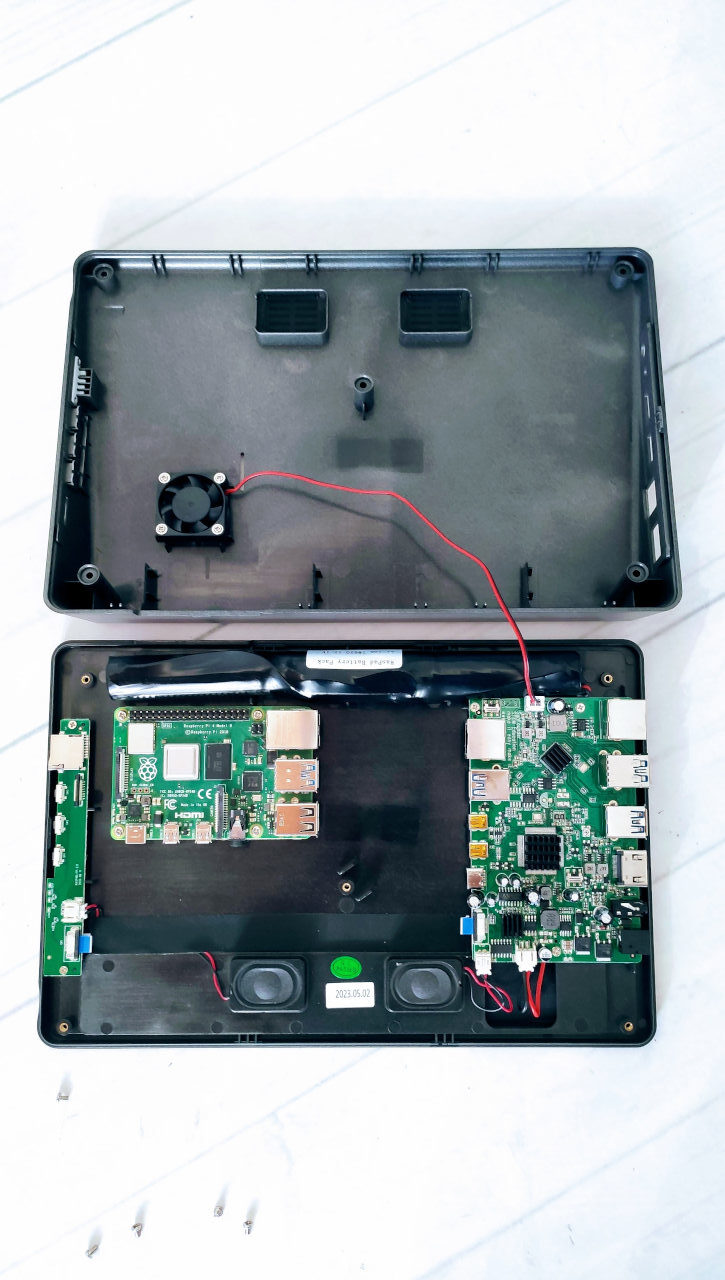
- Cable Management: Take care with the USB cable length; ensure it’s neatly tucked without forcing the Raspberry Pi into its slot.
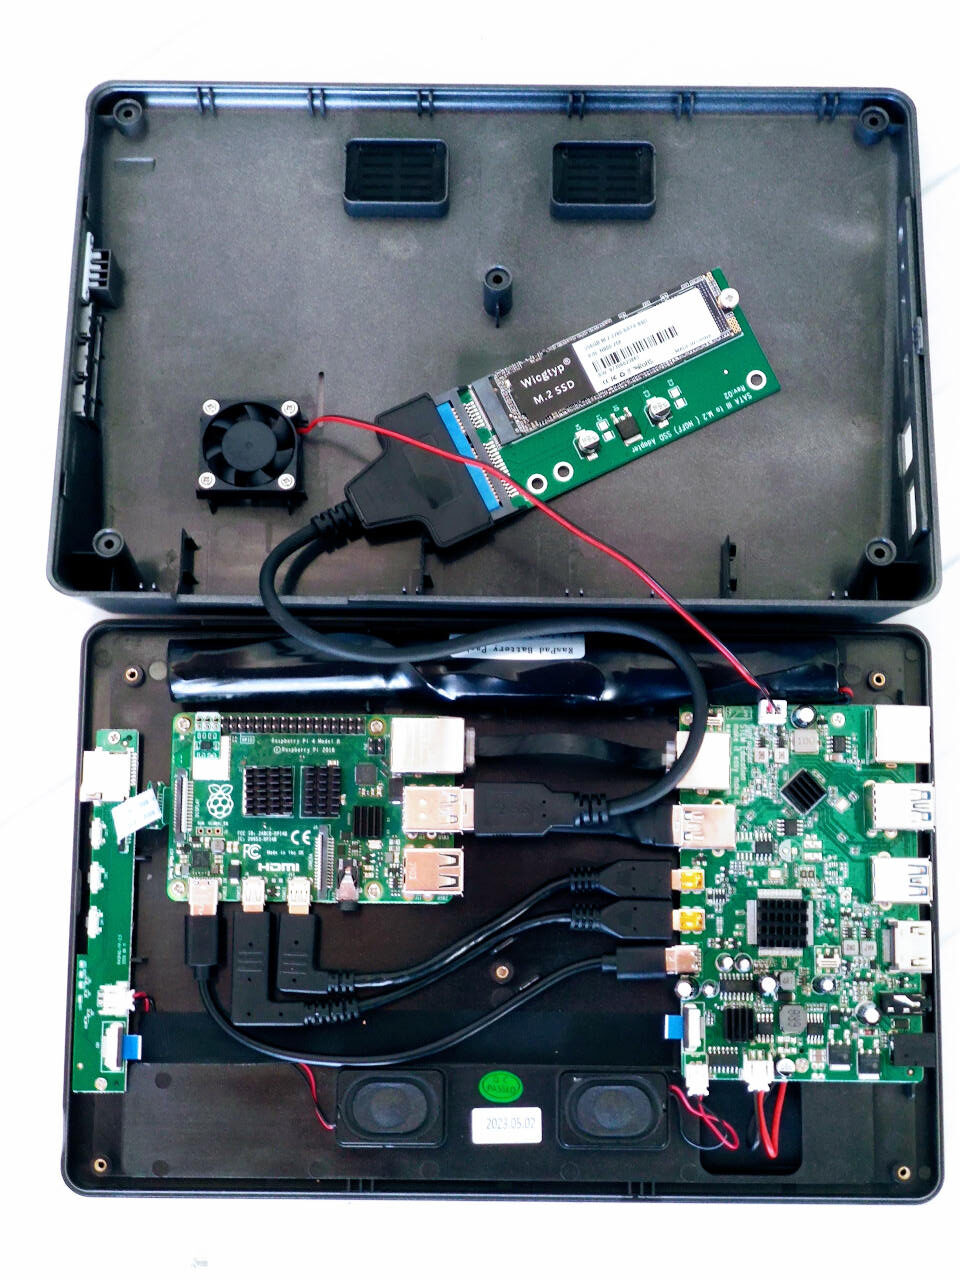
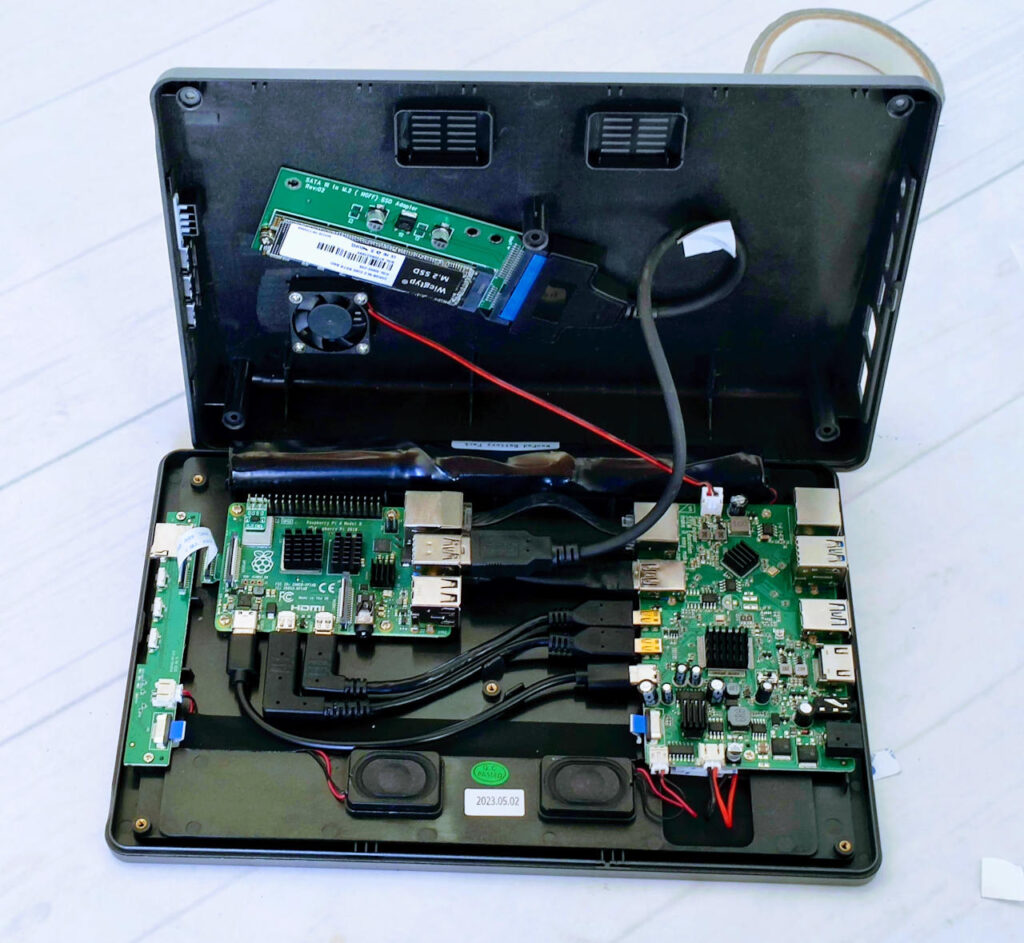
- Add SSD: Attach the SSD to the case and connect to the Raspberry Pi.
- Closing the Case: Once all components are in place and connected, close the case and secure it with screws.
- Power Test: Connect the power supply and perform a quick test to ensure everything is functioning correctly before proceeding with the operating system installation.
This process should take around 10-15 minutes for those familiar with hardware assembly. If you encounter any challenges, refer to the user manual or online documentation for assistance. With the RasPad assembled, you can proceed to install your preferred operating system and configure the M2. SSD for enhanced storage and performance.
Install the OS
The operating system installation on your assembled RasPad 3 is a straightforward process that can accommodate any OS compatible with Raspberry Pi 4.
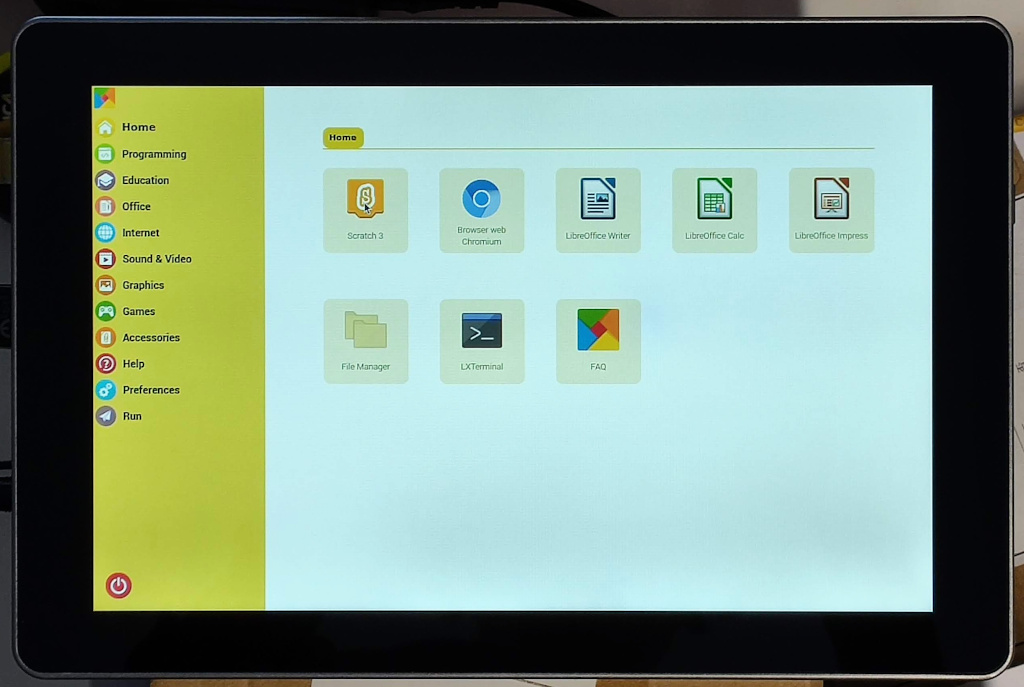
Notably, the RasPad launcher, a custom system optimized for touchscreen use and screen rotation, is an excellent starting point installed over Raspbian. It’s a launcher designed to enhance the touch interface. To install RasPad launcher.
But now we are going to install Raspbian on SD.
Standard installation
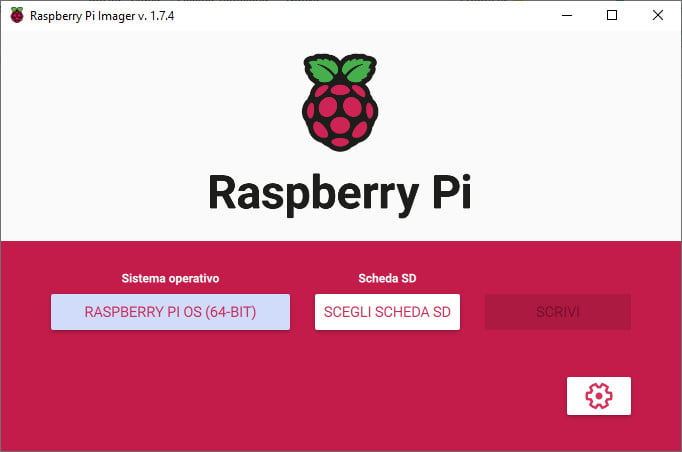
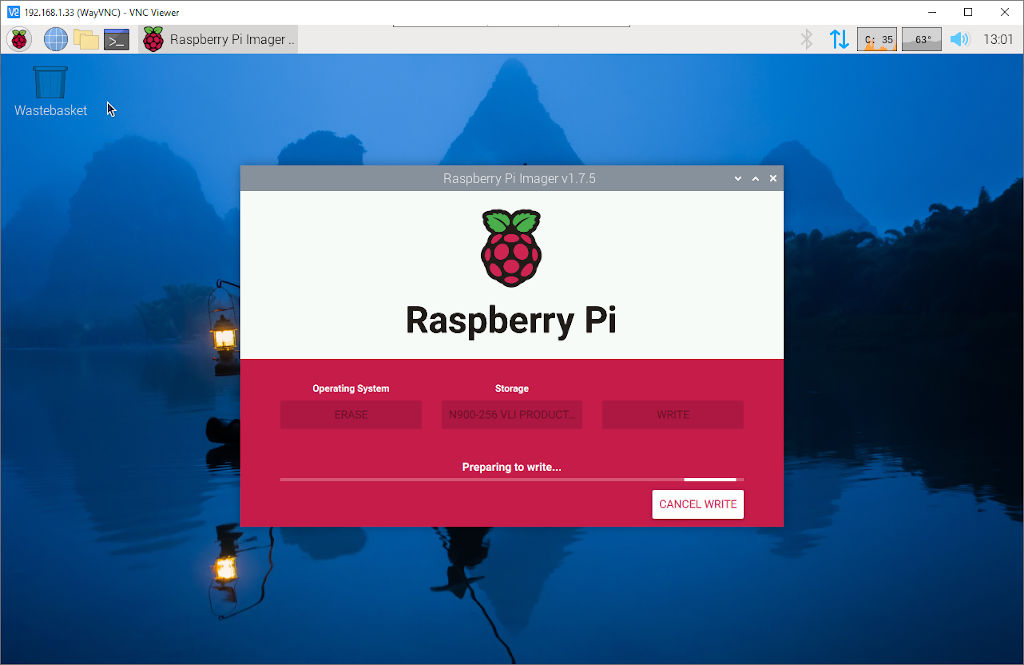
As usual, I advise using Raspberry Pi imager for the installation, I select Raspberry Pi OS BullsEye (64-bit) for me, and I put all in an SD.
Now put It on the back slot for the SD card and start the device. Add all mandatory data. Remember to click on the setting icon to enable ssh or, the first time, attach a keyboard and mouse.
You can have problems with display resolution, and ssh connection is very useful to change the config.txt file to fix them
SSD management
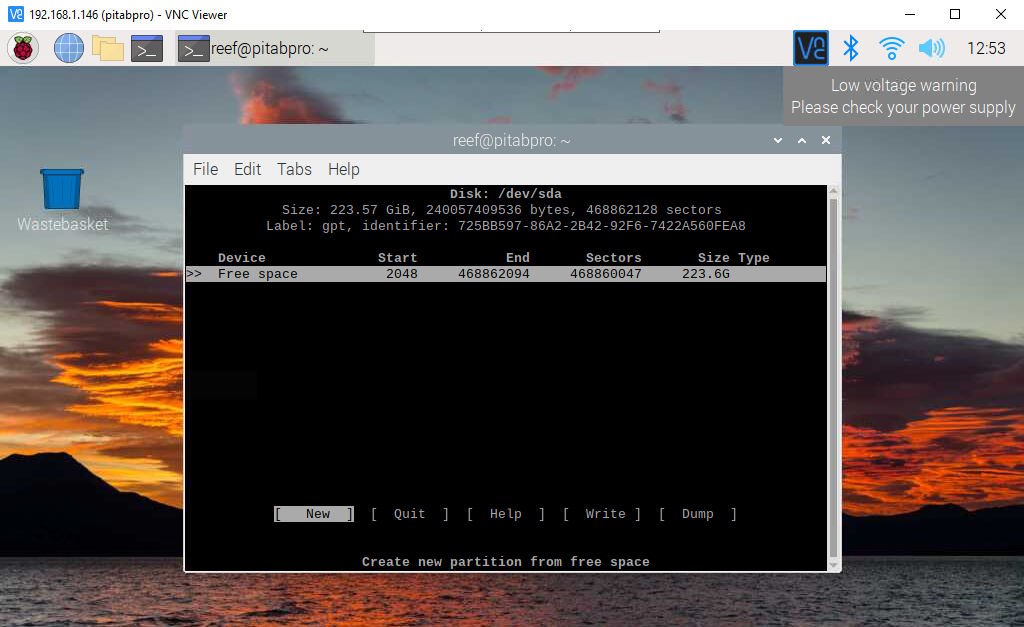
When the system is started, you can install the SO directly on SSD, or you can do a partition on It to use as an external drive. You can write:
cfdisk /dev/sda
And then create the partition.
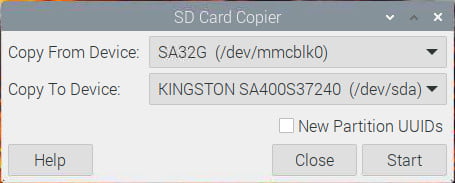
Another option is to use the utility given by the SO, the SD card copier that allows to you to copy the current SD to the SSD so that you can use the same SO on SSD.
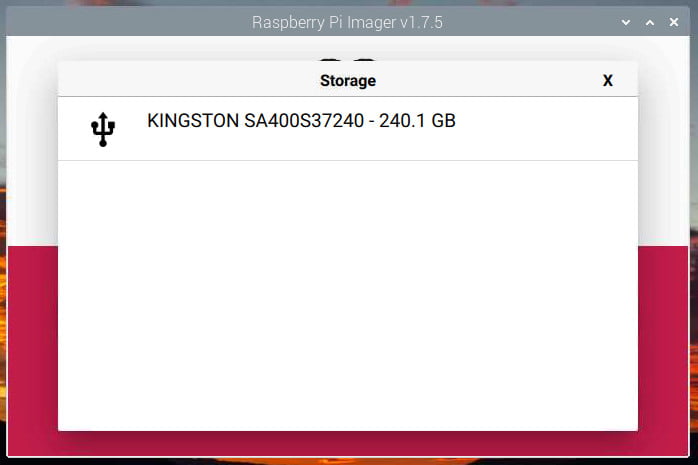
Or (my option) use the Raspberry Pi Imager, already installed on Raspberry Pi OS, to do a new installation.
Hard disk speed test
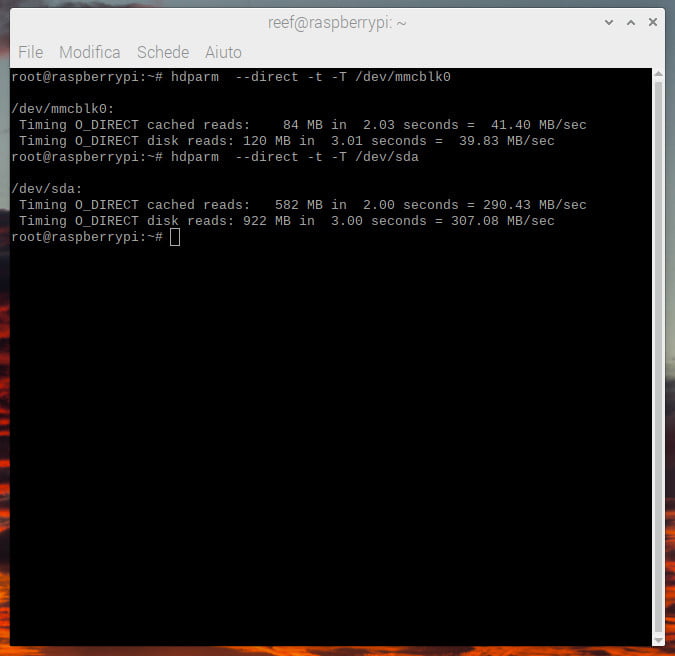
I evaluate if SSD offers better performance than SD (securely, SSD is more strong than an SD).
So I launch a benchmark on SSD and SD, with these commands:
hdparm  --direct -t -T /dev/mmcblk0
hdparm  --direct -t -T /dev/sda
The result, as I already say, is that my SSD is seven times faster than my SD.
Install Raspad launcher
Download the RasPad Launcher package, and extract it.
wget https://github.com/raspad-tablet/raspad-launcher/releases/latest/download/raspad-launcher.zip
unzip raspad-launcher.zip
cd raspad-launcher
The script will install the following:
- RasPad launcher with desktop profile.
- RasPad FAQ desktop profile (Just a quick icon to browser RasPad FAQ webpage).
- display auto rotates for Accl SHIM.
Run the install script.
chmod +x install
sudo ./install
Post-installation, you’ll be greeted by a custom setup menu rather than the typical Raspberry Pi OS wizard, making it more touch-friendly.
Multiple boot on Raspberry Pi devices
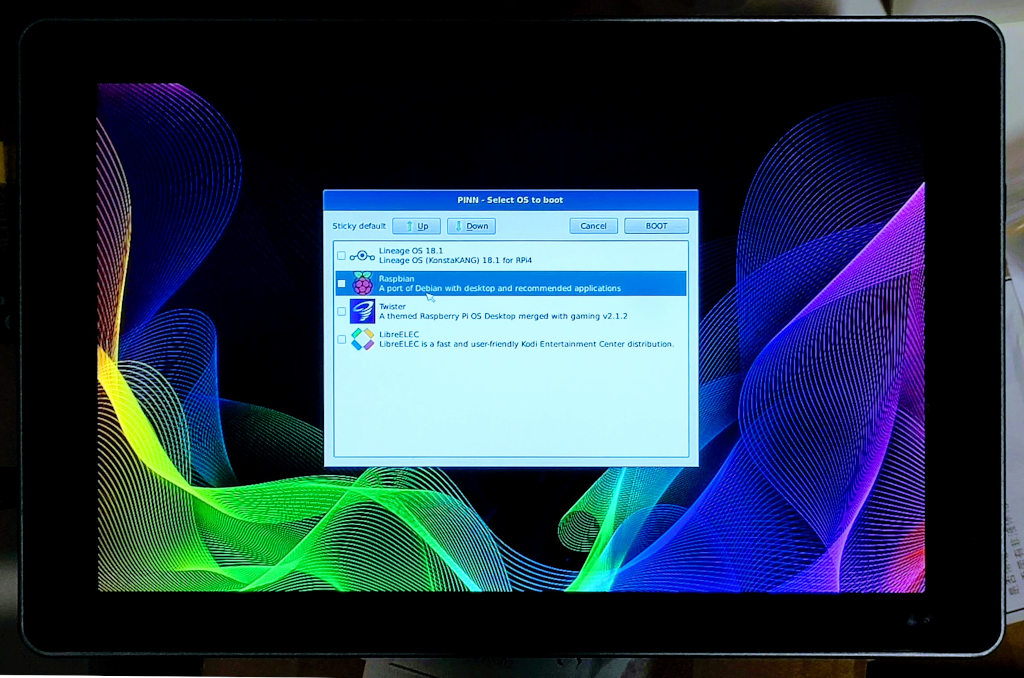
For those venturing into a multiboot setup, PINN can be utilized to manage multiple operating systems, allowing you to partition your storage and choose which OS to boot into, be it for media centers, programming, or educational purposes.
With the addition of an M2. SSD, you gain the benefit of increased storage space and potentially faster performance, particularly useful when managing multiple operating systems or working with large files.
After the creation of a Raspbian SD card with the Imager described before we are going to do the installation of multiple OS:
- Insert the SD Card: Place the flashed SD card into the RasPad’s card slot.
- Initial Boot: Power on the RasPad to boot from the SD card.
- Install GParted: we are going to use GParted to manage the SSD partition.
You can use directly the command:
sudo apt-get install gparted
- Open GParted: click on System Tools -> GParted and select the correct disk to partition.
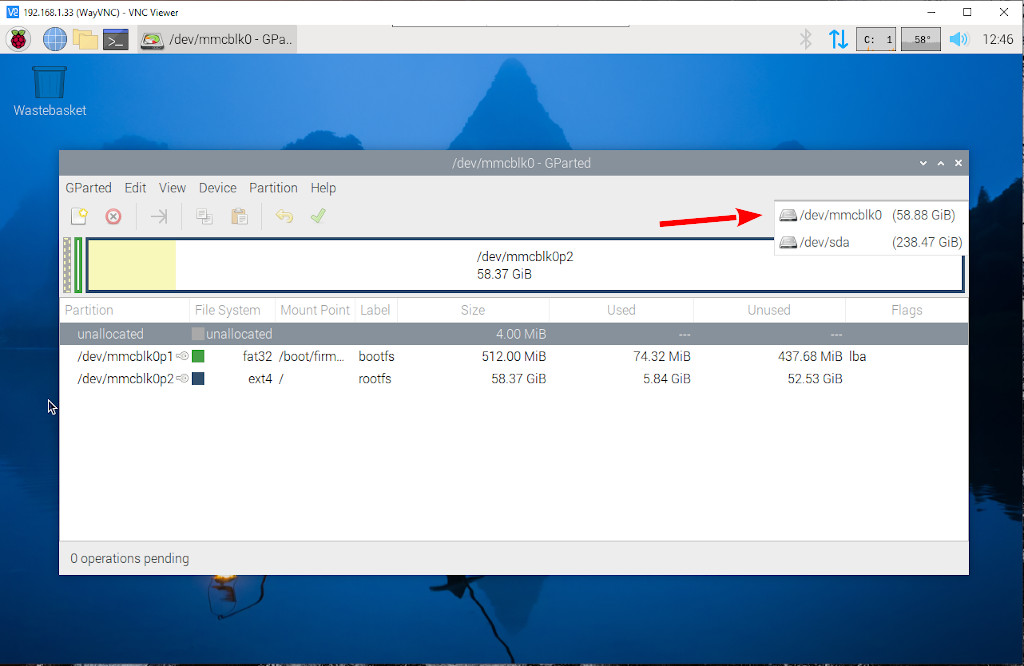
- Partitions: do a single FAT32 partition on the SSD.
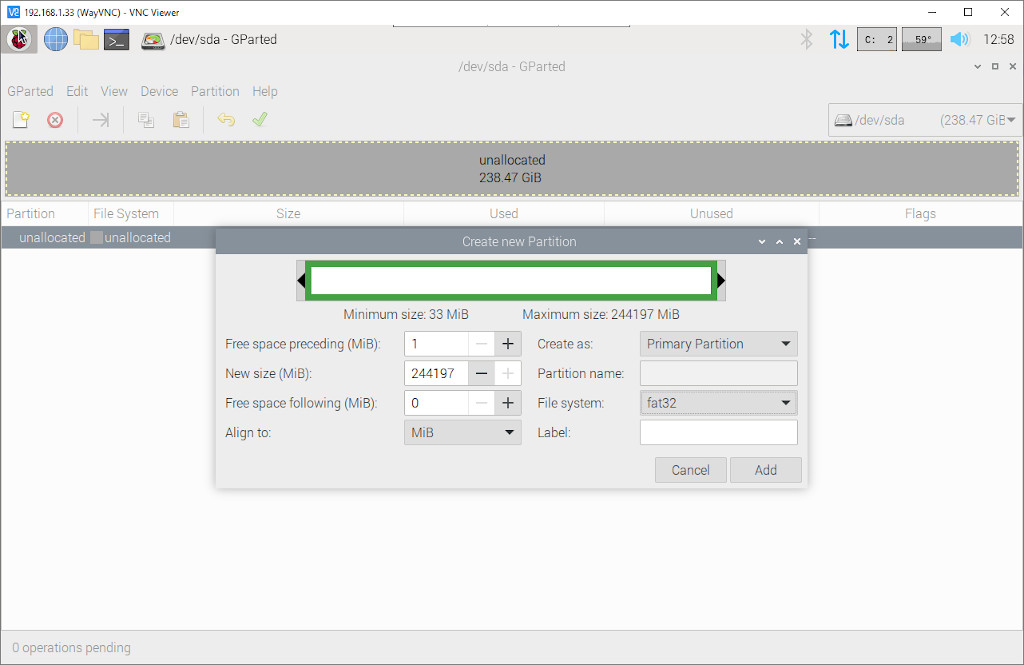
- Format: to do precise formatting, use the Imager again.
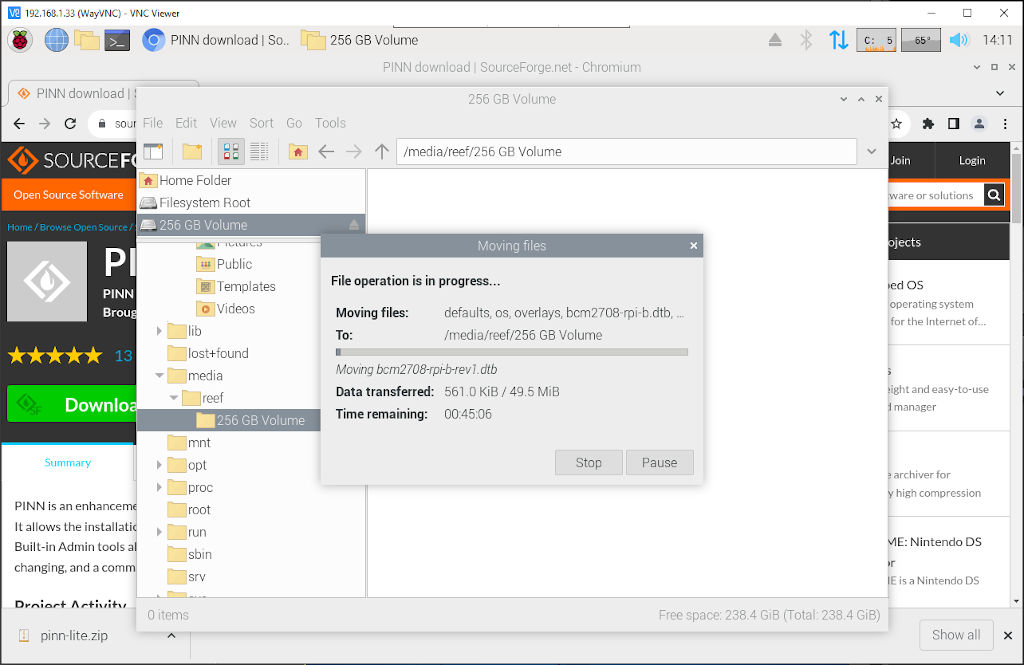
- Download PINN: If multiboot is desired, download PINN from here.
- PINN Installation: uncompress and copy PINN files on FAT32 disk.
- Shutdown
- Remove SD from slot
- Power On
- OS Selection: Install and select between multiple operating systems using PINN.
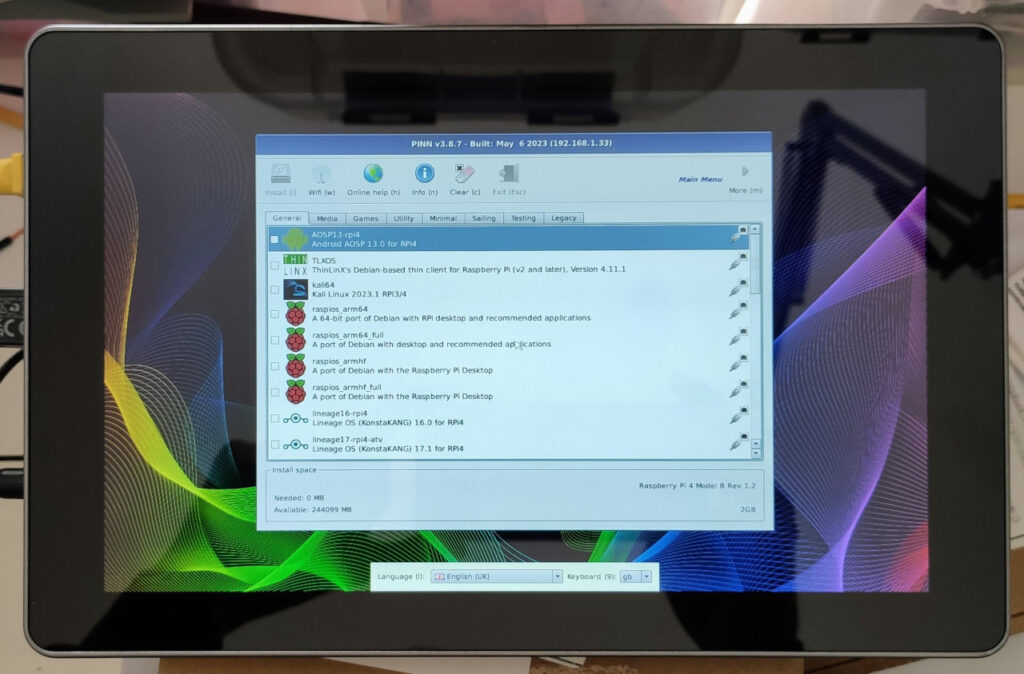
- Installing all the OS: wait for the installation phase.
- Final Testing: Test each operating system to ensure they boot and run correctly.
Each phase ensures you set up a robust multi-boot environment tailored to the capabilities of the RasPad 3 and the Raspberry Pi 4.
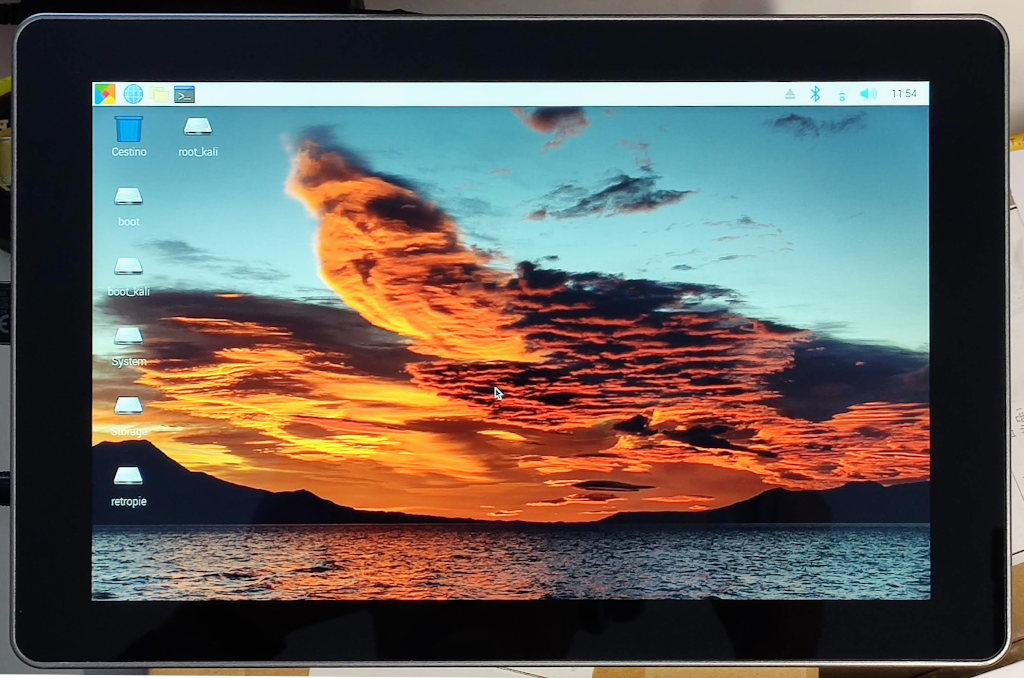
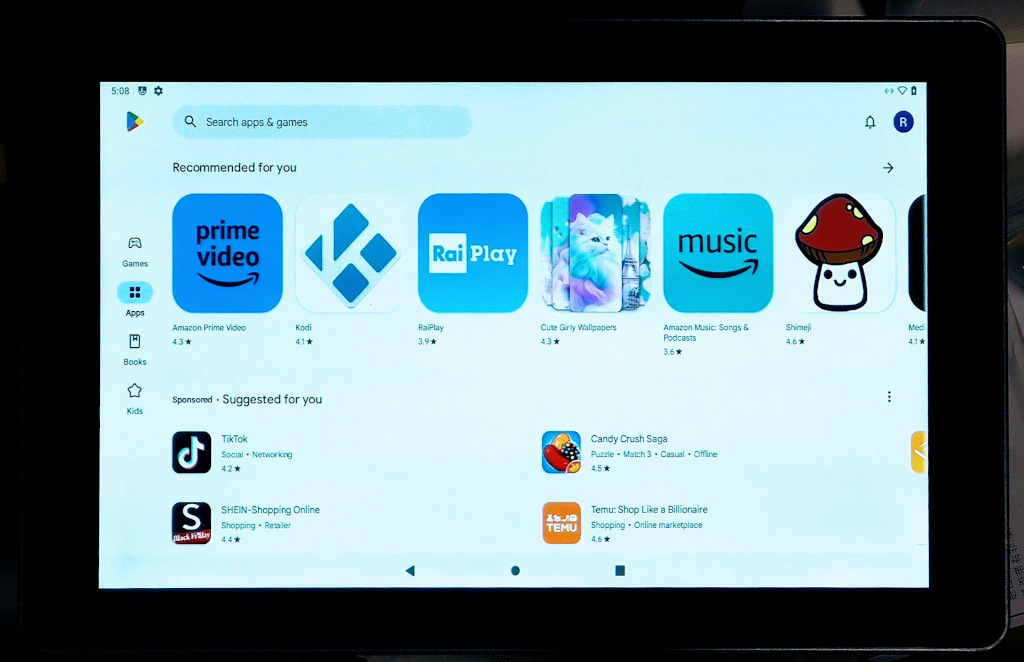
Now we can choose to play or work with Android.
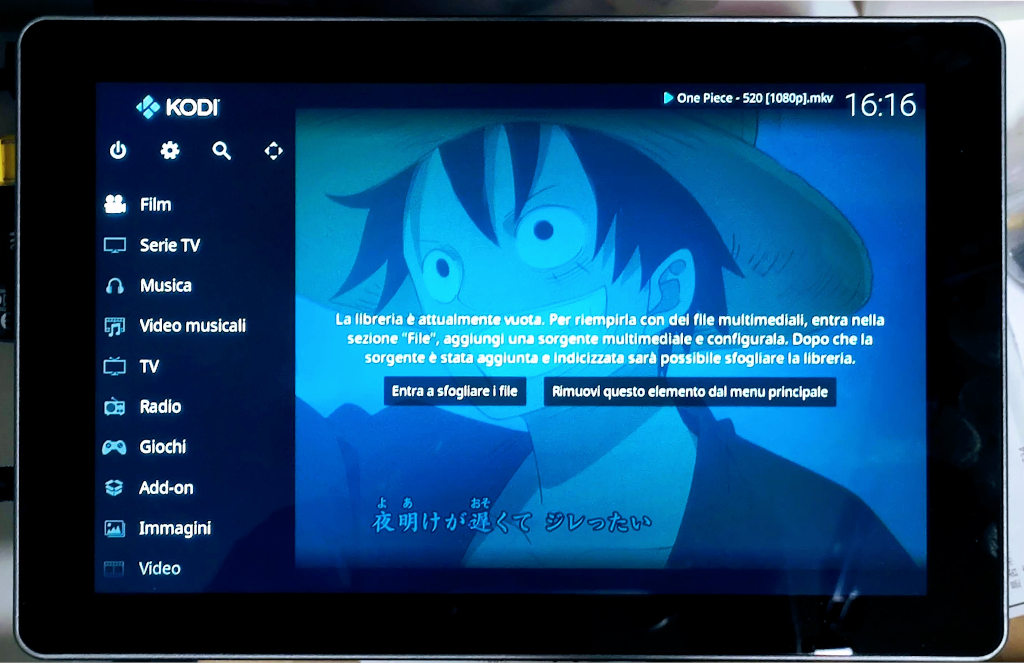
Or watch a video or play a retro game with LibreELEC.
Or return to our Raspbian with an optimized Raspad Launcer.
Use your RasPad with remote monitoring and performance upgrades
If you’re interested in taking your Raspberry Pi projects to the next level, particularly in enhancing performance and enabling remote monitoring, you might find the following resource valuable. SunFounder has provided a comprehensive guide on setting up a Raspberry Pi system monitor for your PC. This guide will walk you through the necessary steps and tools to not only boost your Raspberry Pi’s performance but also to keep an eye on it from anywhere. To learn more about this potent upgrade to your Raspberry Pi experience, visit their detailed post here.
Thanks
Raspberry Pi case
- Pironman Mini PC: a Raspberry Pi in a compact package with SSD, heat sync, and more.
- Night Vision on Raspberry Pi: TS7-Pro Display, PiPower & DIY 3D Printed Battery in Action!
- RasPad 3: transform your Raspberry Pi into a versatile tablet with multi-OS boot


