AWS IoT core and MQTT services: test with console and MQTT.fx – 6
Now we have a series of devices connected, but we must test if all work well, to do that, we are going to discover some essential test instruments.
AWS IoT Online console
We can use the IoT AWS console to test the flow. Click on the left menu Test.
https://eu-west-1.console.aws.amazon.com/iot/home?region=eu-west-1#/test (Europe)
https://us-east-1.console.aws.amazon.com/iot/home?region=us-east-1#/test (North America)
Now write relay/pub on the Subscription topic input box, then click Subscribe button; on Arduino IDE, upload the sketch and open Serial monitor.
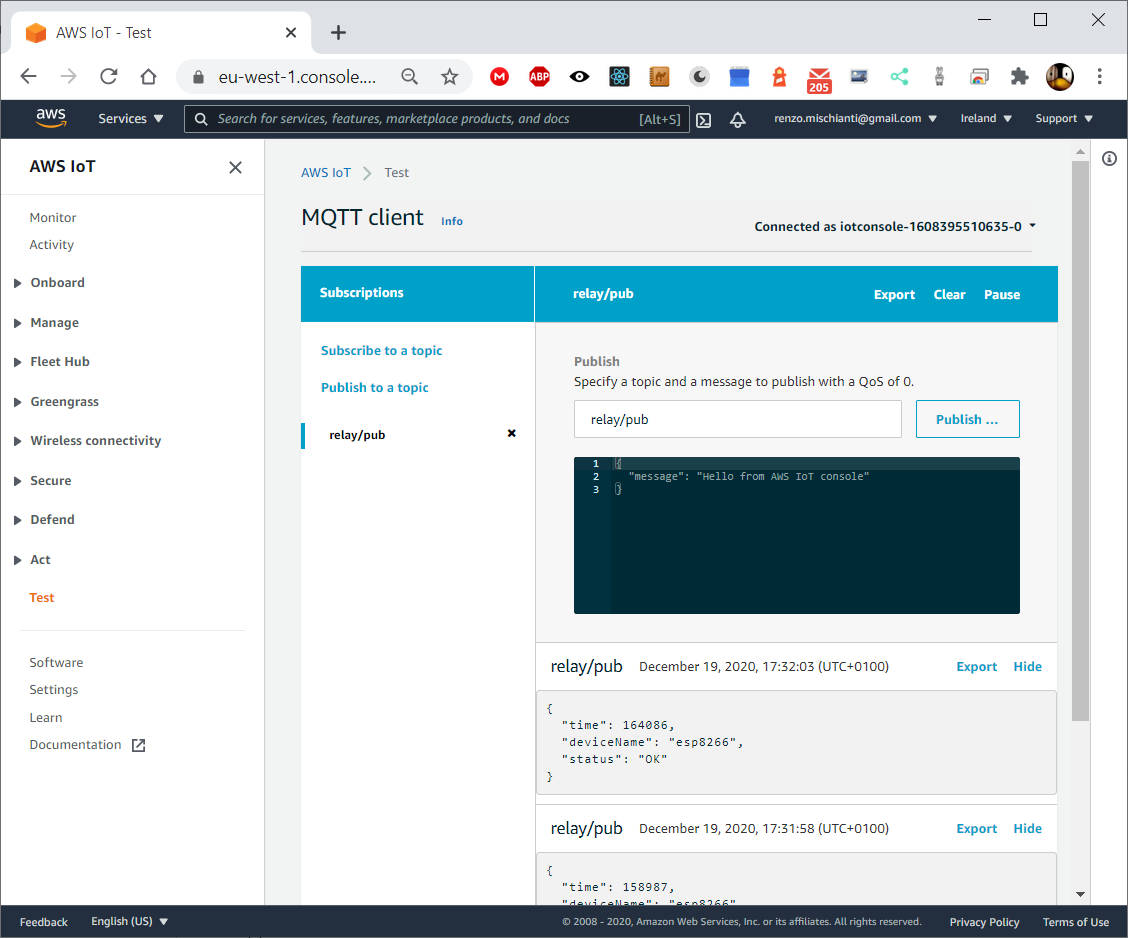
The message sent by the microcontroller will appear on the test page.
Connecting to reef-casa-sopra
1.

Connection established!
IP address:	192.168.1.179
Connecting to AWS IOT
Message on relay/pub topic... Published!
Message on relay/pub topic... Published!
Message on relay/pub topic... Published!
incoming: [relay/sub]
---------------------------
{
  "message": "Hello from AWS IoT console",
  "status": "OK"
}
---------------------------
Message on relay/pub topic... Published!
Message on relay/pub topic... Published!
Message on relay/pub topic... Published!
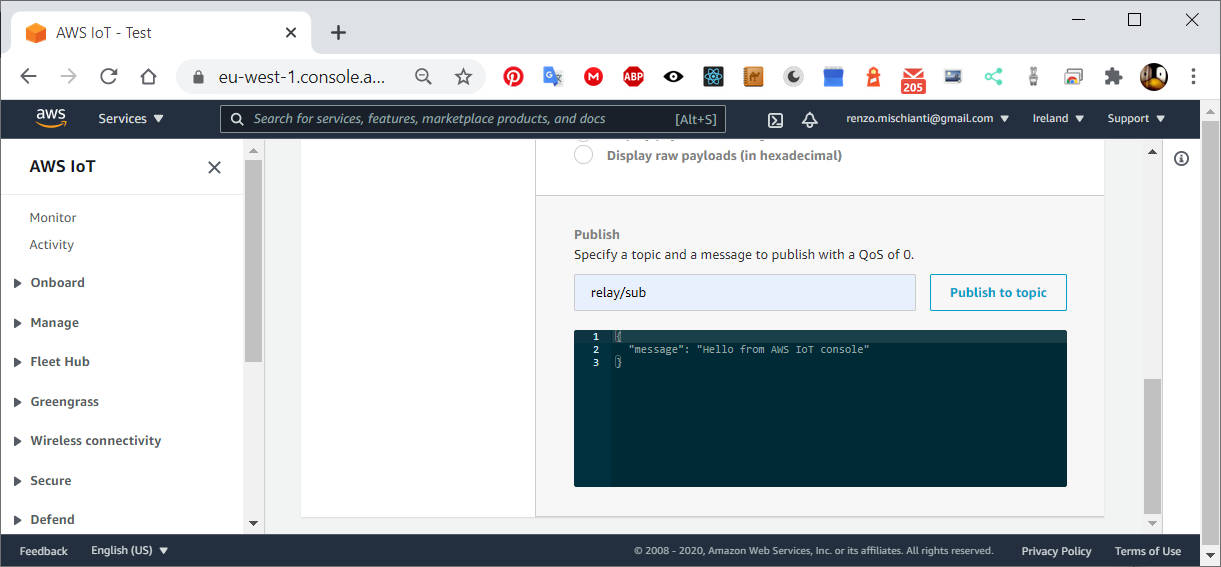
Now in the Test page of the IoT Core console, click on Publish to a topic, insert in Publish input box relay/sub and click Publish to the topic button.
The published result is in the serial output of our microcontroller.
incoming: [relay/sub]
---------------------------
{
  "message": "Hello from AWS IoT console",
  "status": "OK"
}
---------------------------
MQTT.fx
To use MQTT.fx without using an existing configuration, we must create a thing with a proper certificate.
If this is the first device of this guide, you can refer to the article of this series, “AWS IoT core and MQTT services: creating AWS thing with certificate and policy” to create a new thing, use mqttfx_test for the name and save the certificate
If you have followed all steps of this guide, check these steps.
Create new thing
In the project that you have already downloaded, check that exist the folder mqttfx_test/certificates, if not, create It.
- In the AWS IoT console (IoT Core), choose from the left menù Manage and Things.
Or directly:
https://us-east-1.console.aws.amazon.com/iot/home?region=us-east-1#/thinghub (North America)
https://eu-west-1.console.aws.amazon.com/iot/home?region=eu-west-1#/thinghub (Europe) - Than click on Create button in the top right, than Register a single AWS IoT thing.
- Name the new thing mqttfx_test, and copy this also in the
setup.txtfile on[Device name]section. Leave the remaining fields set to their defaults. Choose Next. - Choose Create certificate.
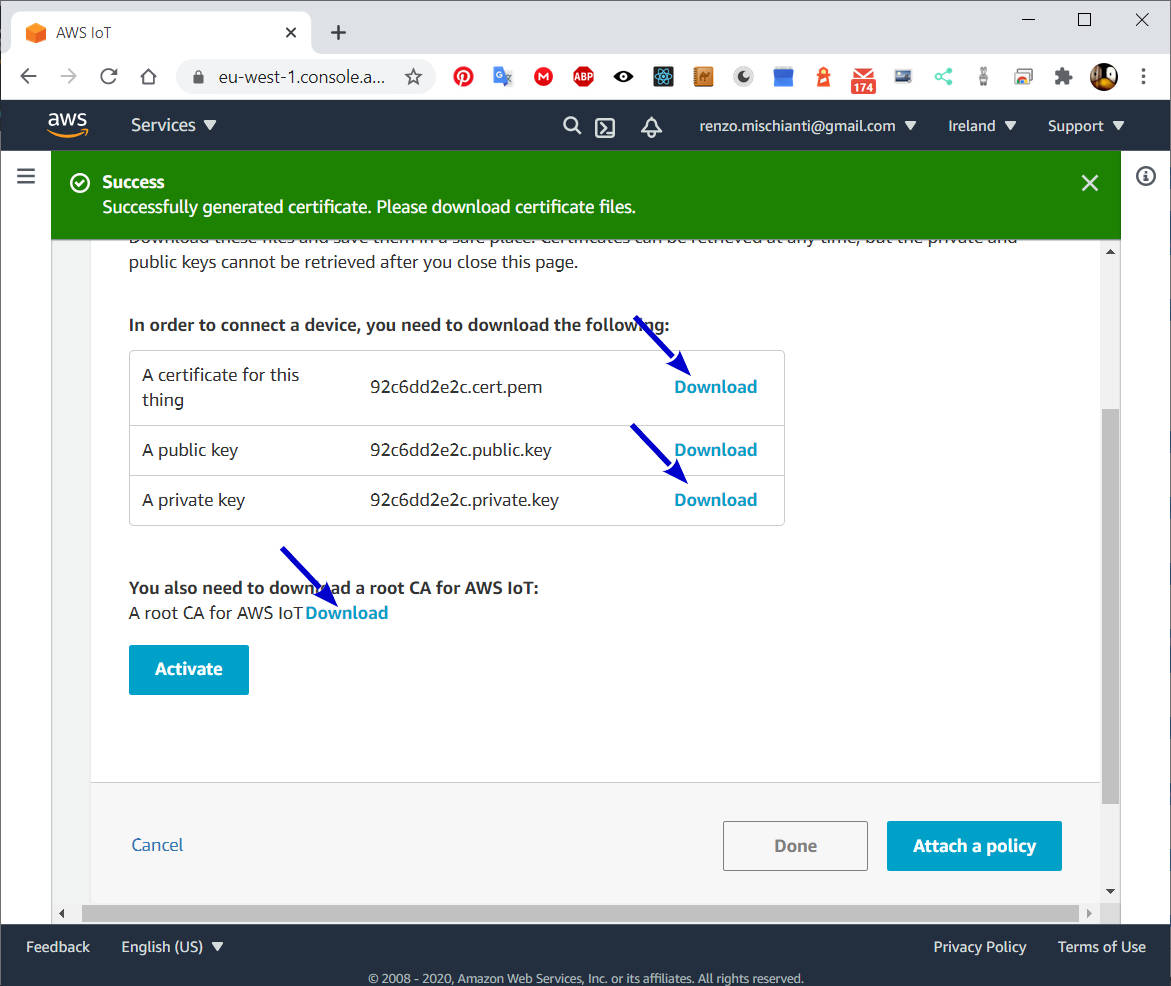
- Download inside the folder
mqttfx_test/certificates: Thing cert, private key, than click near A CA root per AWS IoT the Download link, and select Amazon Root CA 1. - Choose Activate.
- Then click on Attach a policy.
- Select the esp8266_relay_policy.
- Click Done.
Modify policy to add new device
- To change policy you must go to AWS IoT Console;
- To the left menu you must click on Secure than in sub menu select Policies
https://eu-west-1.console.aws.amazon.com/iot/home?region=eu-west-1#/policy/esp8266_relay_policy (Europe)
https://us-east-1.console.aws.amazon.com/iot/home?region=us-east-1#/policy/esp8266_relay_policy (North America); - Click on
esp8266_relay_policy; - Click in the top right of the text of policy Edit policy document;
- All permission of subscription to topic is ready you must only add this lines
    {
      "Effect": "Allow",
      "Action": "iot:Connect",
      "Resource": "arn:aws:iot:[Region]:[Account ID]:client/mqttfx_test"
    },
mqttfx_test is the name of the thing created now.
- And now click on Save as new version.
Configure MQTT.fx
Now we are going to set all the information needed for our client.
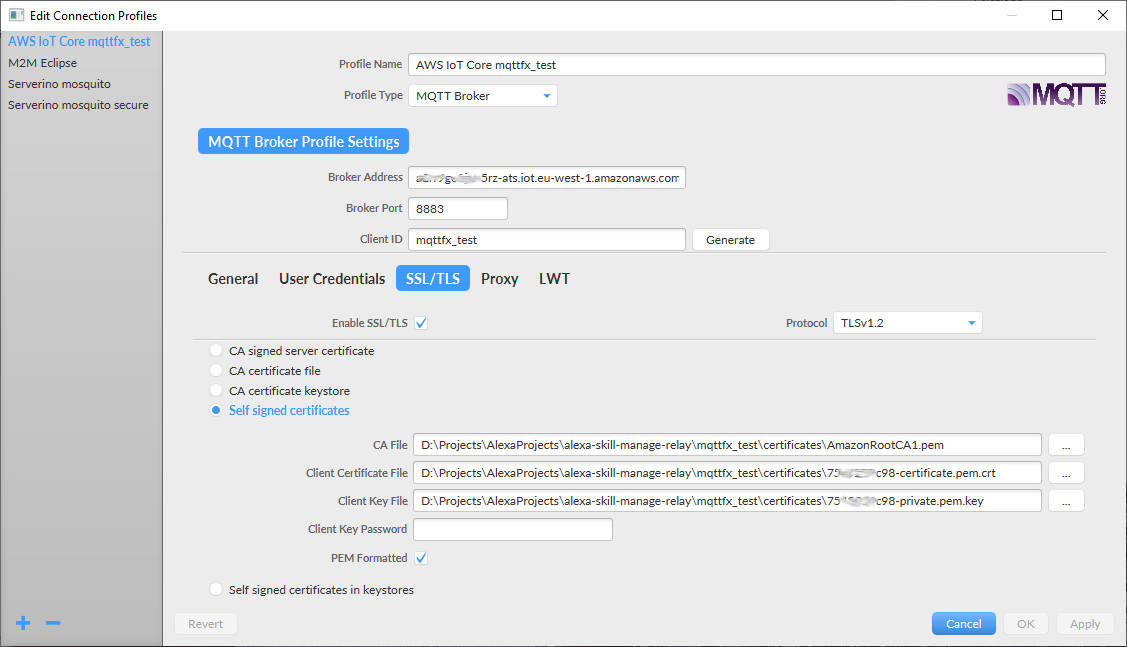
- In the ClientID put the thing name mqttfx_test;
- Select SSL/TLS tab, and select Self signed certificates;
- Put AmazonRootCA1.pem certificate on CA File;
- Put XXXXXXXXX-certificate.pem.crt on Client Certificate File;
- Put XXXXXXXXX-private.pem.key in Client Key File;
- Verify PEM Formatted is checked;
Now your client is configured, you can click on Connect button.
Now on subscribe, insert relay/sub and Subscribe button.
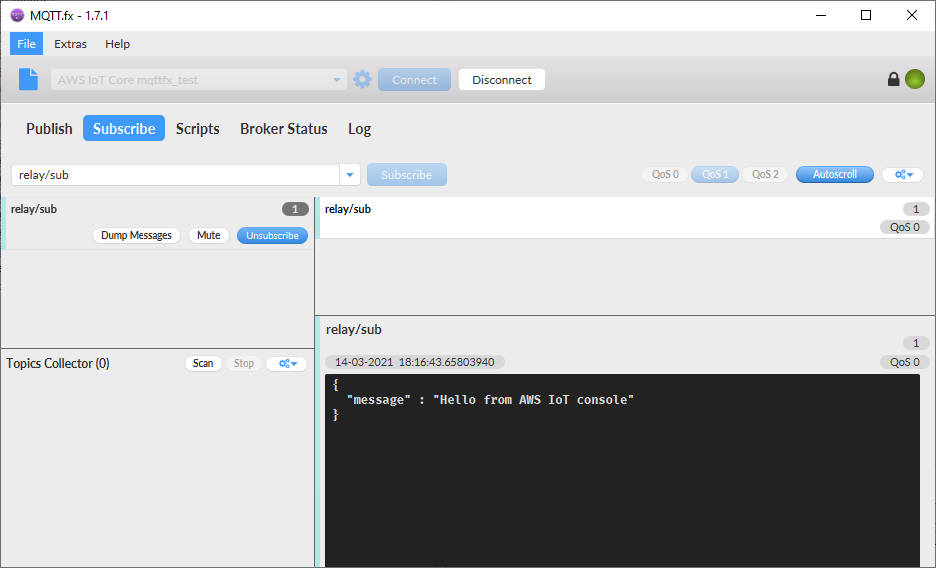
In Publish section, you can add relay/pub and write something in the text area, then click Publish button.

Thanks
- AWS IoT core and MQTT services: introduction and prerequisite
- AWS IoT core and MQTT services: creating AWS thing with certificate and policy
- AWS IoT core and MQTT services: connect esp8266 devices
- AWS IoT core and MQTT services: connect esp32 devices
- AWS IoT core and MQTT services: connect Arduino SAMD (WiFiNINA) devices
- AWS IoT core and MQTT services: test with console and MQTT.fx